 |
*** BMW Car Club GB website - see https://bmwcarclubgb.uk/ ***
*** Looking to buy or sell? ~ Checkout our BMW Car Club GB classifieds ***
|
DJ 6's Build Thread E46 M3 |
Post Reply 
|
Page 123> |
| Author | ||||
DJ Syxx 
Club Member 
Joined: 07 Sep 2012 Location: London Status: Offline Points: 208 |
 Post Options Post Options
") Thanks(0) Thanks(0)
 Quote Reply Quote Reply
 Topic: DJ 6's Build Thread E46 M3 Topic: DJ 6's Build Thread E46 M3Posted: 19 Sep 2012 at 11:59am |
|||
|
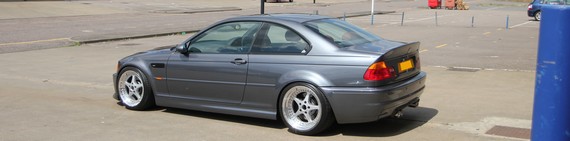
Thought I'd start my build thread up here, copying and pasting from start till present.
Introducing my 2002 6 speed manual pre-facelift Steel Grey M3 with black leather, sunroof, HK system and gloss black window trim. I purchased the car approx 10 months ago. Original intentions were to keep it as standard although that decision didn't last very long! First things first. I wanted to get the car in for an inspection 2 to get the car fresh and ready to drive, so this was carried. Whilst the car was having this done, I had ordered a new Control Pressure Valve, Sump Plug and Gaskets as these do tend to go on these cars. Also I replaced the oil level sensor as well as a preventative measure as you are lucky to have them last any more than 10 years from factory. Few pics when I bought her: 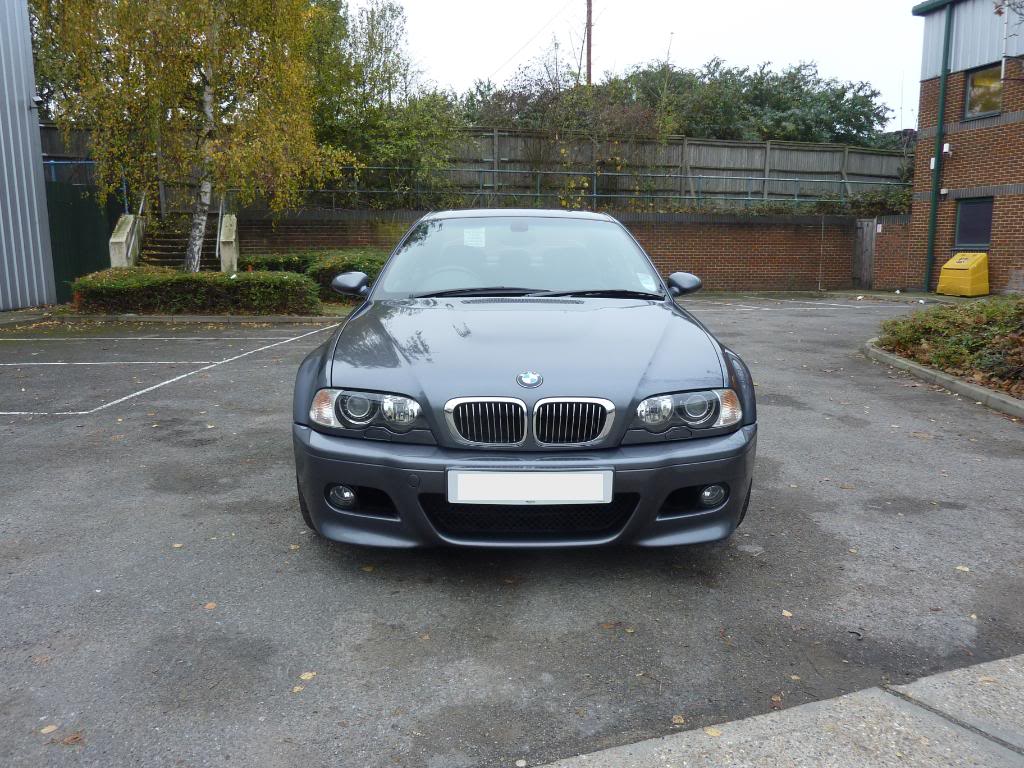 10bmp by djsyxx6, on Flickr  13bmp by djsyxx6, on Flickr  15bmp by djsyxx6, on Flickr 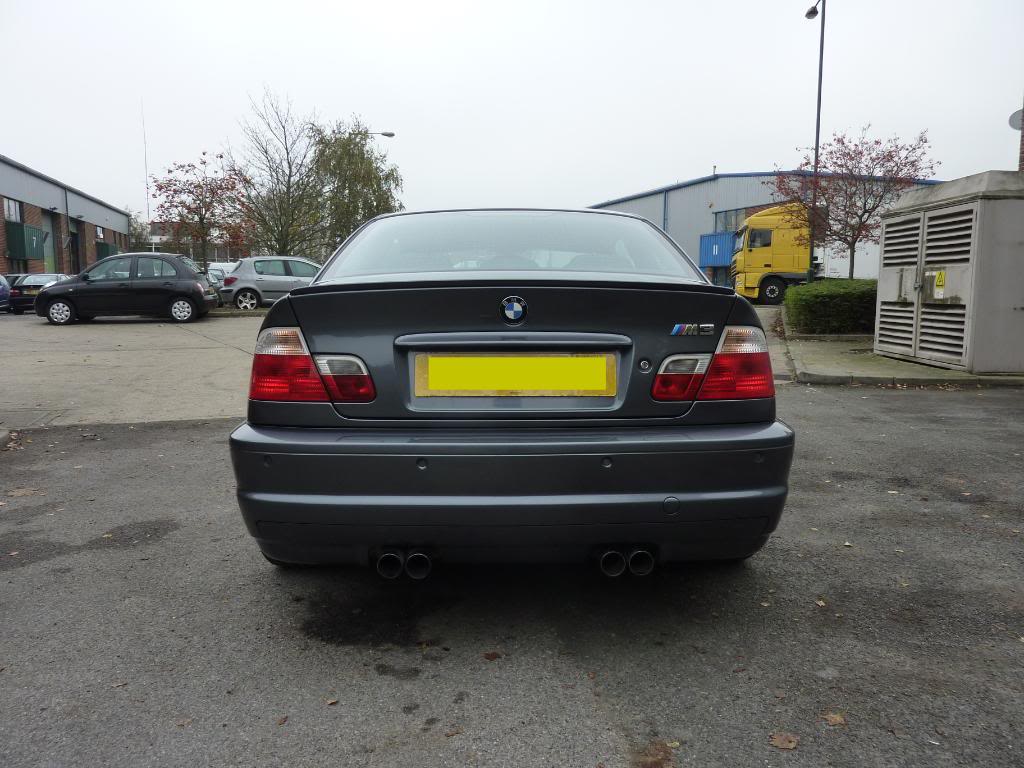 16bmp by djsyxx6, on Flickr 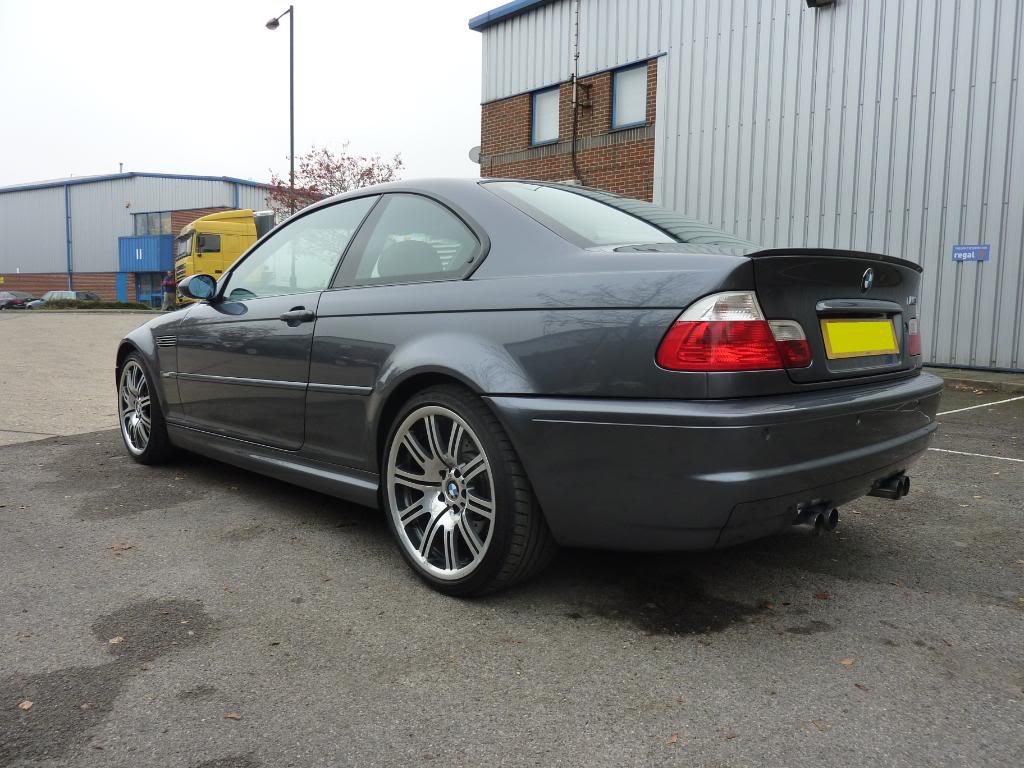 17bmp by djsyxx6, on Flickr  19bmp by djsyxx6, on Flickr 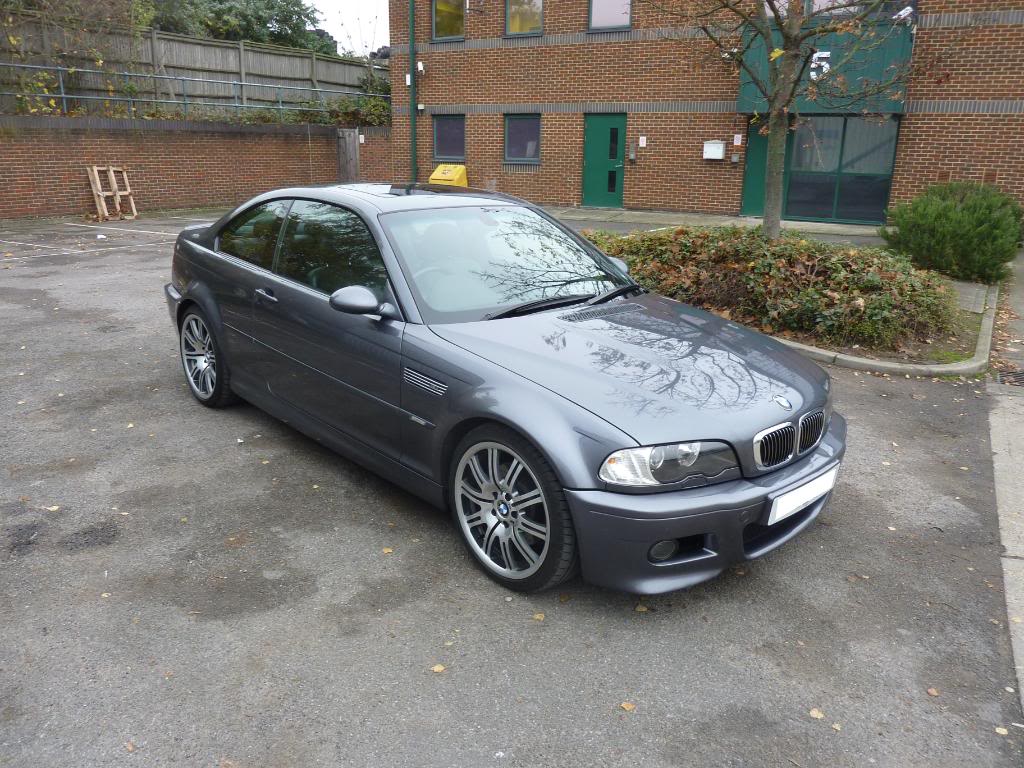 20bmp by djsyxx6, on Flickr 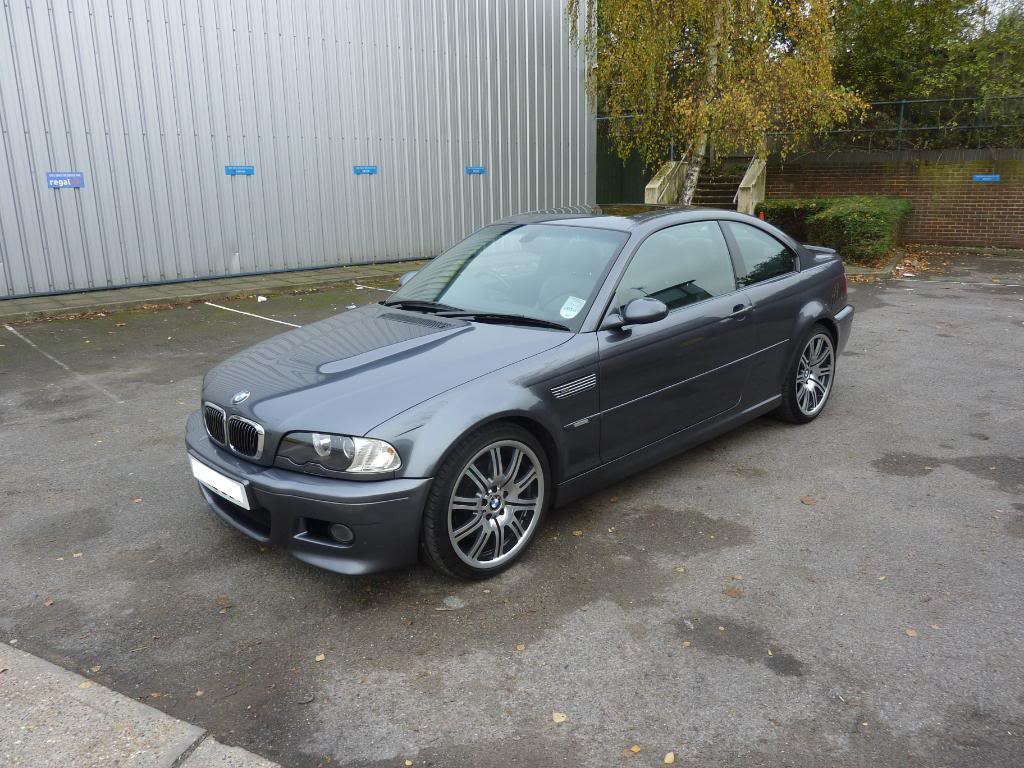 23bmp by djsyxx6, on Flickr 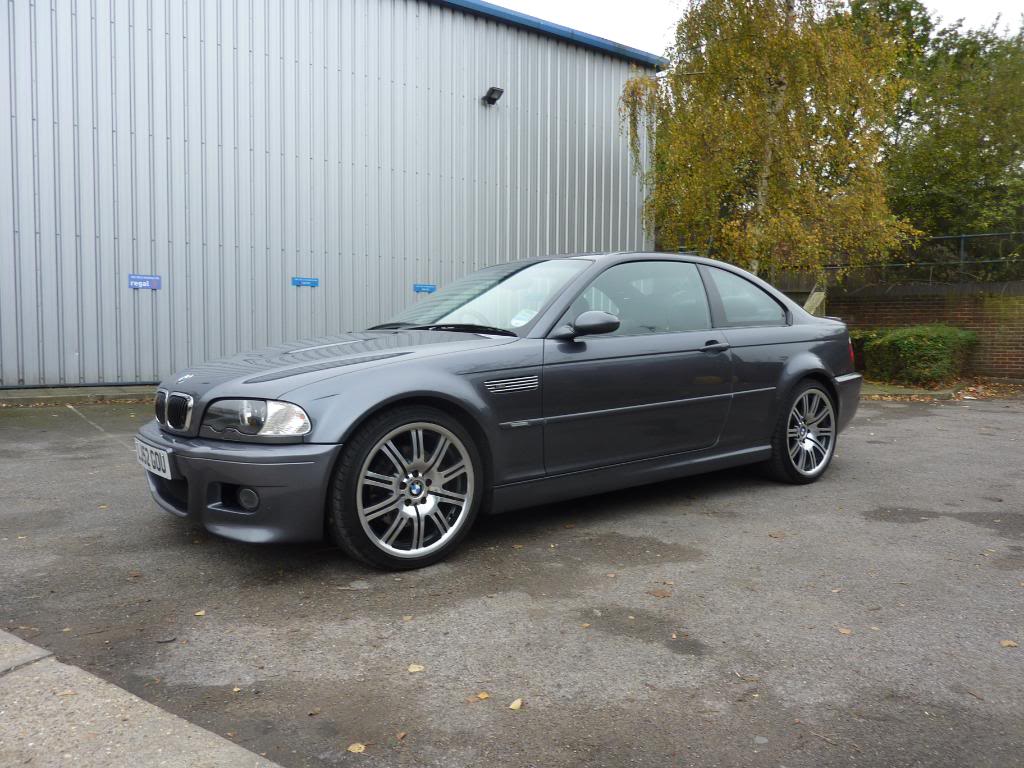 18 by djsyxx6, on Flickr 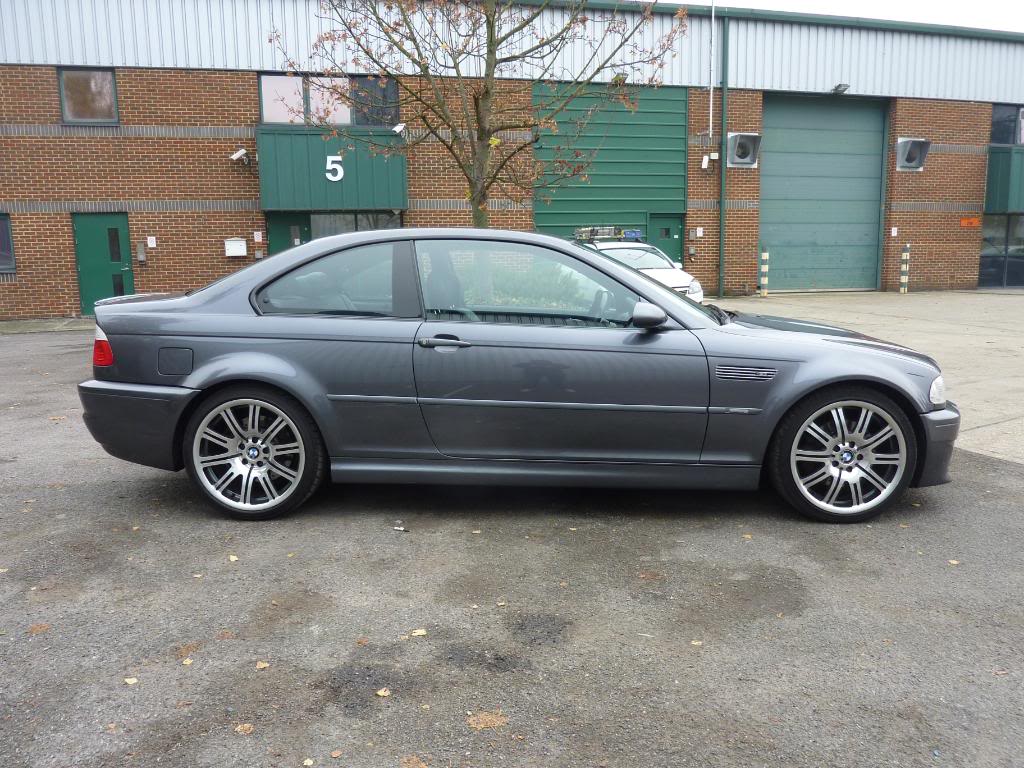 21 by djsyxx6, on Flickr  22 by djsyxx6, on Flickr 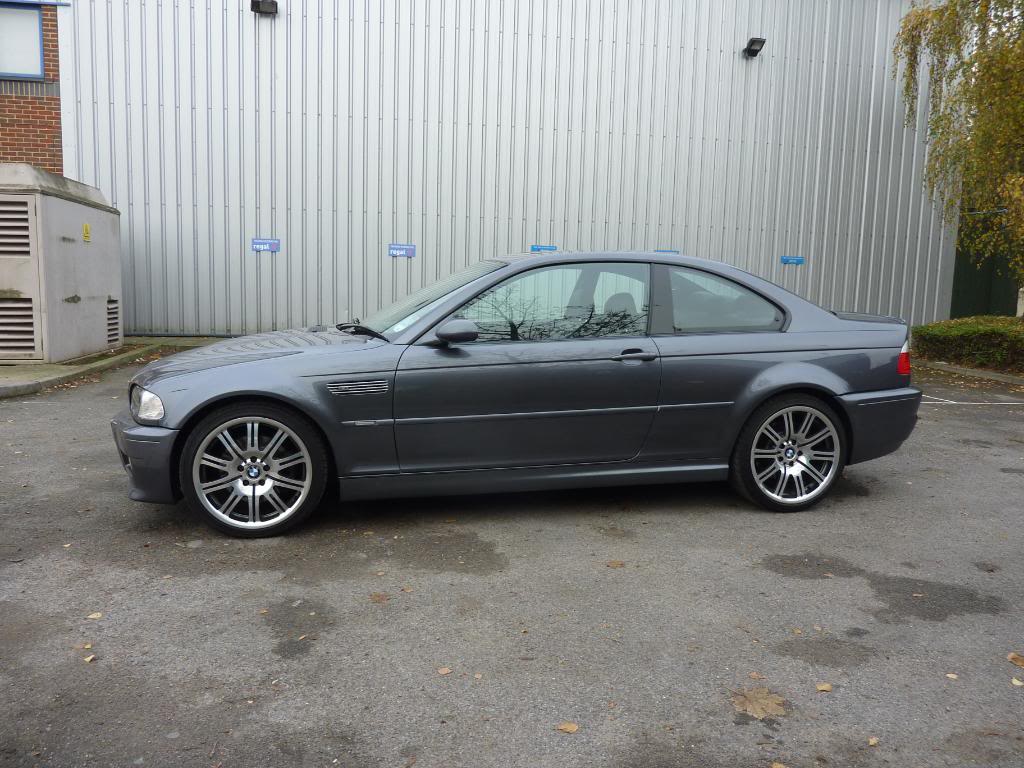 24 by djsyxx6, on Flickr 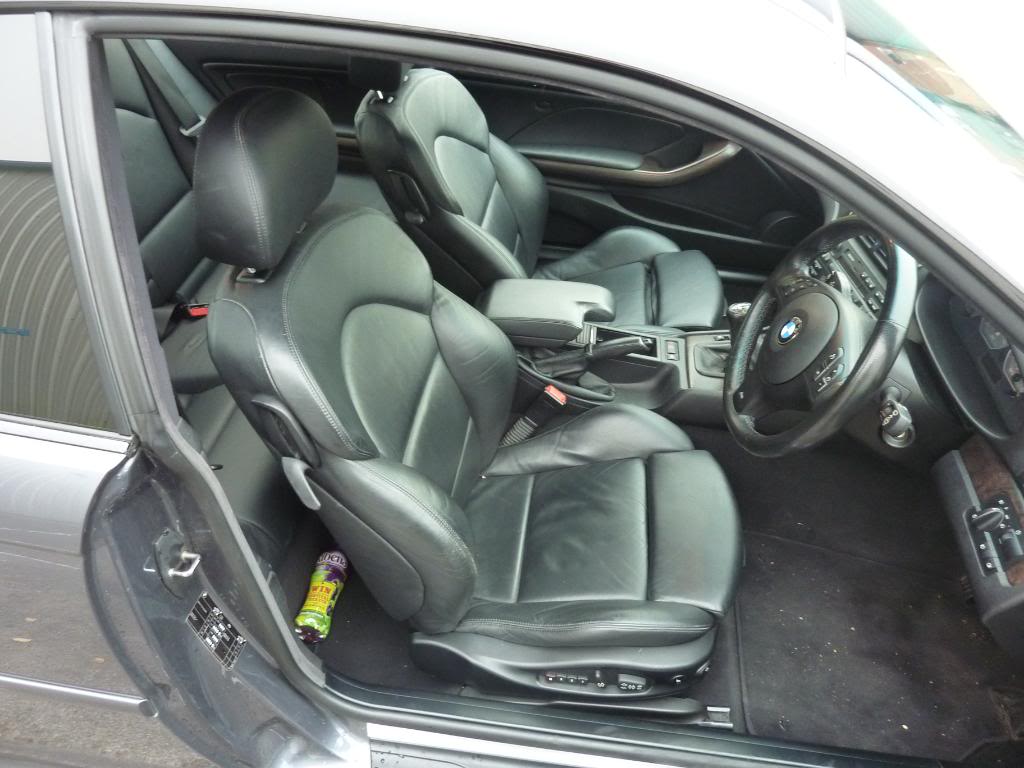 25 by djsyxx6, on Flickr 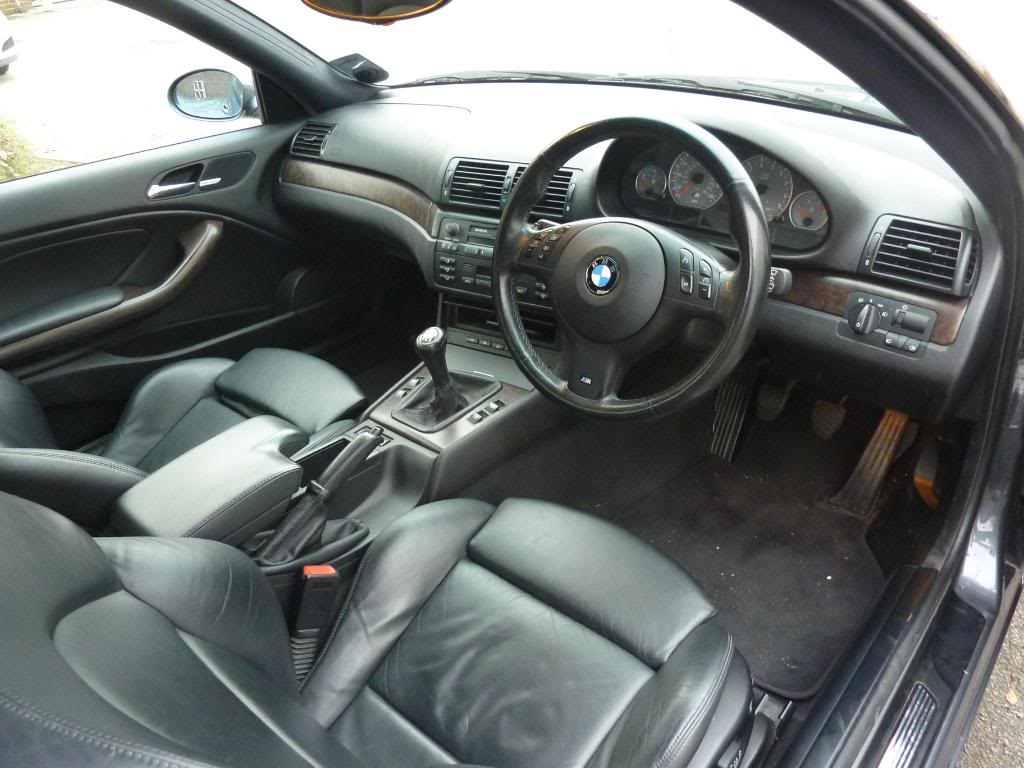 26 by djsyxx6, on Flickr 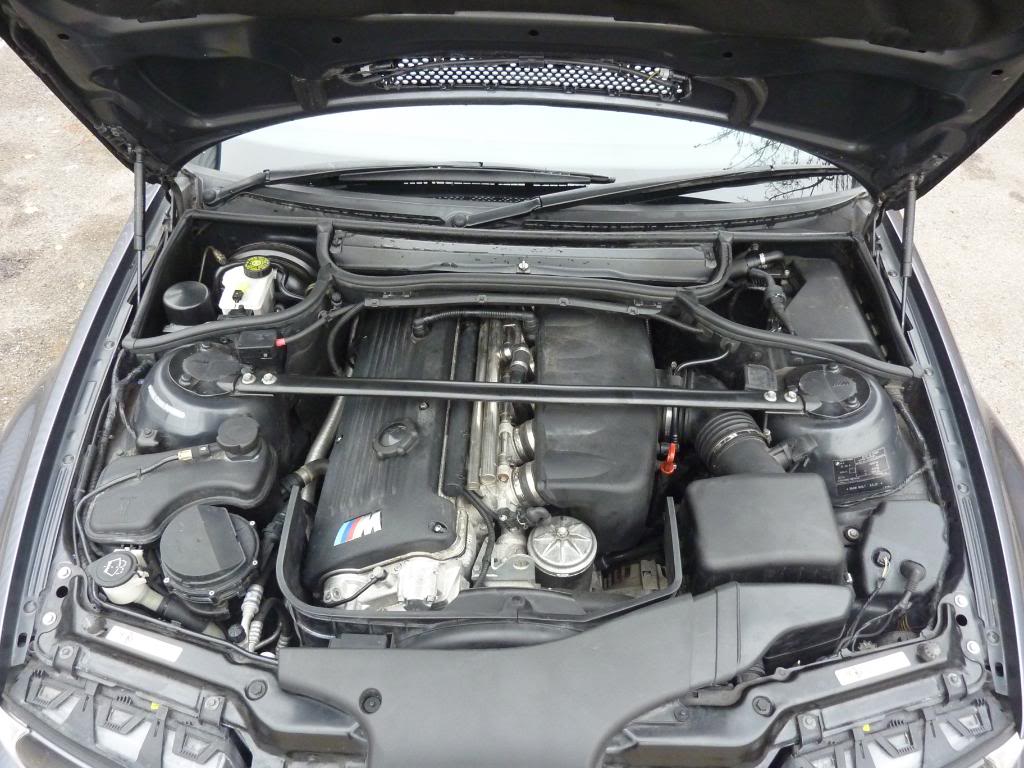 27 by djsyxx6, on Flickr [size=150]Old 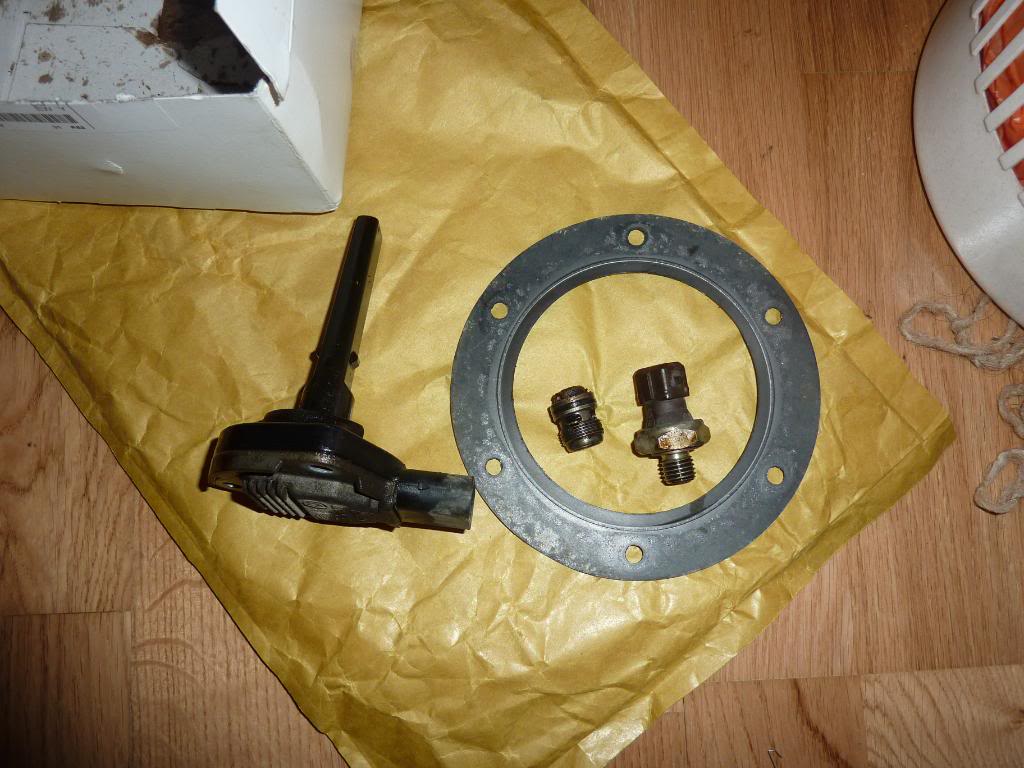 28 by djsyxx6, on Flickr [size=150]New  05 by djsyxx6, on Flickr First mod, angel eyes/corona rings. Was deciding between LED or CCFL angel rings and after looking at both pictures of them and in real life still prefer the CCFL's and liked them on my old coupe. I find the LED's are too bright for my liking! So on with fitting them. Before: 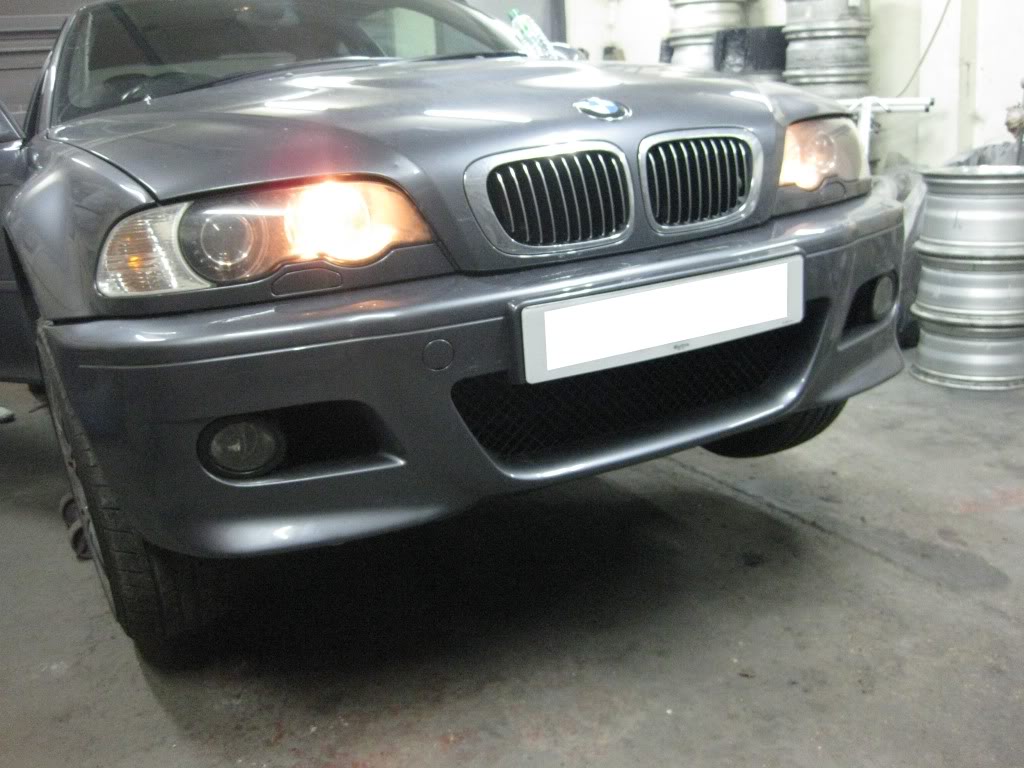 26-1 by djsyxx6, on Flickr 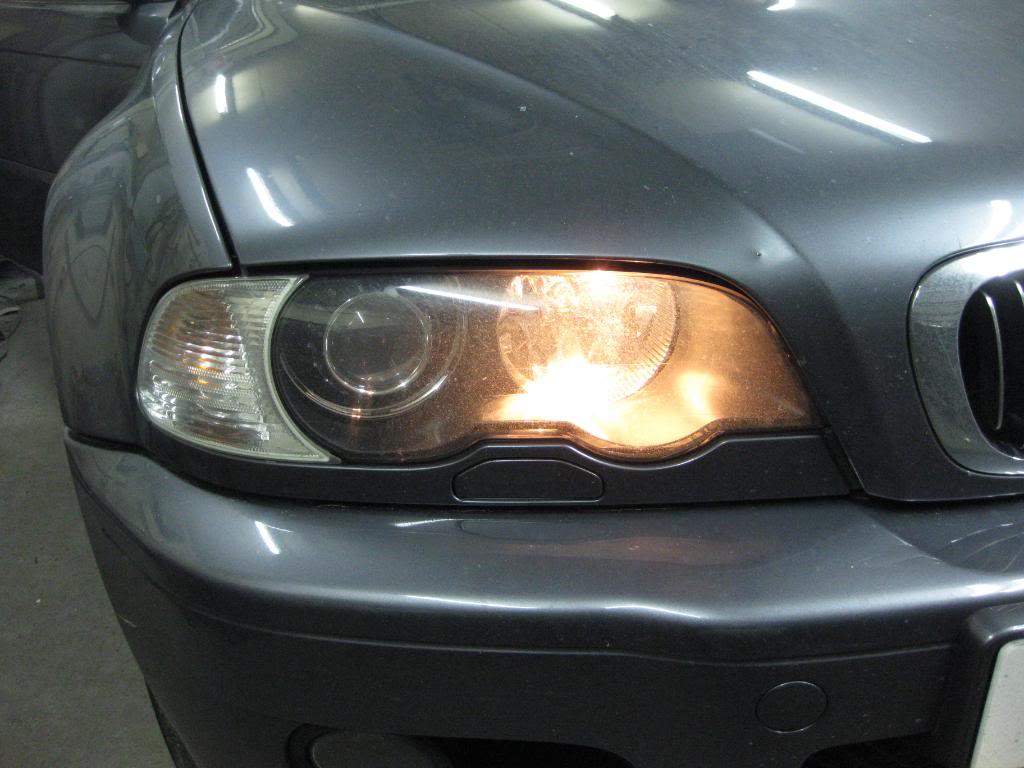 27-1 by djsyxx6, on Flickr 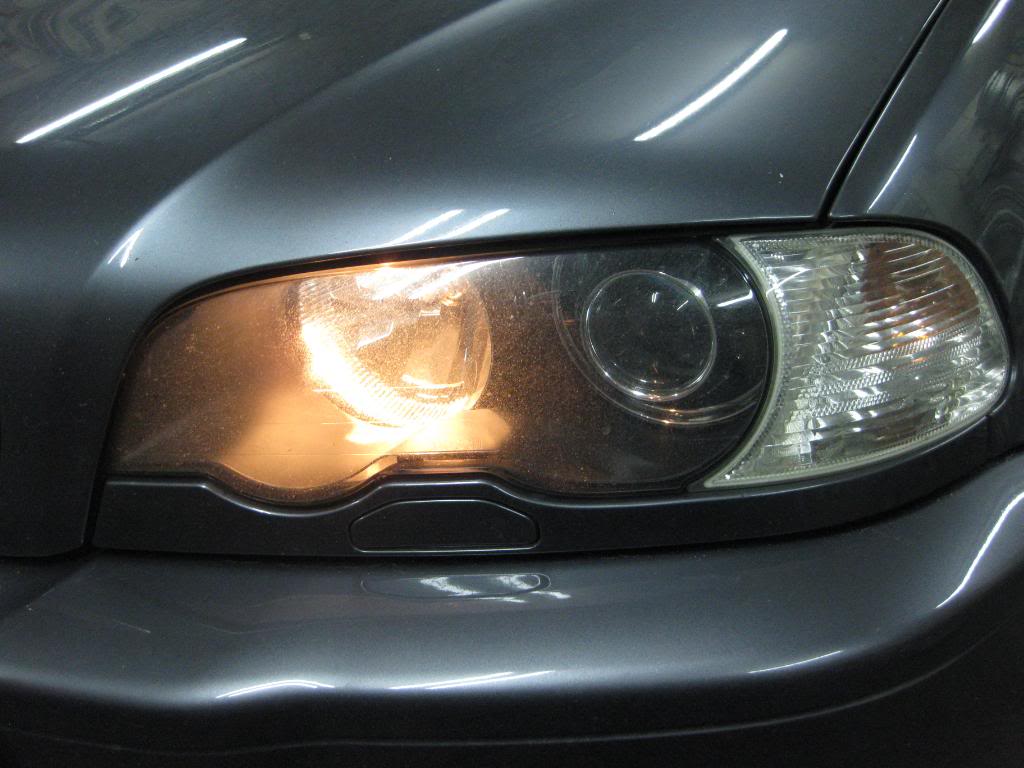 28-1 by djsyxx6, on Flickr After: 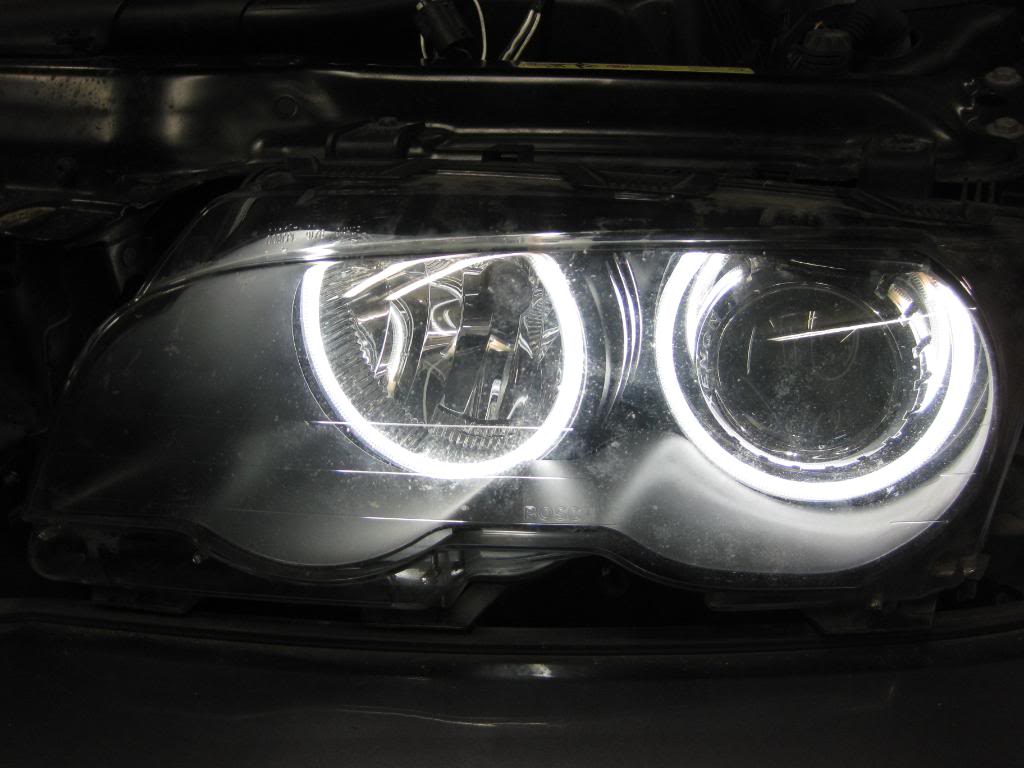 30 by djsyxx6, on Flickr 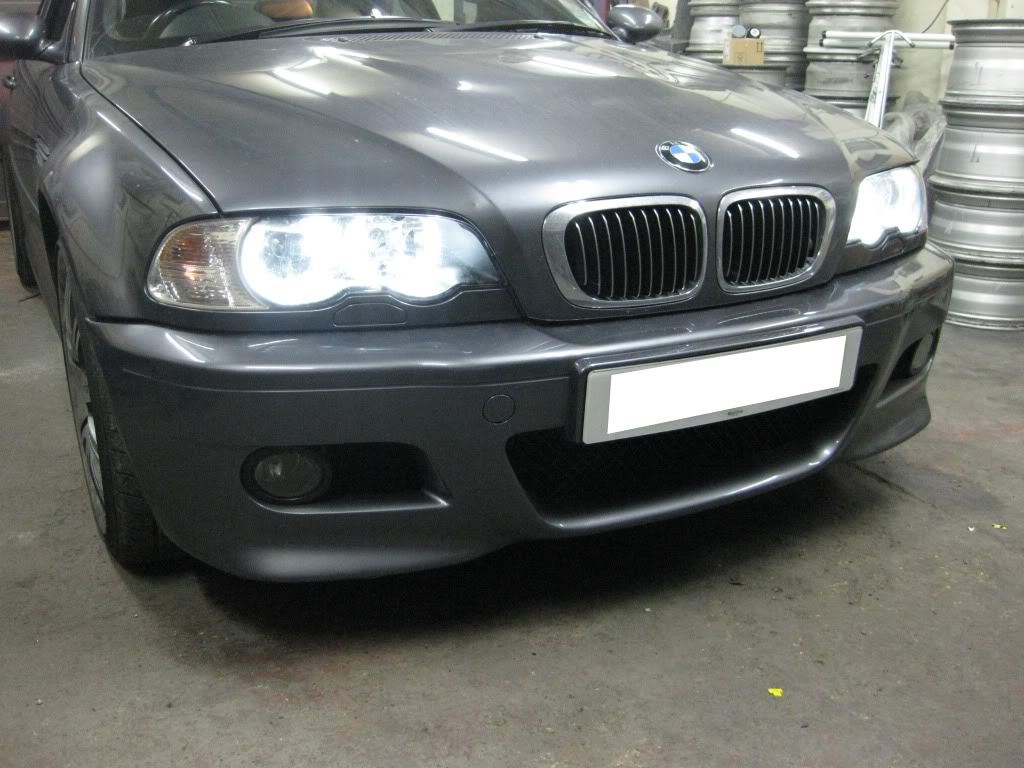 34 by djsyxx6, on Flickr 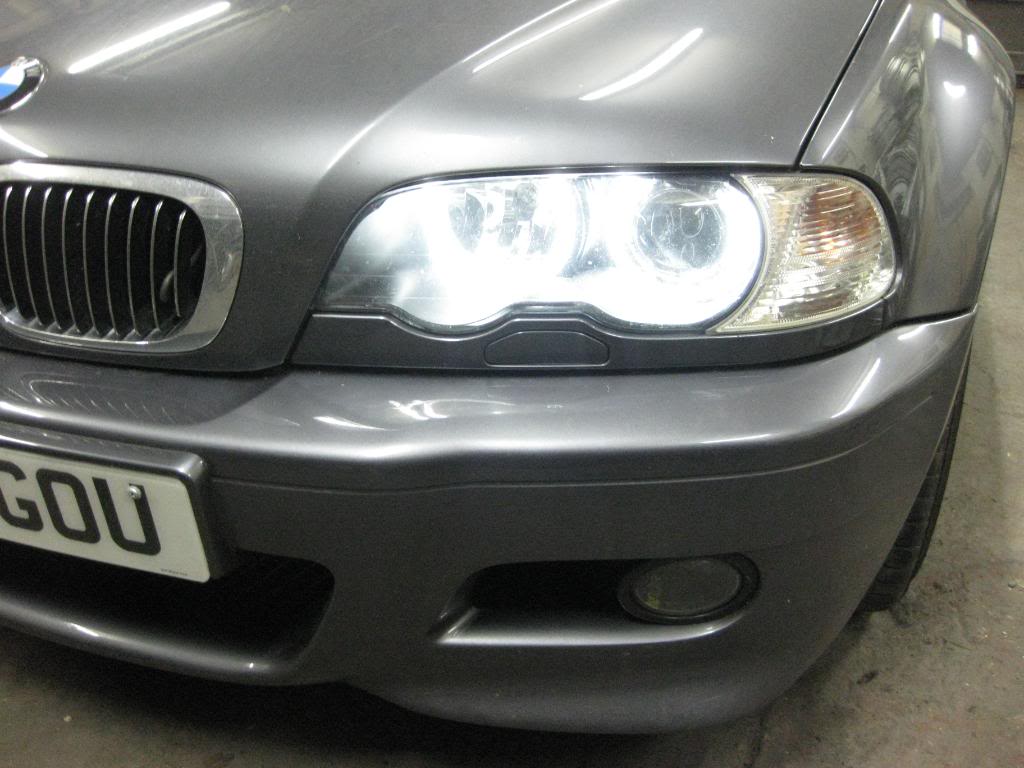 32 by djsyxx6, on Flickr 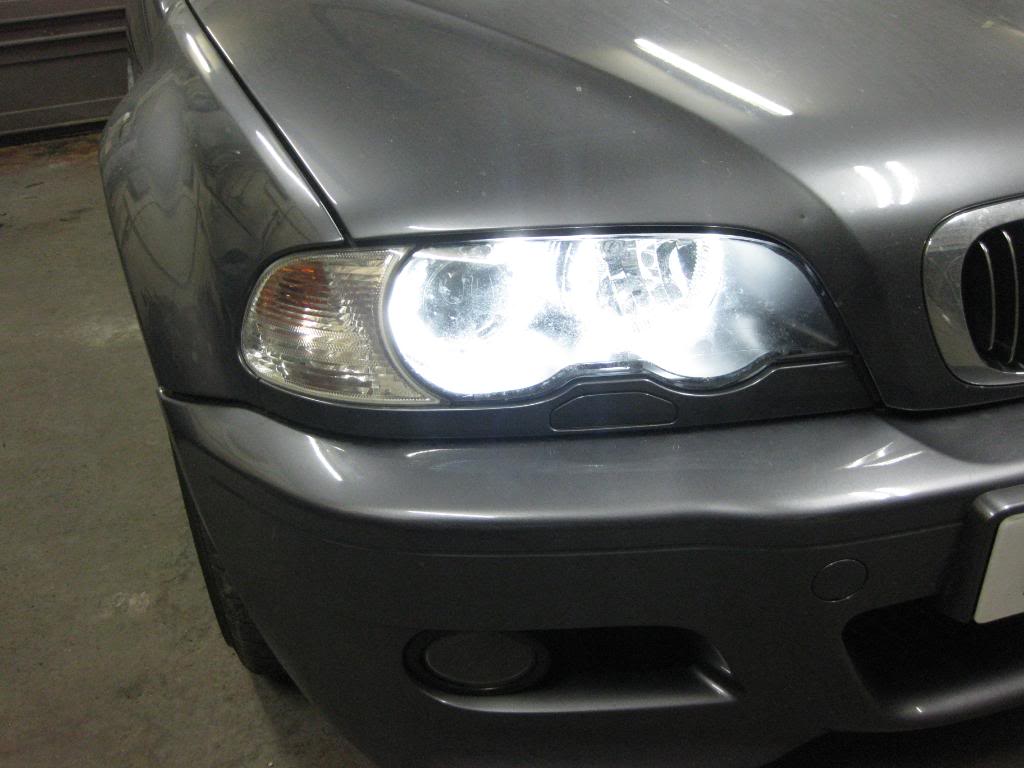 33 by djsyxx6, on Flickr  35 by djsyxx6, on Flickr Next had to sort my tracking alignment as it was out, so got it scanned and adjusted with a Hunter KDS machine. Now the car feels exactly as it should, steers correctly and feels a lot more tighter now. 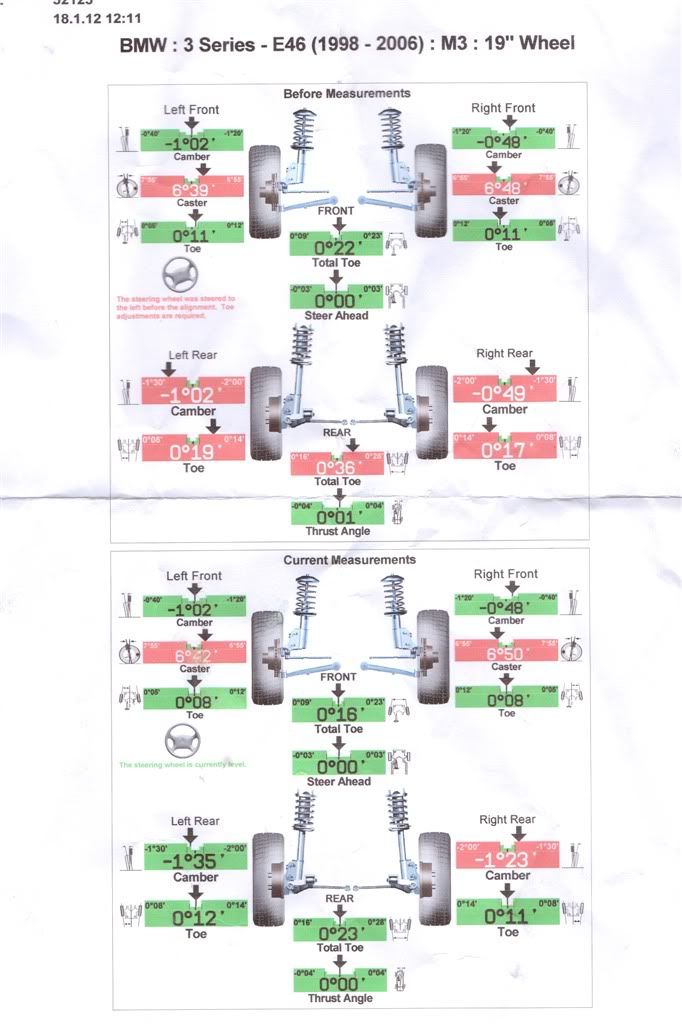 Bought new carbon fibre effect badges for boot and bonnet: Old badges:  39 by djsyxx6, on Flickr  40 by djsyxx6, on Flickr Some crud was under the badge:  41 by djsyxx6, on Flickr  42 by djsyxx6, on Flickr Nothing a little quick clean won't fix:  43 by djsyxx6, on Flickr  44 by djsyxx6, on Flickr And new badges fitted:  45 by djsyxx6, on Flickr  46 by djsyxx6, on Flickr Edited by DJ Syxx - 08 May 2014 at 2:59pm |
||||
|
||||
 |
||||
| Sponsored Links | ||||
|
||||
|
DJ Syxx
Club Member
Joined: 07 Sep 2012 Location: London Status: Offline Points: 208 |
Post Options
Thanks(0)
Quote Reply
Posted: 19 Sep 2012 at 12:00pm |
|||
|
Next I bought Depo smoked indicators and side repeaters, gunsmoked Lamin-X, satin black bonnet/kidney grills and satin black wing vents.
Firstly the lamin-x. I whipped off the lights from the car and swapped them with a spare set from my old 330. Outer lights were clean and didn't have any gunk but my inner boot lights which seems to be common on all E46's I've seen all have crud getting trapped inside the light. I soaked them in soapy water but me being impatient I took them apart as I didn't get anywhere! Then got started with the Lamin-X so here's my lights before: 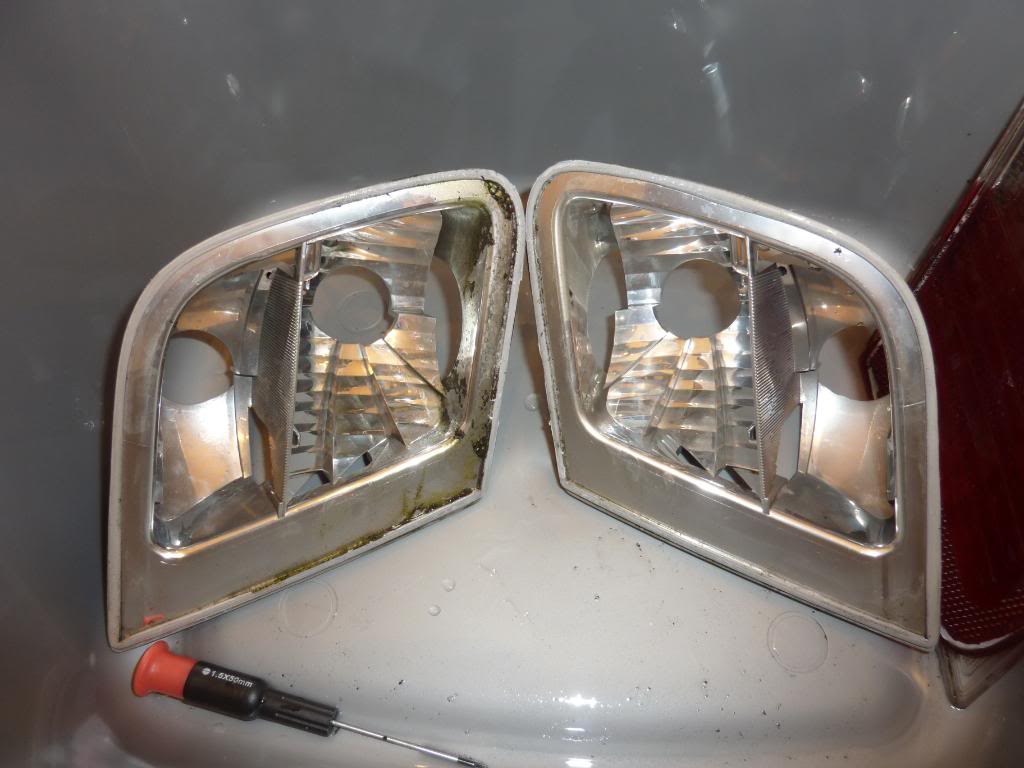 47 by djsyxx6, on Flickr The lenses had some mud/dirt on them as well:  48 by djsyxx6, on Flickr They got glued back together again and let it dry for a day. Then got started with the Lamin-X so here's my lights before:  49 by djsyxx6, on Flickr  52 by djsyxx6, on Flickr Got cutting to shape and using the squidgy and hairdyrer got as many air bubbles out as possible. There are few left but these disappear over time as its breathable: 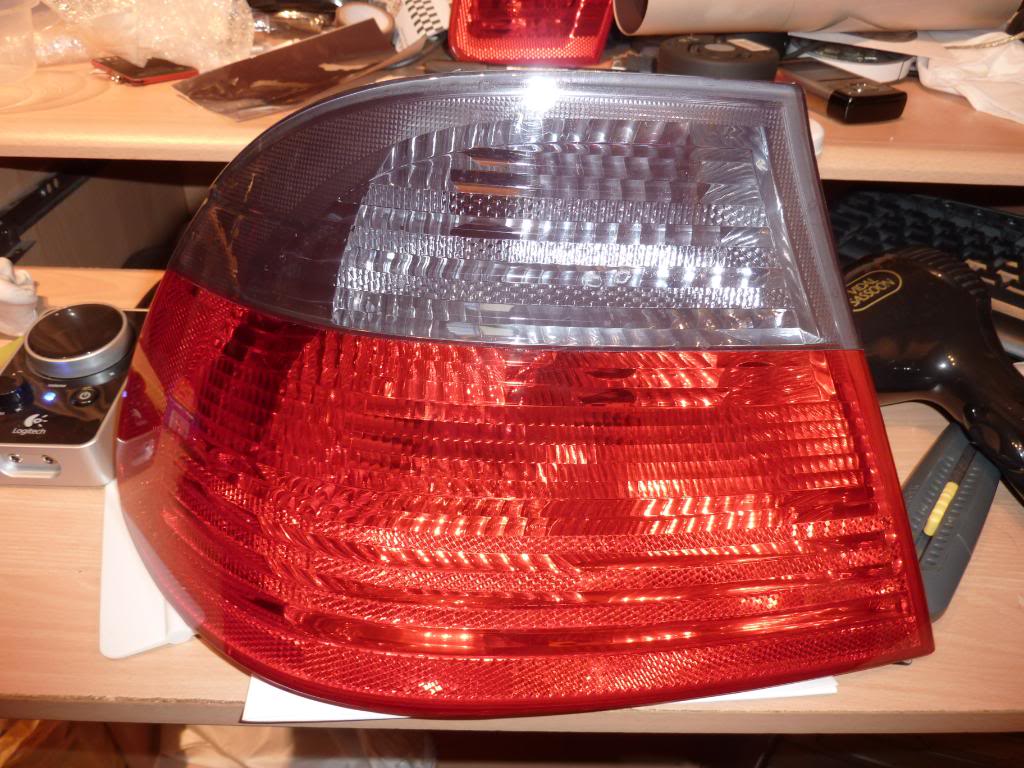 50 by djsyxx6, on Flickr 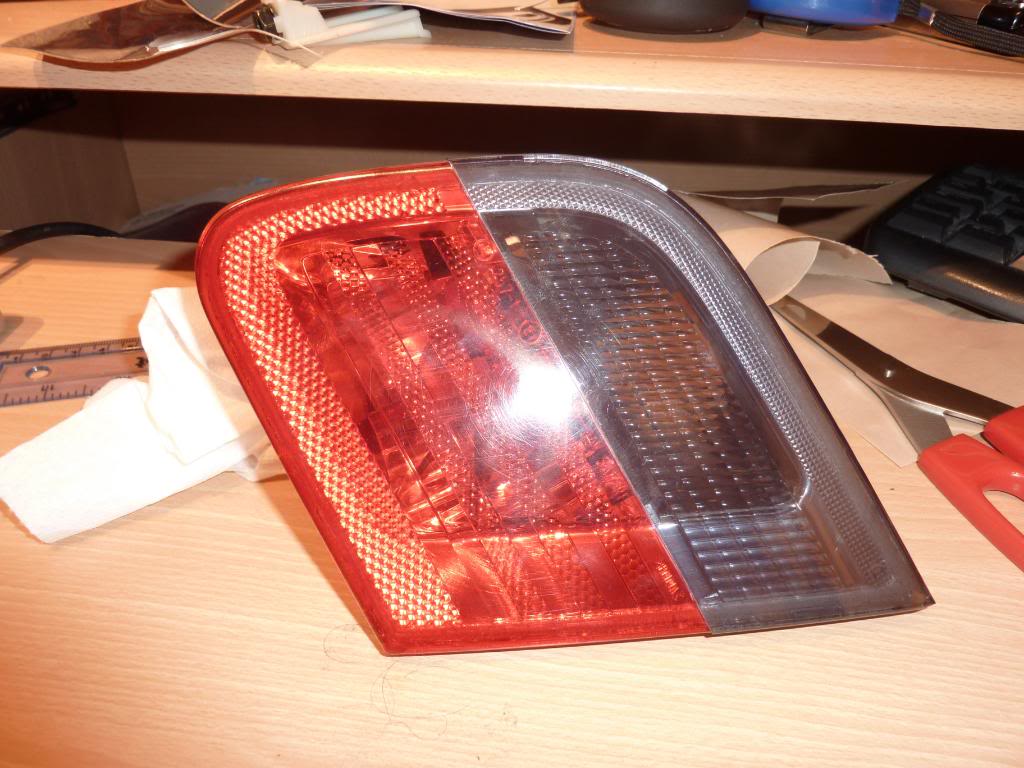 53 by djsyxx6, on Flickr And a comparison: 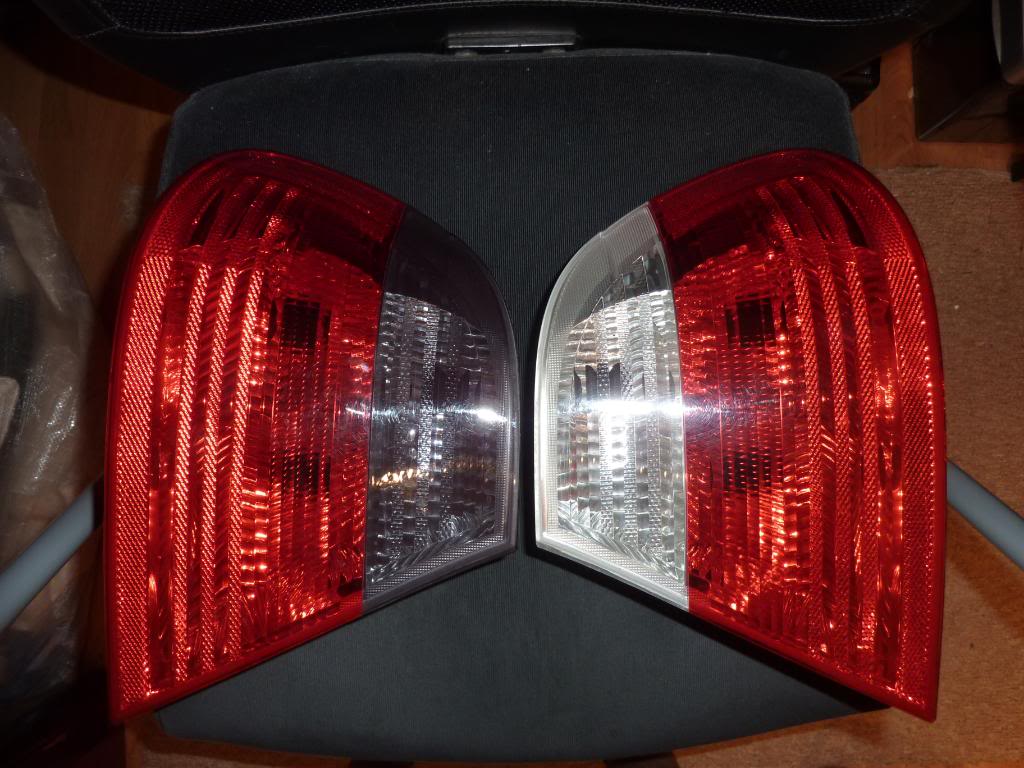 51 by djsyxx6, on Flickr The finished product! 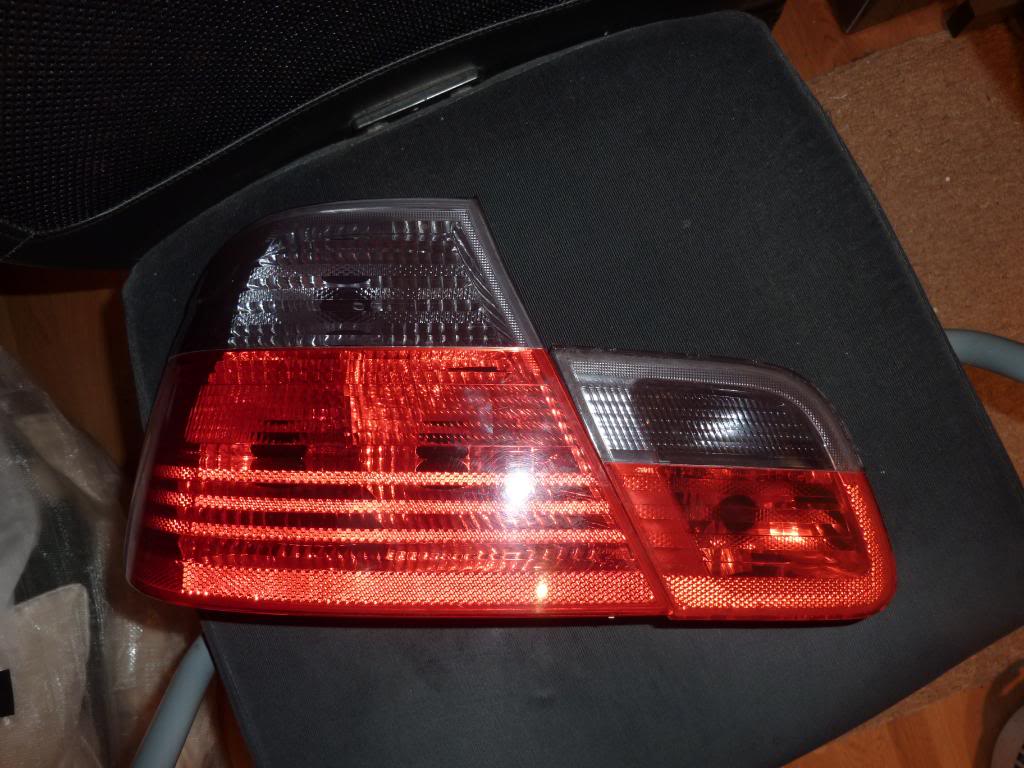 54 by djsyxx6, on Flickr 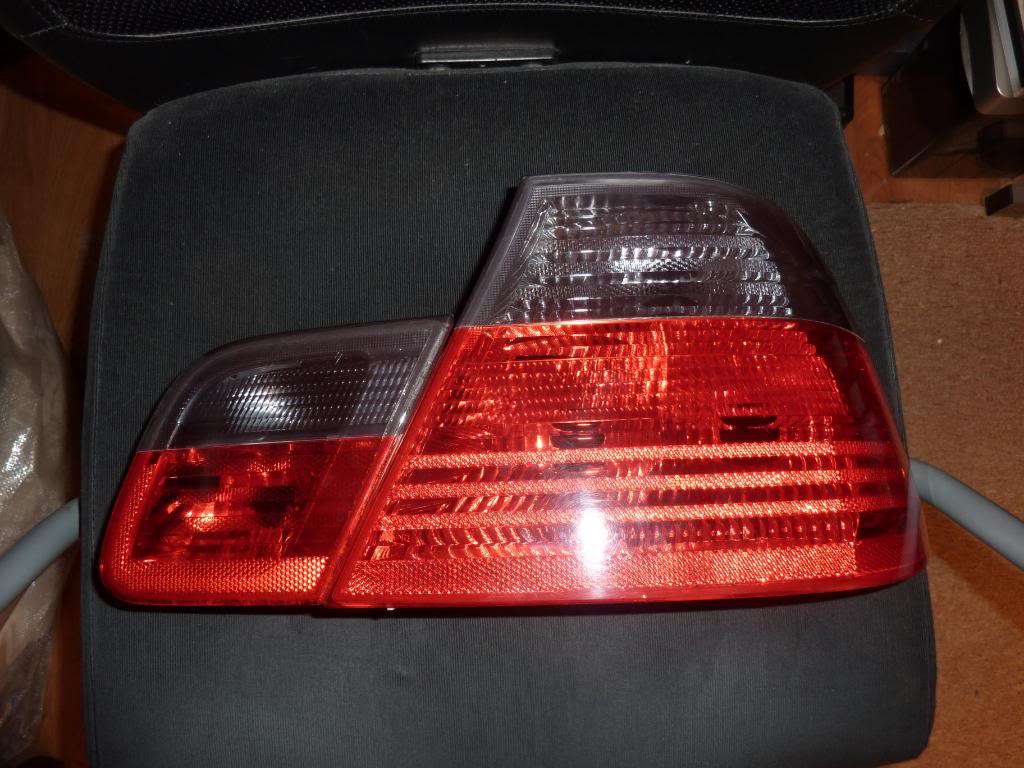 55 by djsyxx6, on Flickr Satin black vent grill: Before:  56 by djsyxx6, on Flickr Disappeared!: 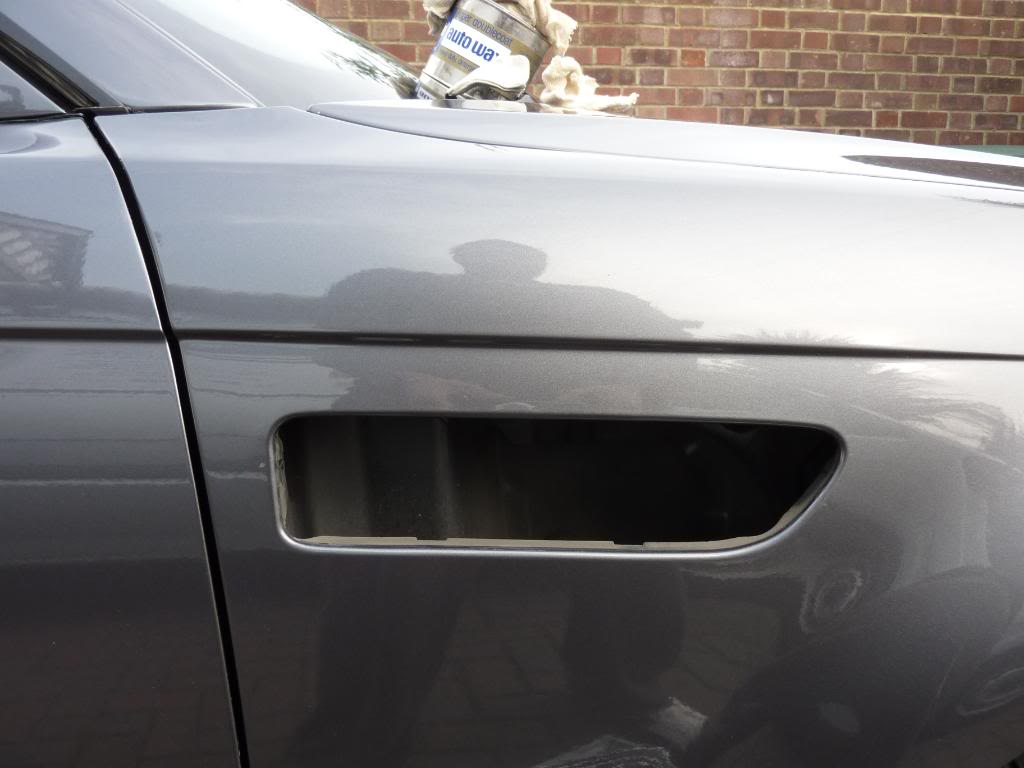 57 by djsyxx6, on Flickr New (I have the monochrome M3 badges to fit on just waiting on delivery):  58 by djsyxx6, on Flickr Side reps before and after with depo smoked: 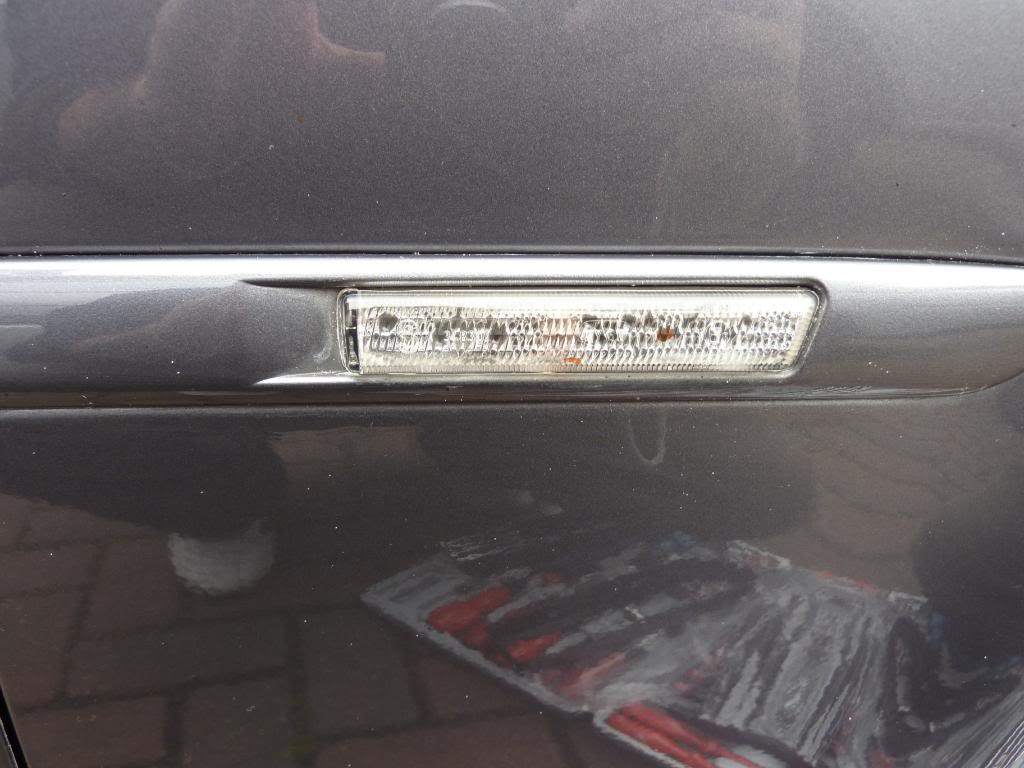 59 by djsyxx6, on Flickr 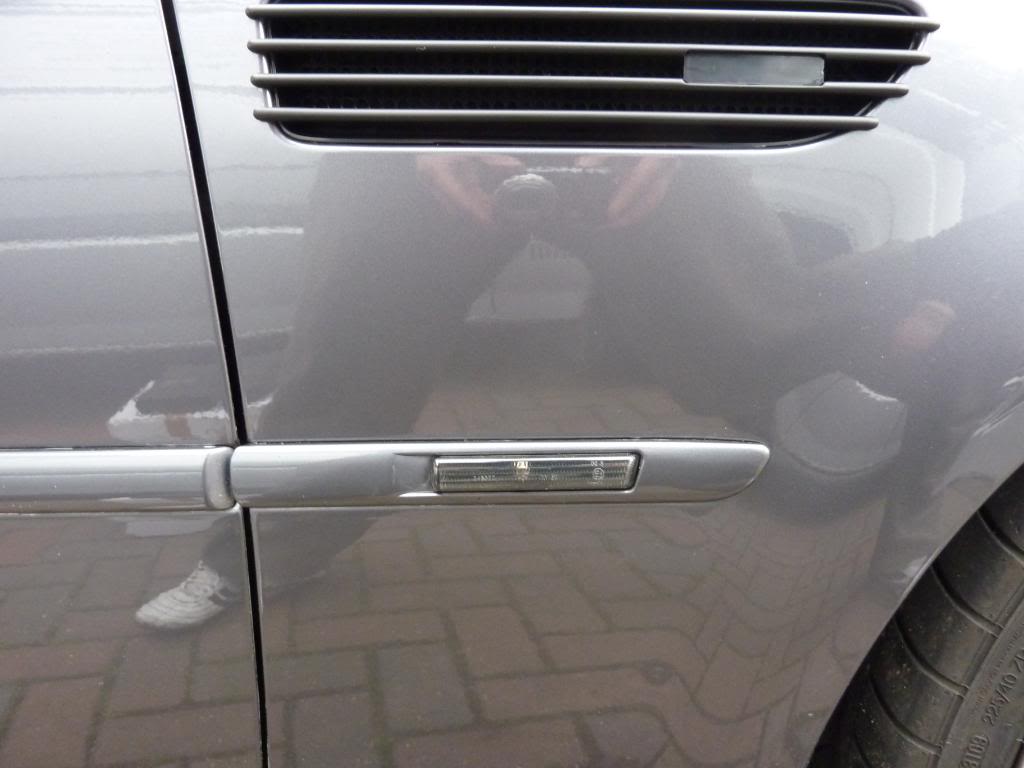 60 by djsyxx6, on Flickr Black grills:  61 by djsyxx6, on Flickr Depo smoked indicators: 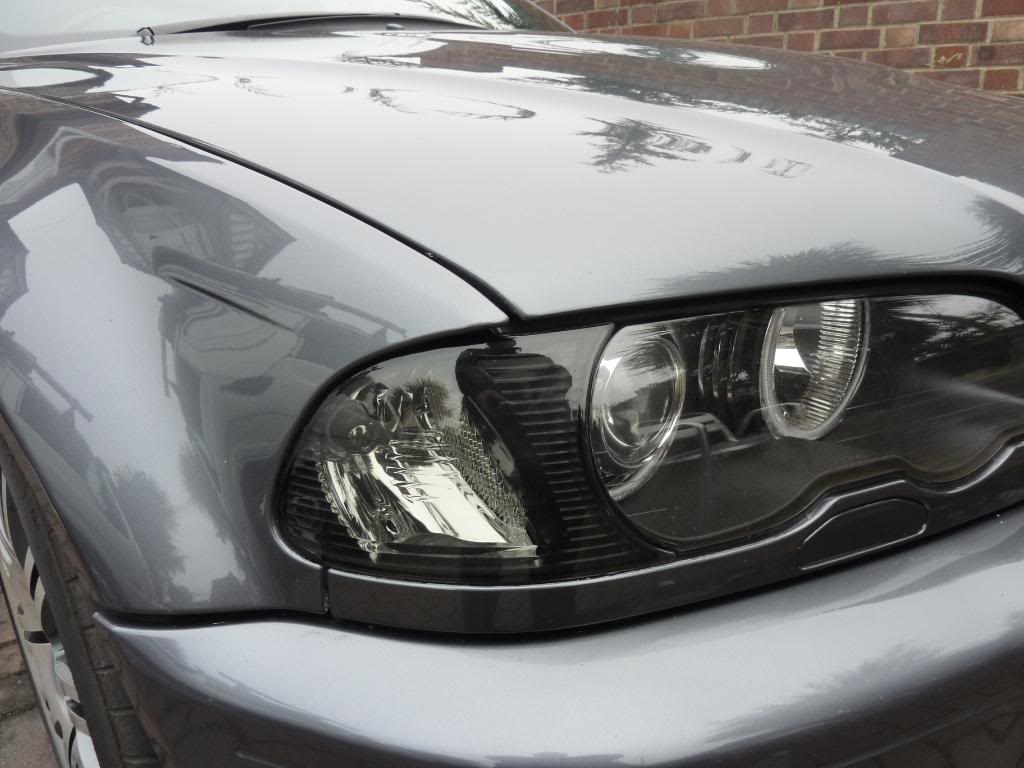 62 by djsyxx6, on Flickr And just a few latest pics of the car taken at New Forest, will be getting some more pics up soon. 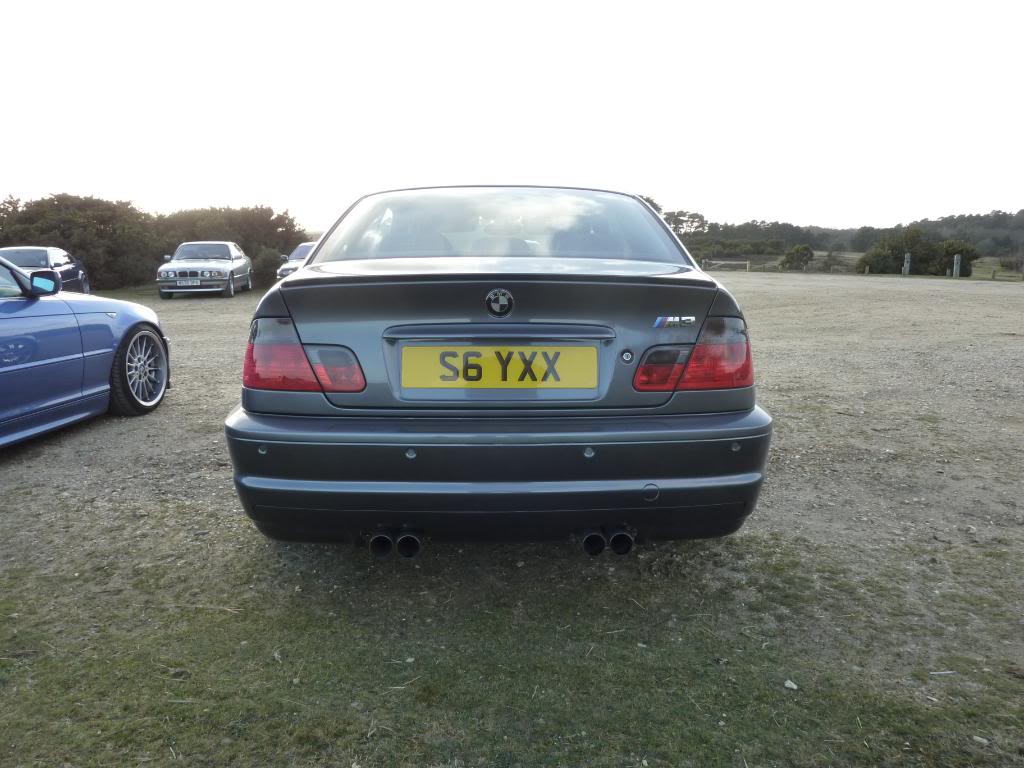 63 by djsyxx6, on Flickr 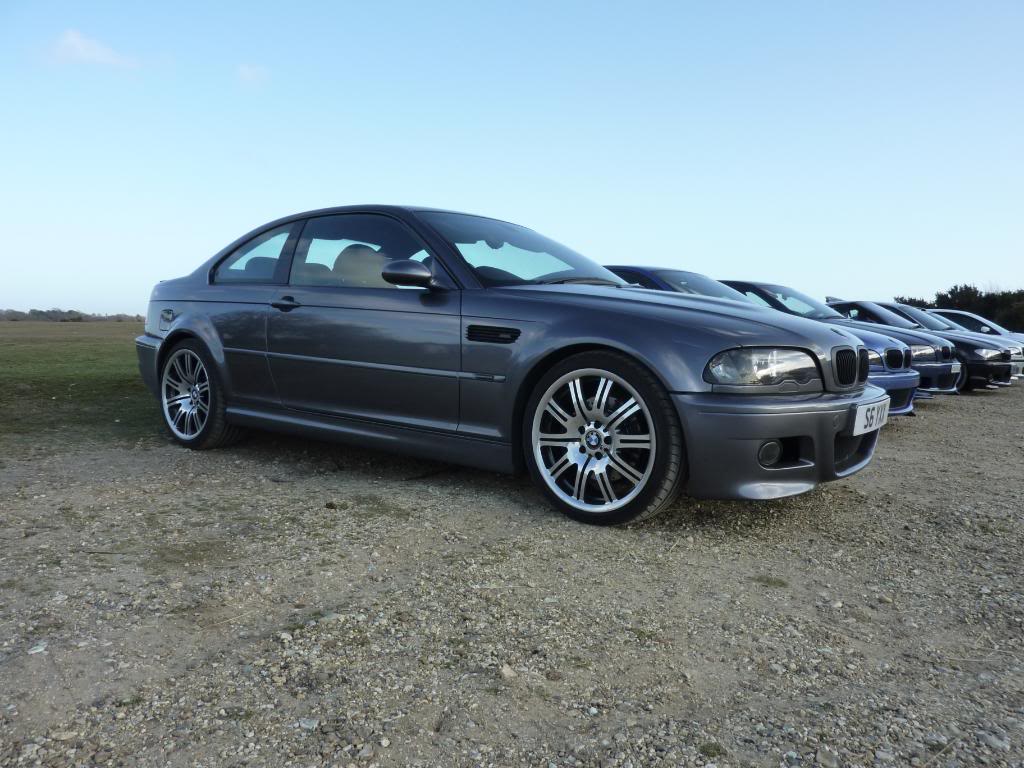 64 by djsyxx6, on Flickr  65 by djsyxx6, on Flickr 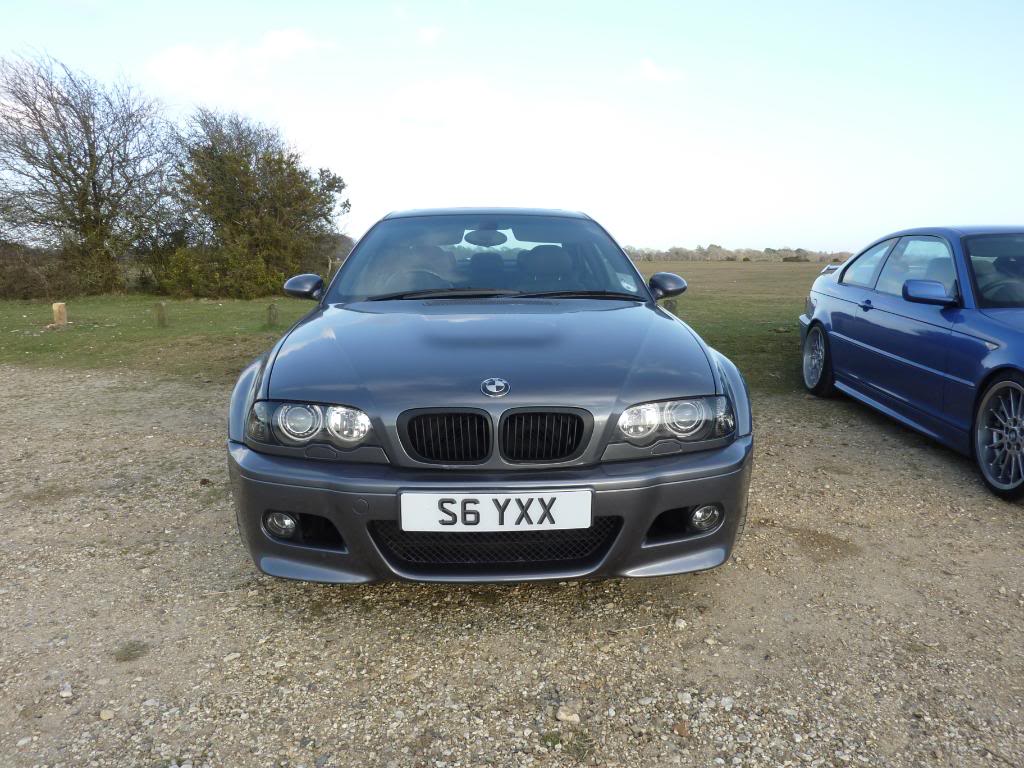 66 by djsyxx6, on Flickr  67 by djsyxx6, on Flickr Wheels were next and there was only one set of wheels that I wanted on this car and nothing else and no way I would ever fit CSL's or CSL reps. So after searching for a while I found what I was looking for. They are AC Schnitzer Type 3 racing in staggered M3 fitment, 8.5x19 front ET43 and 9.5x19 rear ET21. They weigh a little less than OEM's. Fronts weigh 12kg and the rear 12.5kg. Barrels were good but the lips needed doing as they were powdercoated so they were given to Dips at Custom Cars who stripped the powdercoat off which wasn't an easy task and split the wheels apart and centres were sent off for powdercoating. All back well and good and the lips polished which have come up nicely and look loads better. Before:  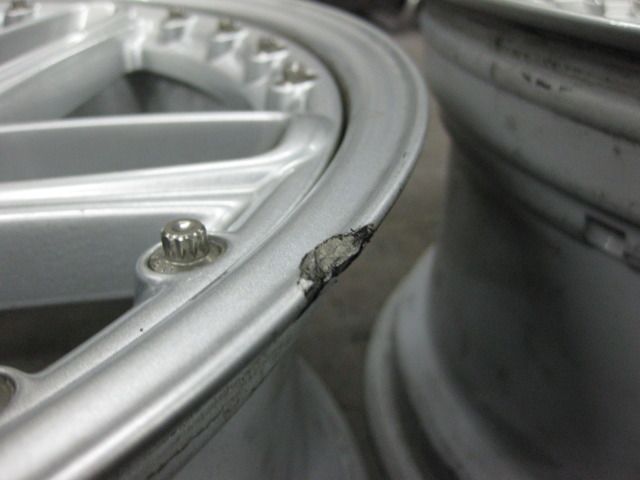 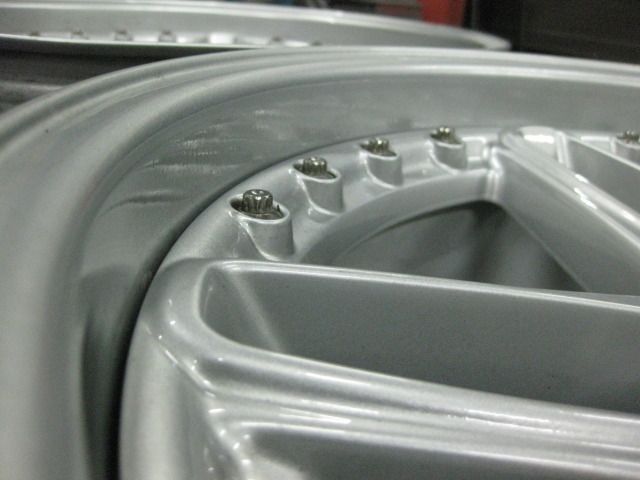 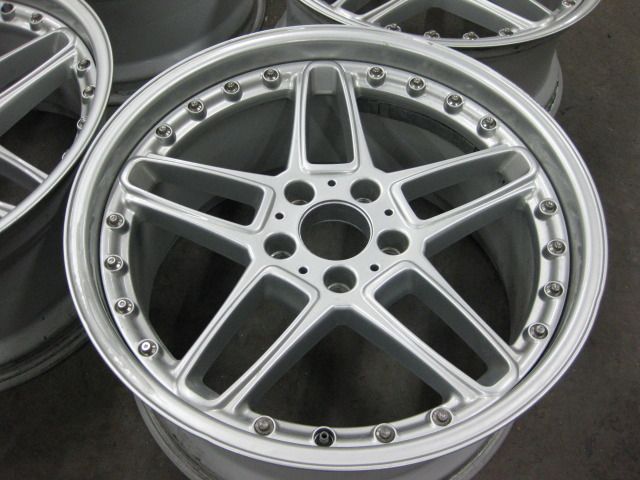 After: 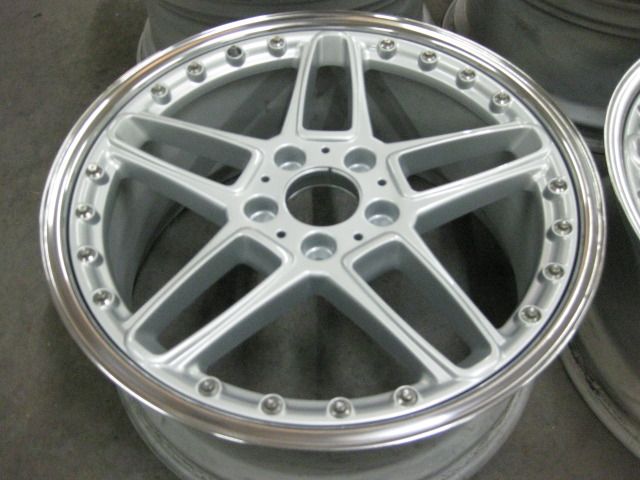 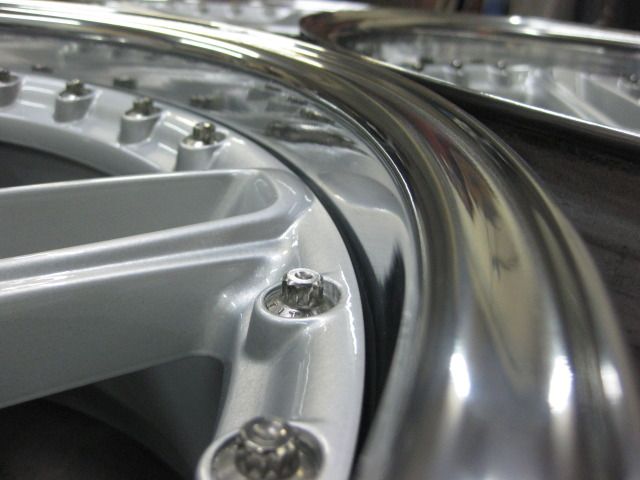  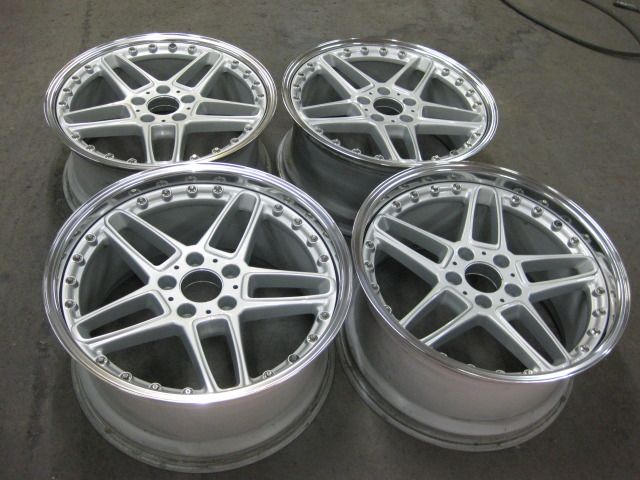 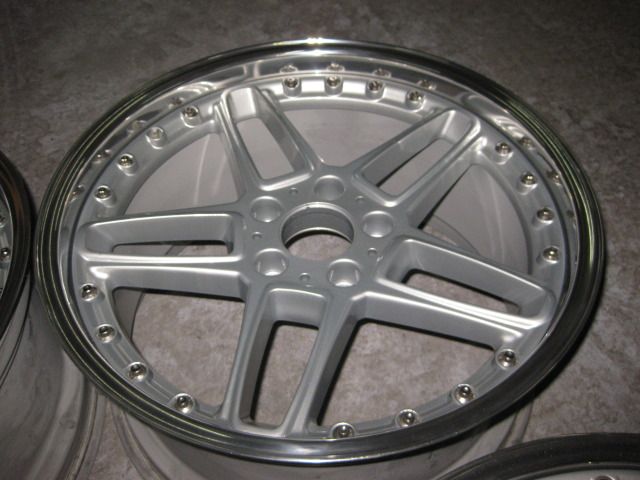 I managed to find 7mm AC Schnitzer hubcentric spacers with longer bolts so fronts now ET36 and rear ET14 which bring them out nicely. Fitted them in time for a car show called DC12 and a few pics. 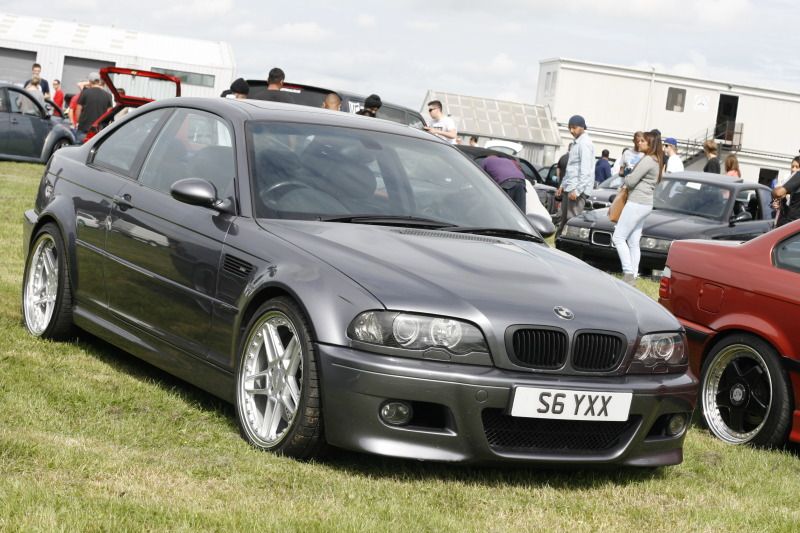  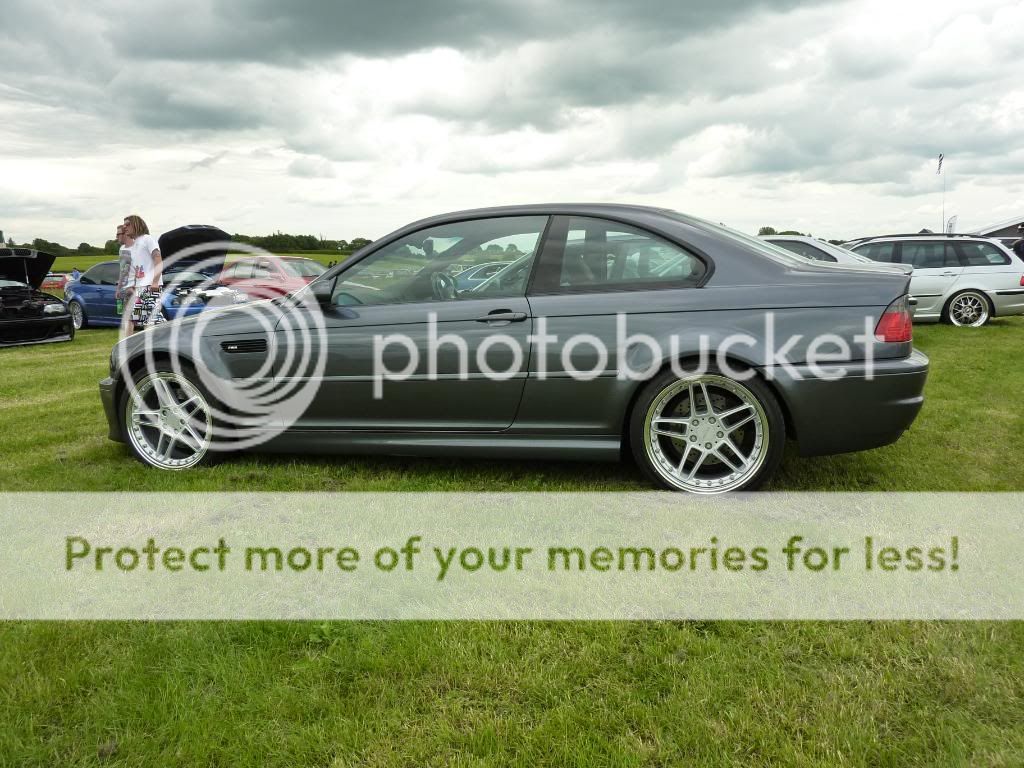  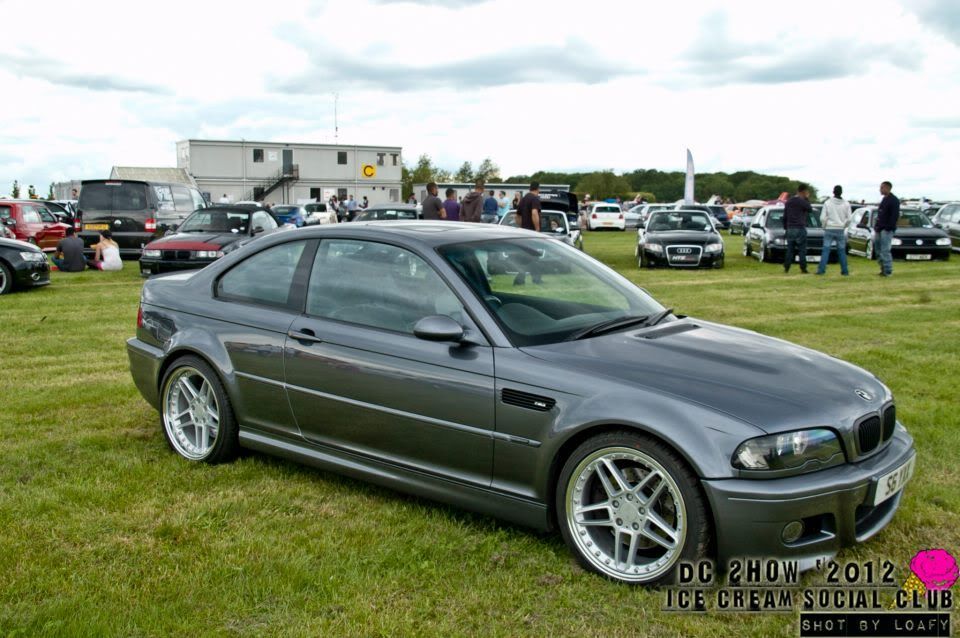 Next after seeing a load of E46's with white CCFL's on the web and on the roads, I decided to switch to yellow rings for a few reasons. What made me choose yellows is with the xenons you can't really make the rings on the outer whereas these because of the difference colour they stand out more and the white ones have become too common. So after doing some searching I found a set of CCFL's in yellow from an Australian company called Euro Division which I think some of you are familiar with on ths forum. I saw a set fitted on E46fanatics and was impressed with them. This is a comparison shot: 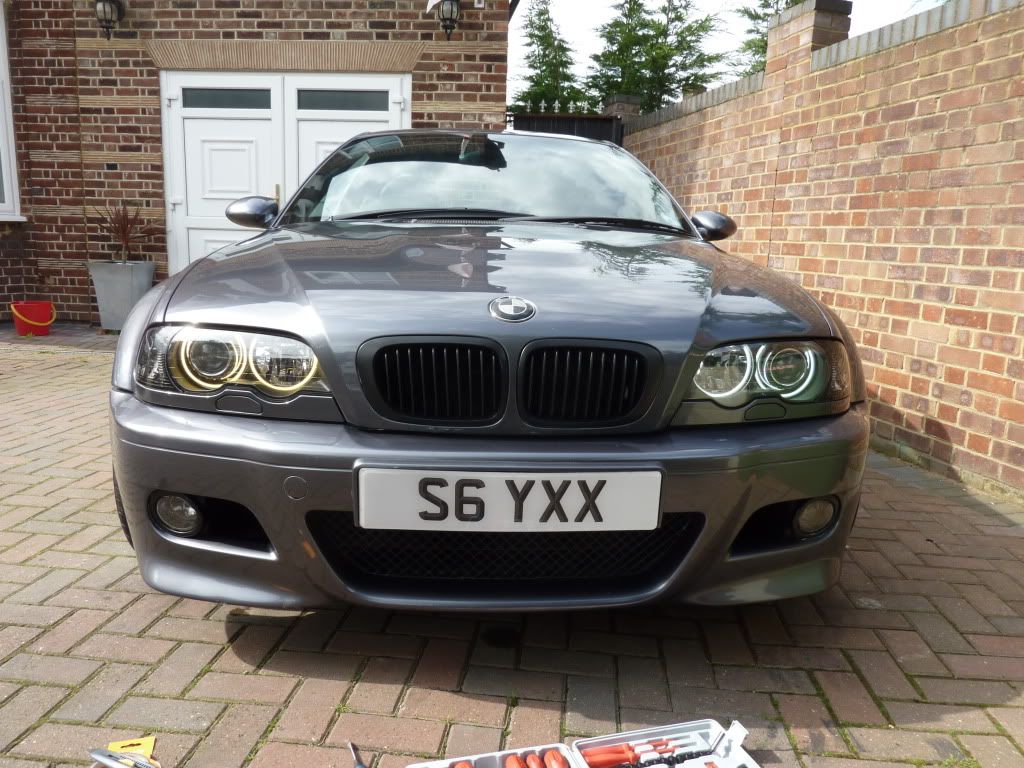 Now on: 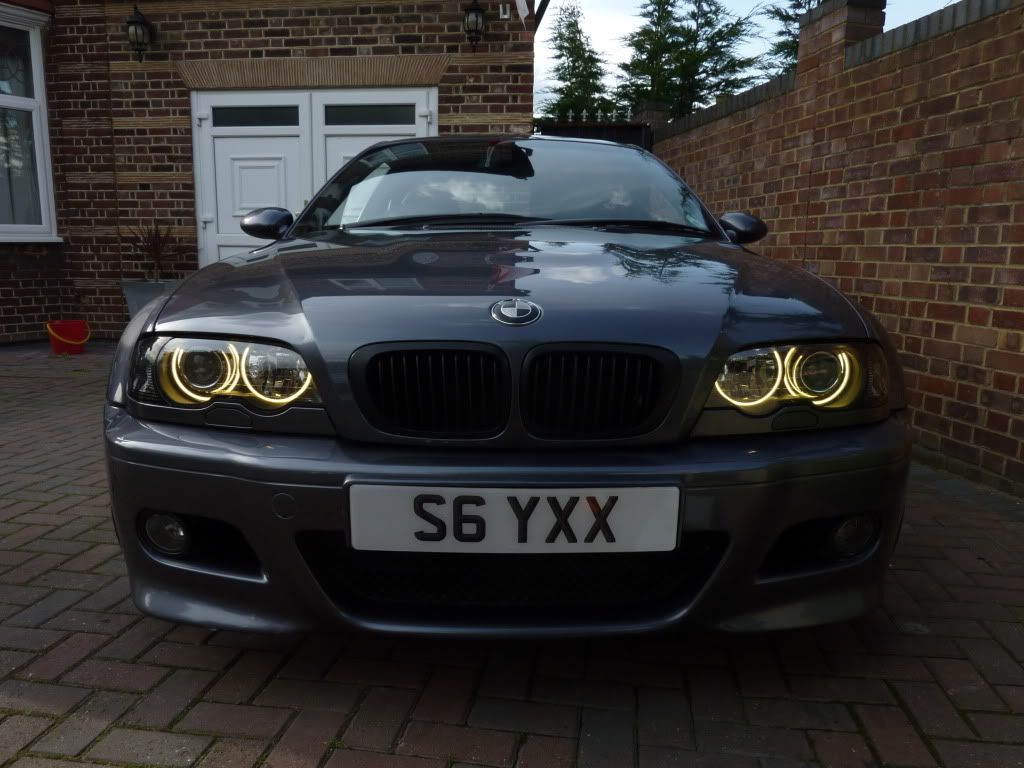 With xenons:  Nightshot hard to capture but they look the part at night. 
Edited by DJ Syxx - 08 May 2014 at 3:05pm |
||||
|
|
||||
|
||||
|
DJ Syxx
Club Member
Joined: 07 Sep 2012 Location: London Status: Offline Points: 208 |
Post Options
Thanks(0)
Quote Reply
Posted: 19 Sep 2012 at 12:00pm |
|||
|
Now onto the recent bit of work done on the car. I had purchased a set of Intrax springs a while back. Saw a few pictures of a CSL style diffuser colour coded with carbon so found a seller on ebay who does them by the name of "mrhappynbuyitnow". My tailpipes were also a little worse for wear so after seeing a few M3's with them on I bought the Eurostyle tail pipes or as I like to call them the "Euro Trash" tail pipes. These are slightly bigger than the originals and lot more shinier!
The springs suprised me quite a bit as the drop was instantly noticeable and weren't fully settled when I took the pics. Unfortunately I did get a little rubbing at the rear arch (fender) made worse with a full tank of petrol so will need to remove the 7mm spacer for now until I get a little roll at the back. Overall really happy with the springs make the car look a lot better and sets off the wheels properly now. A little stiffer than oem but ride quality still decent. Tail pipes off: 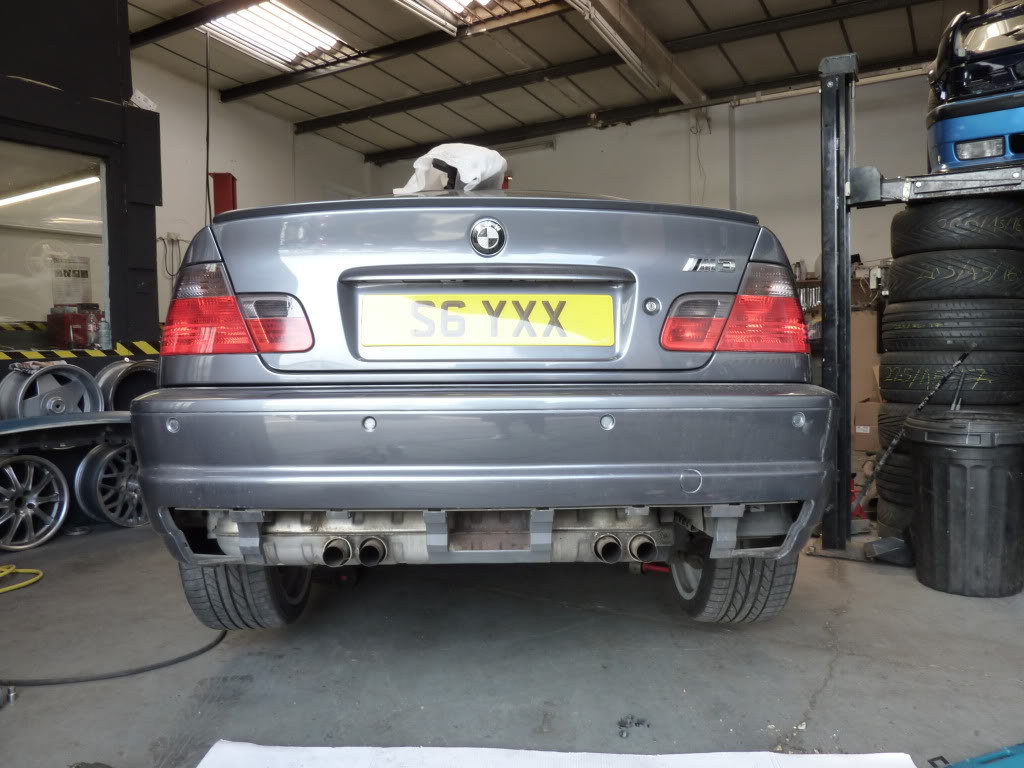 113 by djsyxx6, on Flickr Tail pipes fitted. These are just pop rivetted on and the pipes are pre drilled ready to go on. 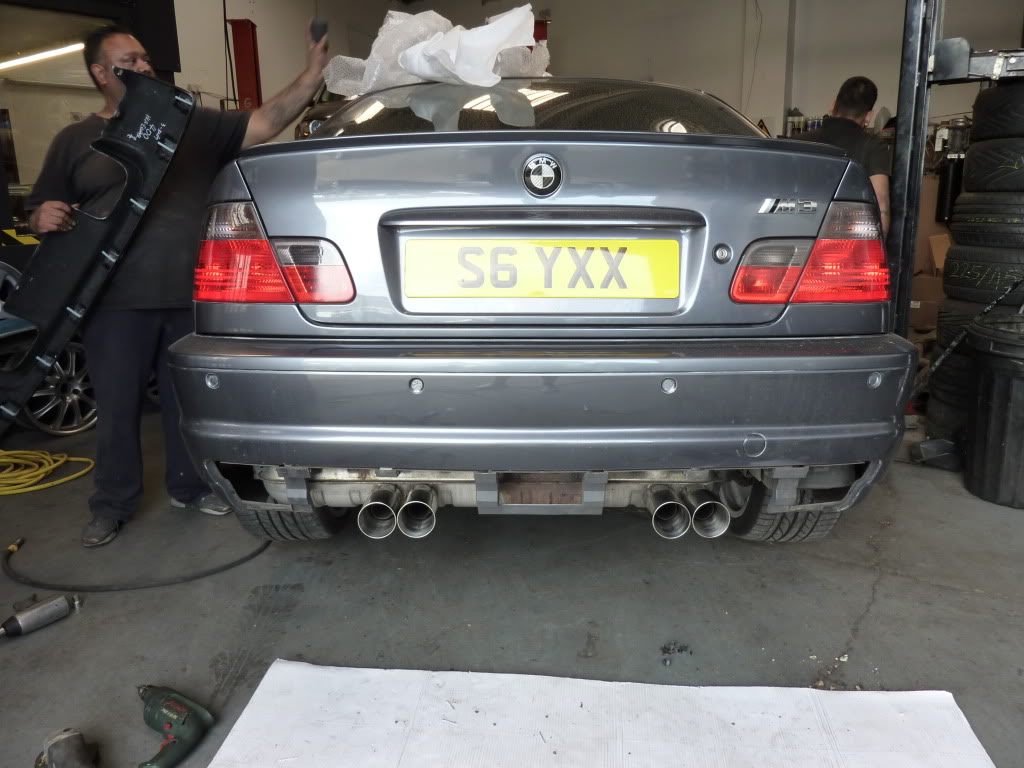 114 by djsyxx6, on Flickr And diffuser fitted:  116 by djsyxx6, on Flickr Got the car washed and took some pics:  117 by djsyxx6, on Flickr 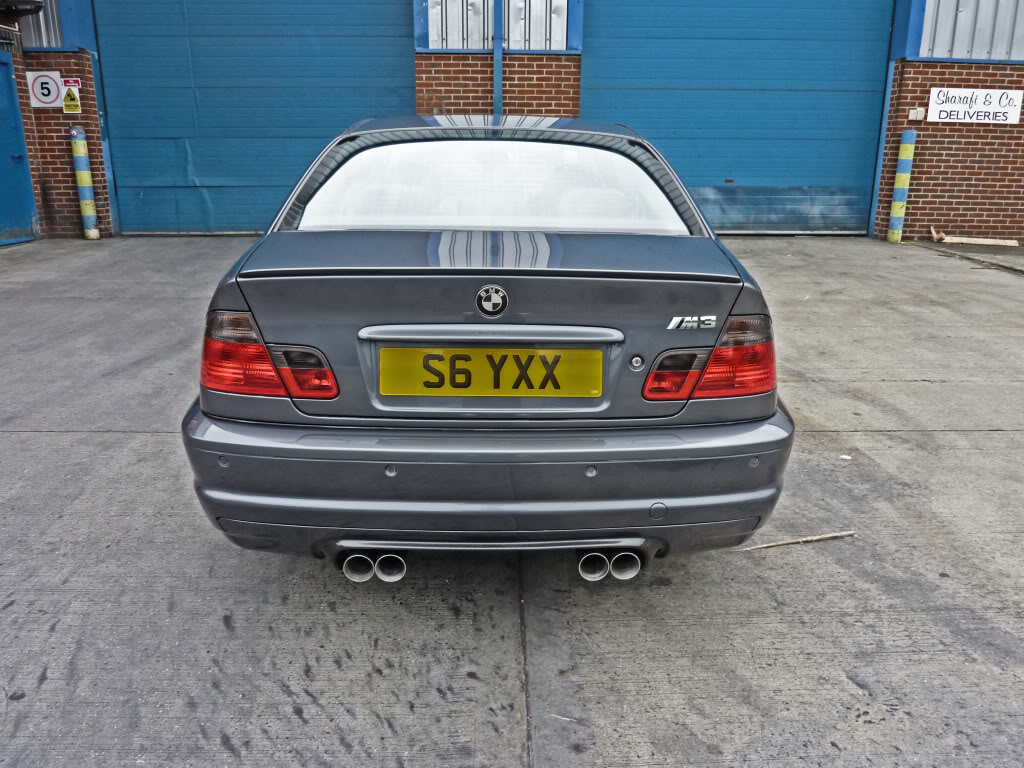 118 by djsyxx6, on Flickr 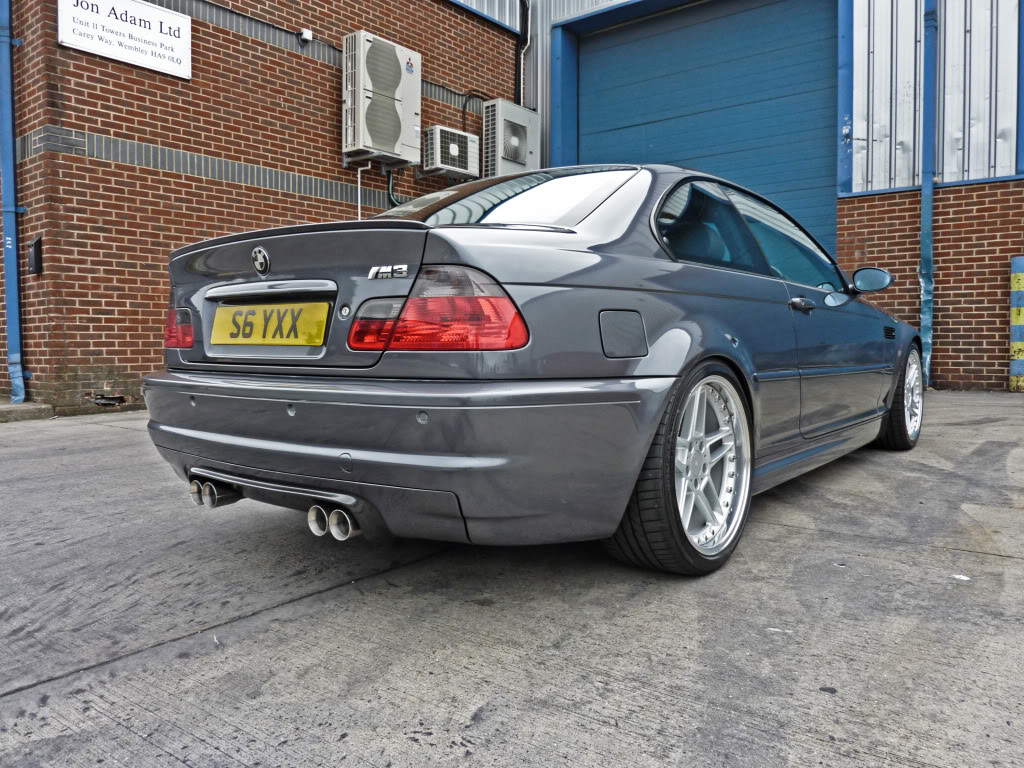 122 by djsyxx6, on Flickr 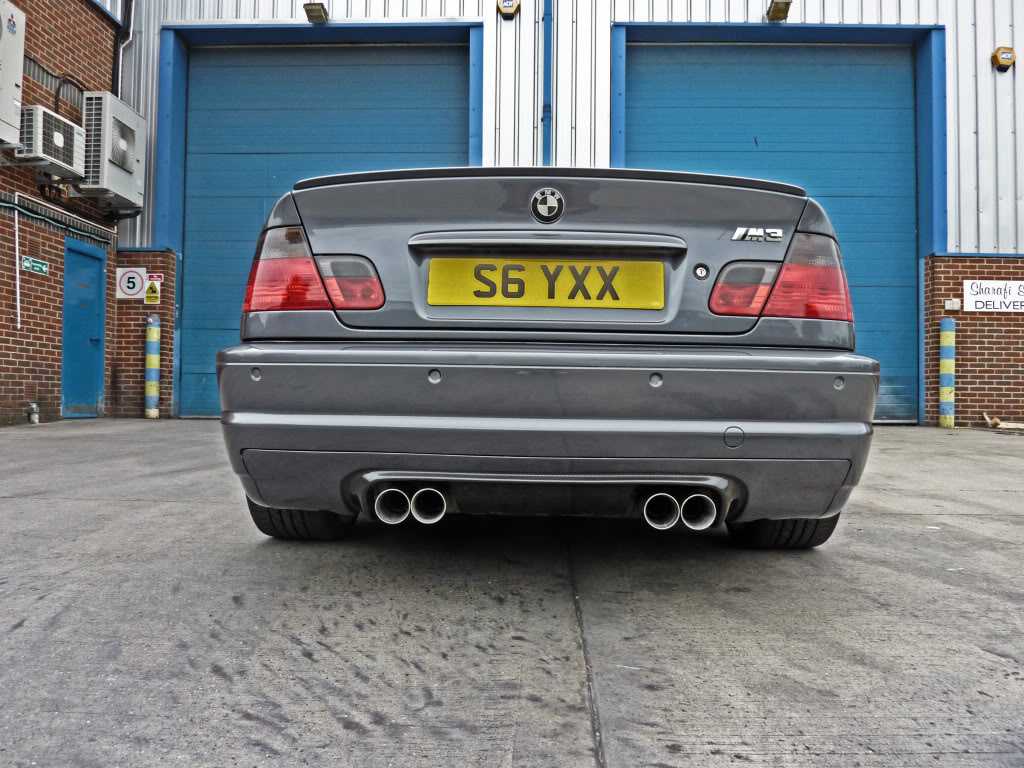 123 by djsyxx6, on Flickr 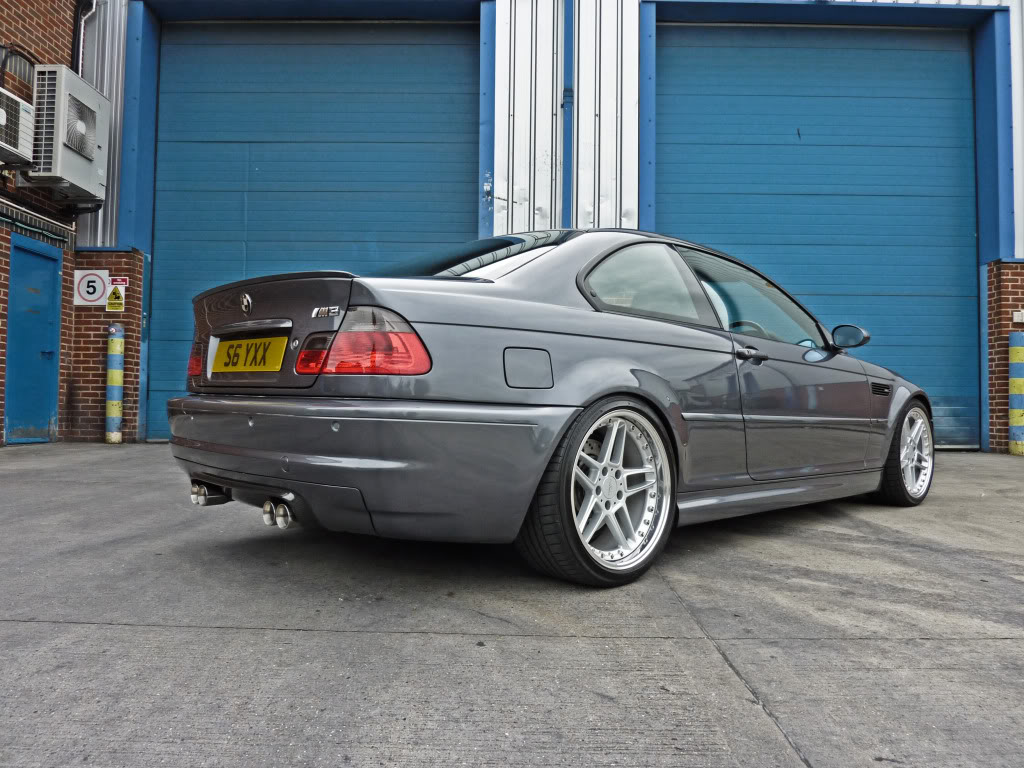 125 by djsyxx6, on Flickr 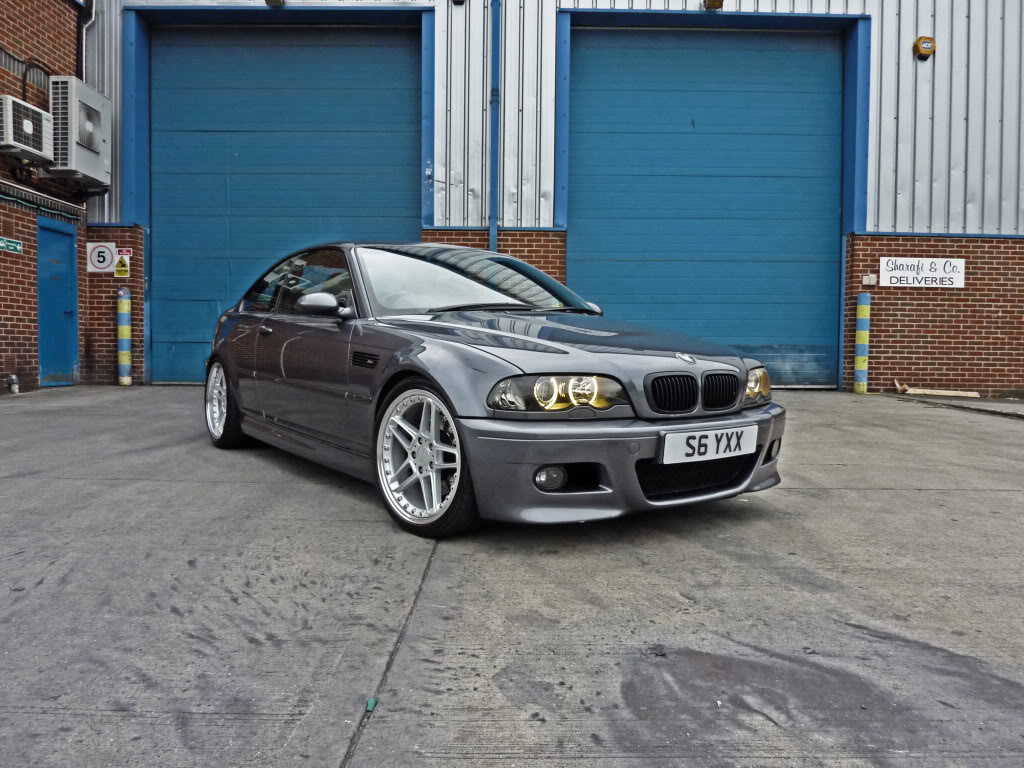 127 by djsyxx6, on Flickr  130 by djsyxx6, on Flickr  129 by djsyxx6, on Flickr 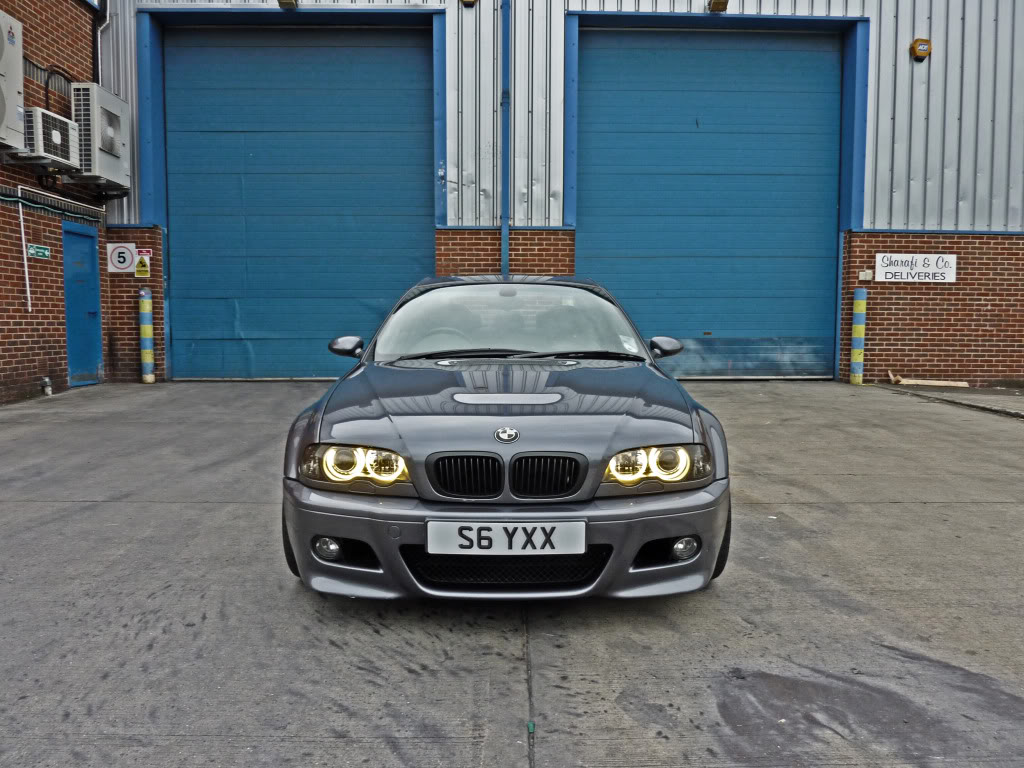 132 by djsyxx6, on Flickr 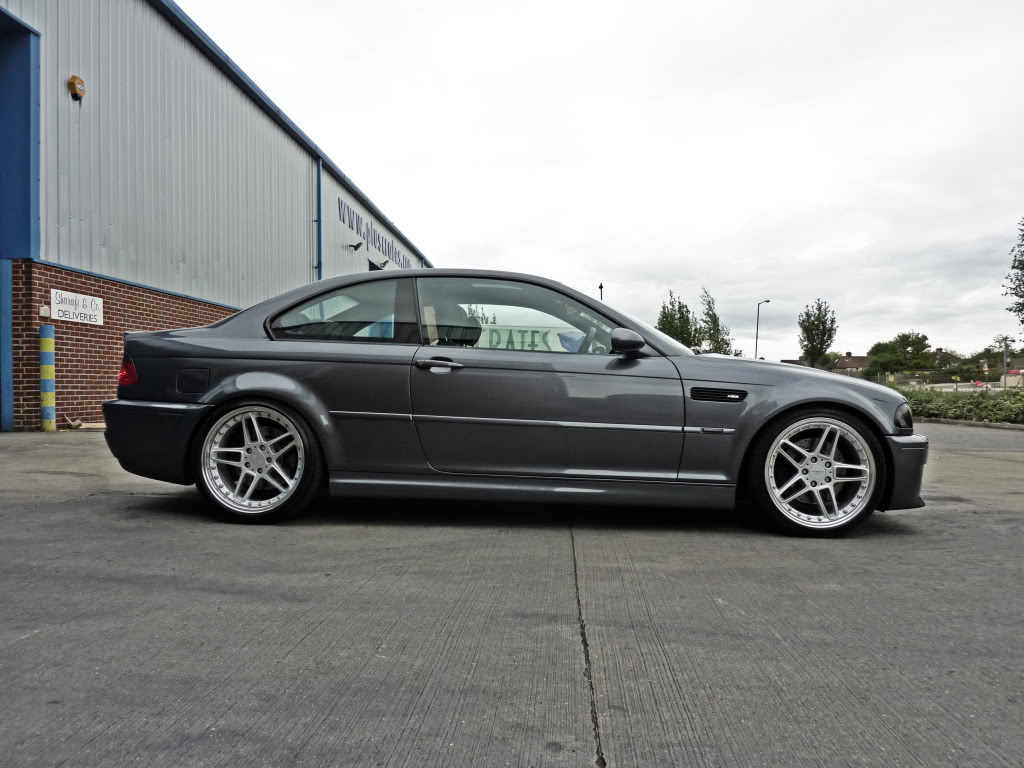 136 by djsyxx6, on Flickr 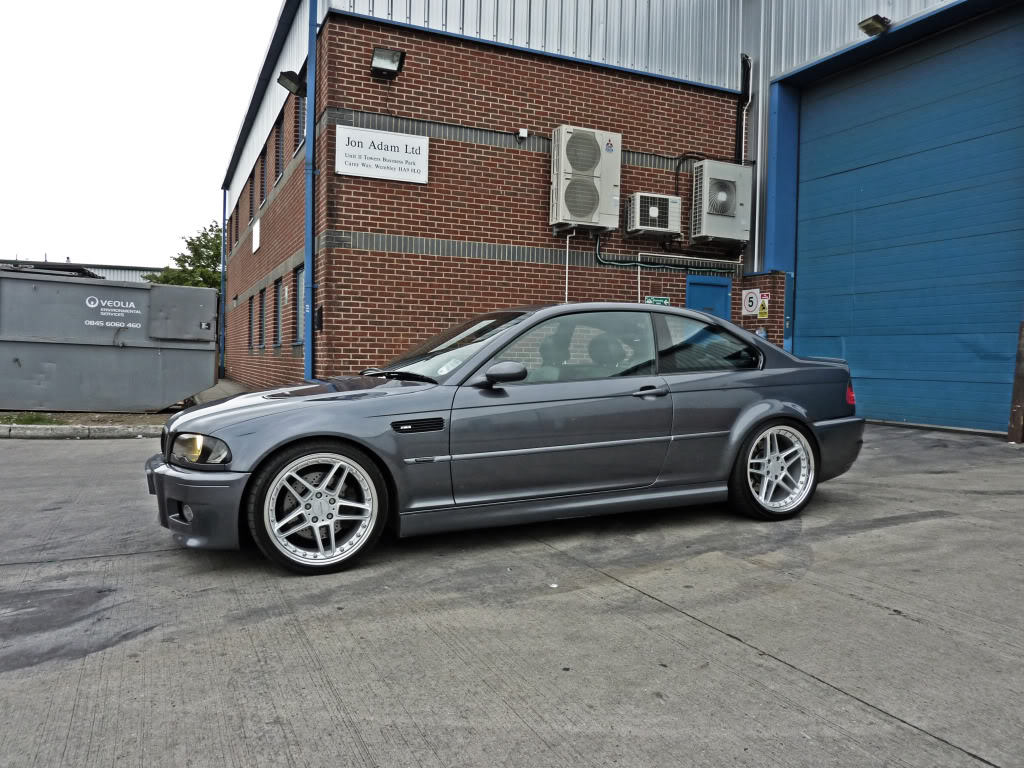 139 by djsyxx6, on Flickr 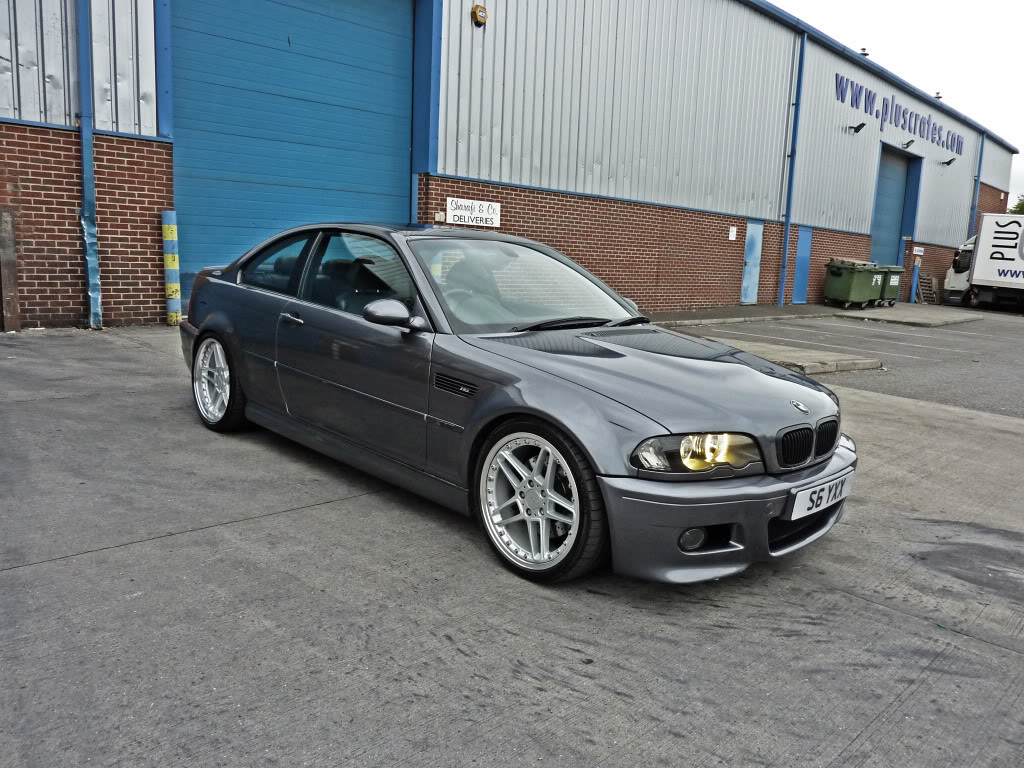 137 by djsyxx6, on Flickr My next update will be the brakes. Not doing a BBK but have sent off my calipers for shot blasting and powdercoating in black with new seals and pistons. I am also going to change my brake discs all round and have ordered Performance Fricition Z pads all round and will be fitting new braided brake lines with new fresh fluid. Edited by DJ Syxx - 08 May 2014 at 3:07pm |
||||
|
|
||||
|
||||
|
DJ Syxx
Club Member
Joined: 07 Sep 2012 Location: London Status: Offline Points: 208 |
Post Options
Thanks(0)
Quote Reply
Posted: 19 Sep 2012 at 12:01pm |
|||
|
Right update time and lots of pics! I had to take care of the brakes as I was getting a squeel from the front passenger and rear drivers. Copper grease didnt help so wasn't sure whether it was the disc, or the caliper at fault. So decided to change all of it once and for all and not having to worry about brakes for a long time. So took the car off road just after Gaydon.
Prepared the car first. 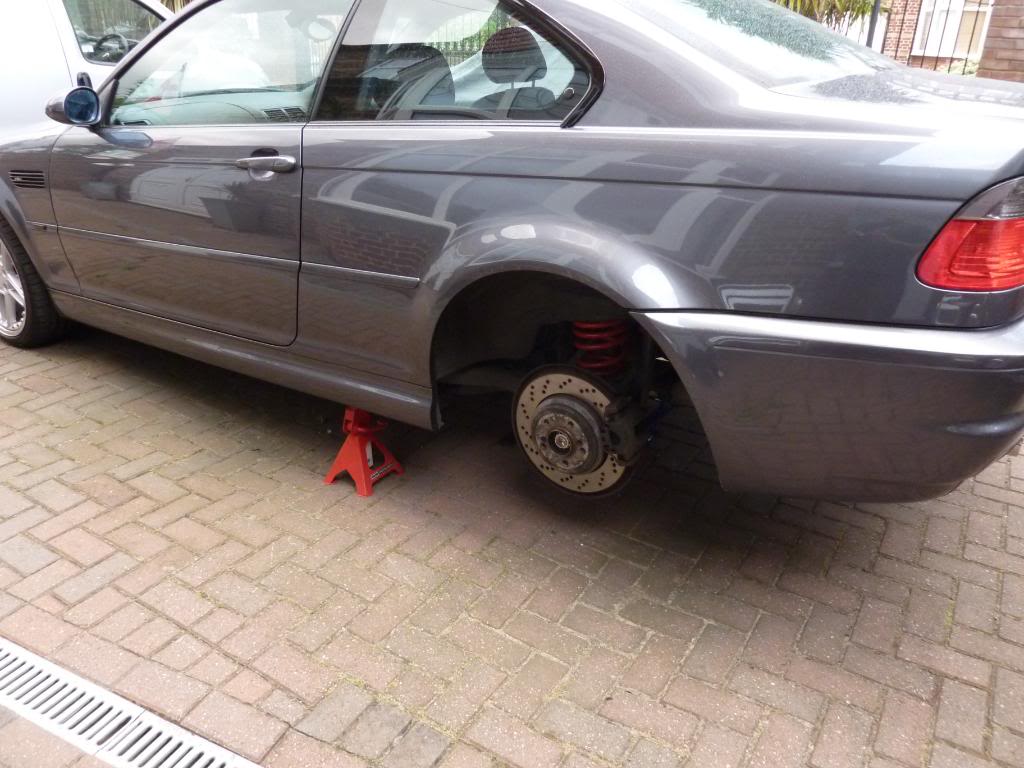 146 by djsyxx6, on Flickr 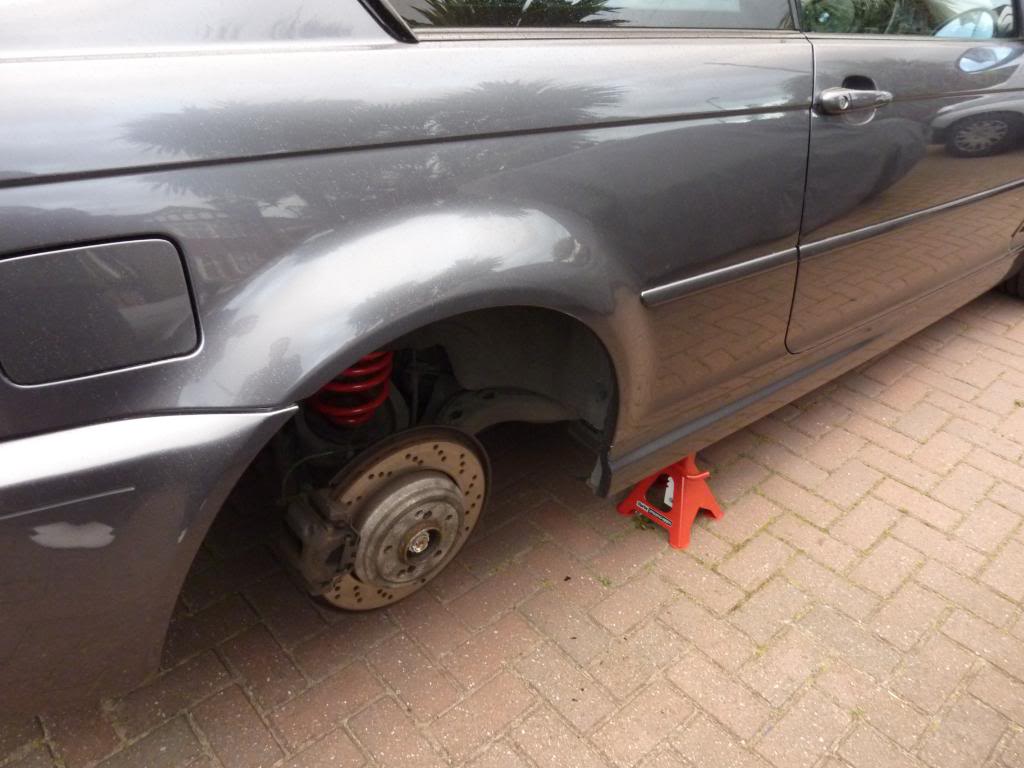 147 by djsyxx6, on Flickr Caliper off 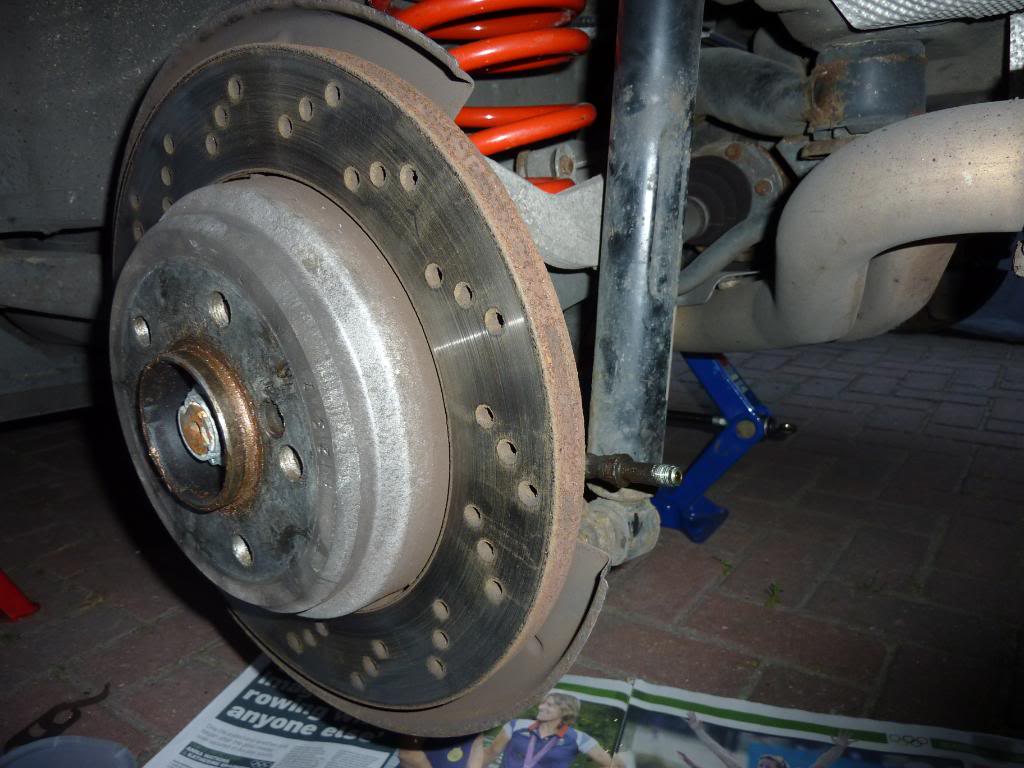 151 by djsyxx6, on Flickr 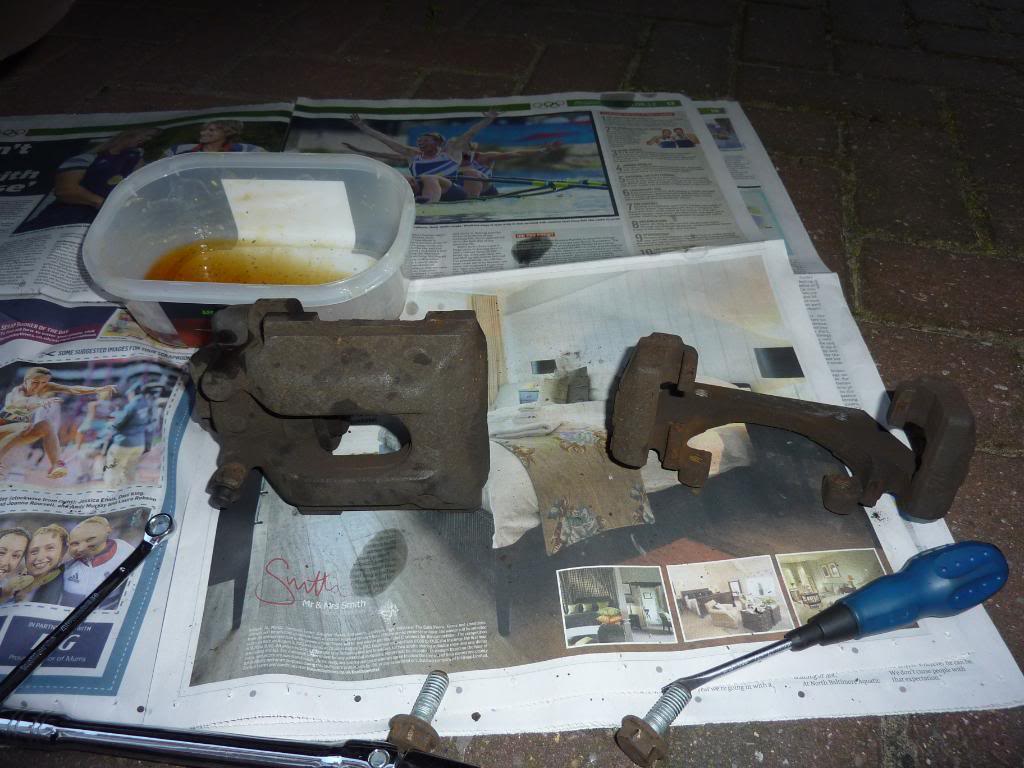 152 by djsyxx6, on Flickr Disc off 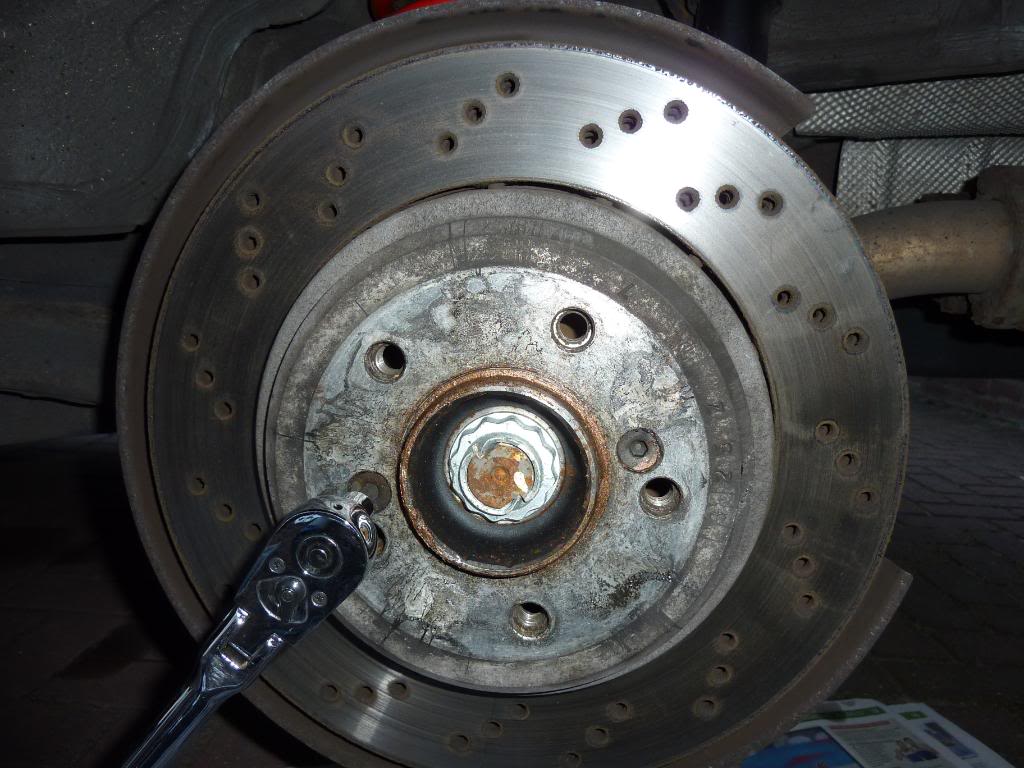 153 by djsyxx6, on Flickr 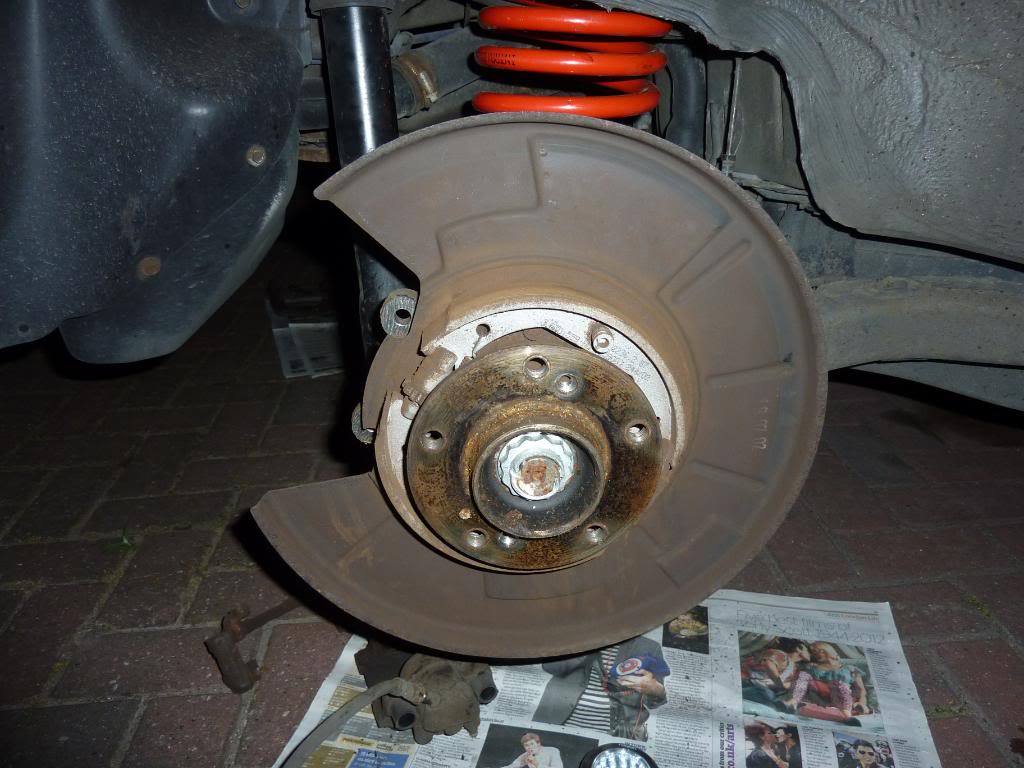 155 by djsyxx6, on Flickr Old brake fluid that hadn't been changed for a long time! I checked my book and the last time it had one was in 2006! It was very old and had a few sludge bits in it. 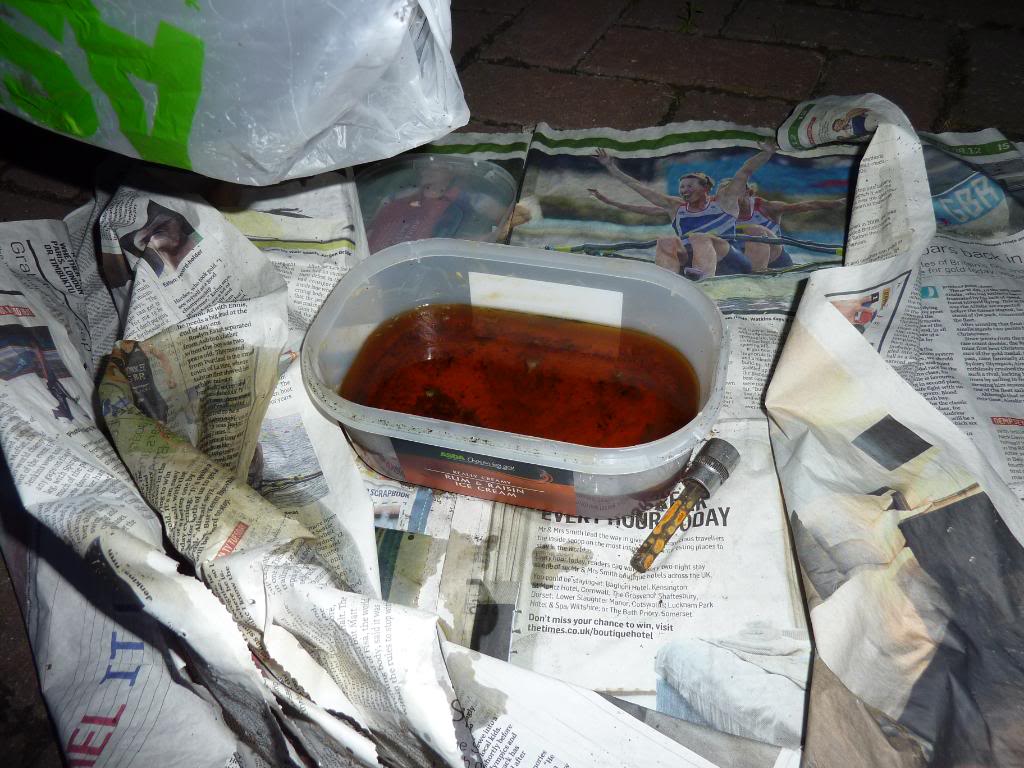 156 by djsyxx6, on Flickr With rear calipers off, I bought a pair of front calipers with brackets off ebay to make life easier and I only have 2 axle stands. So these were before brackets and calipers:  157 by djsyxx6, on Flickr 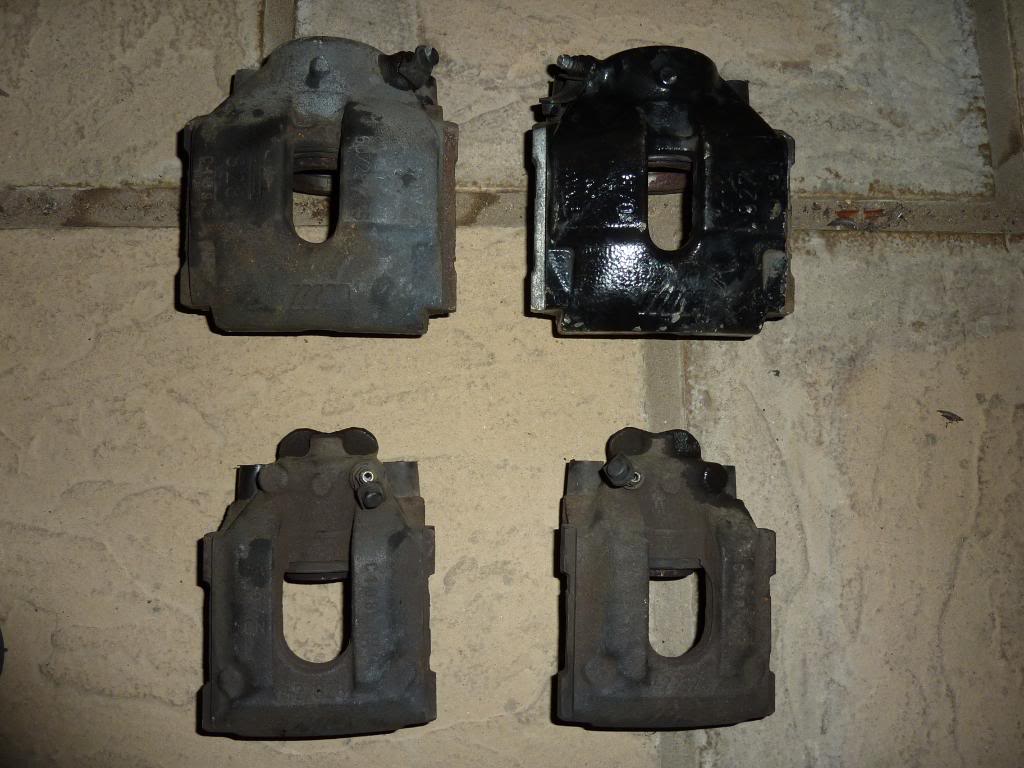 158 by djsyxx6, on Flickr 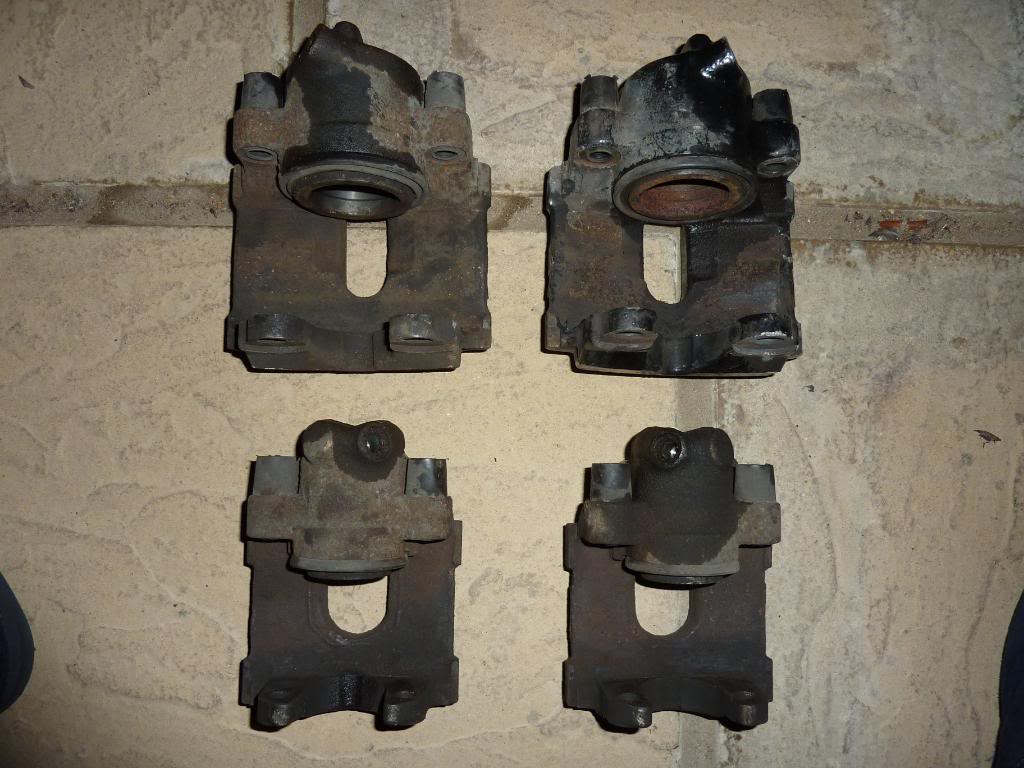 159 by djsyxx6, on Flickr They were all sent off to Biggred a company who refurb nothing but calipers. They were re-done with the black polymer coating. Brand new seals, new pistons, new bleed nipples, new slider pins so literally like new. So here is when they came back: 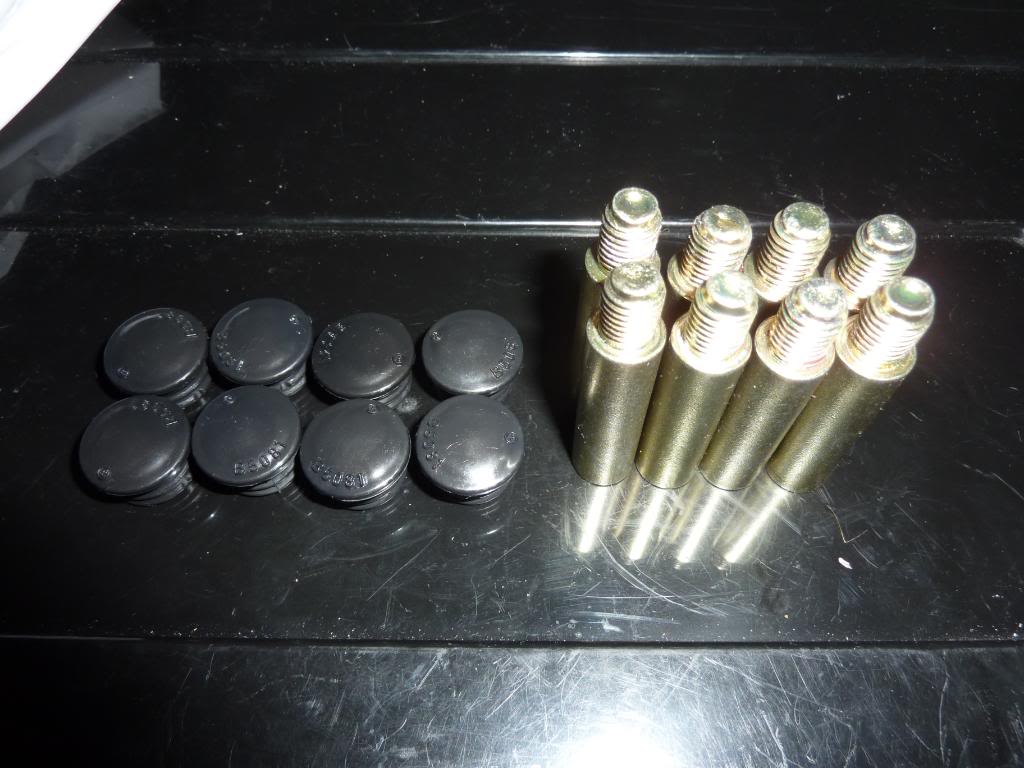 163 by djsyxx6, on Flickr 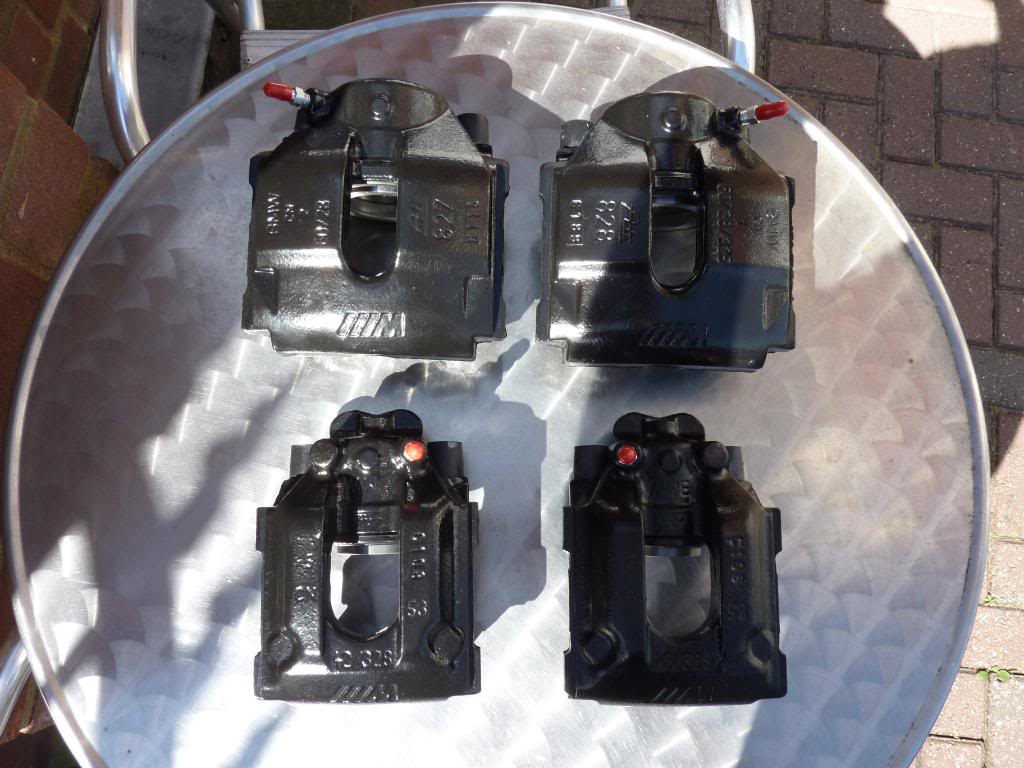 164 by djsyxx6, on Flickr 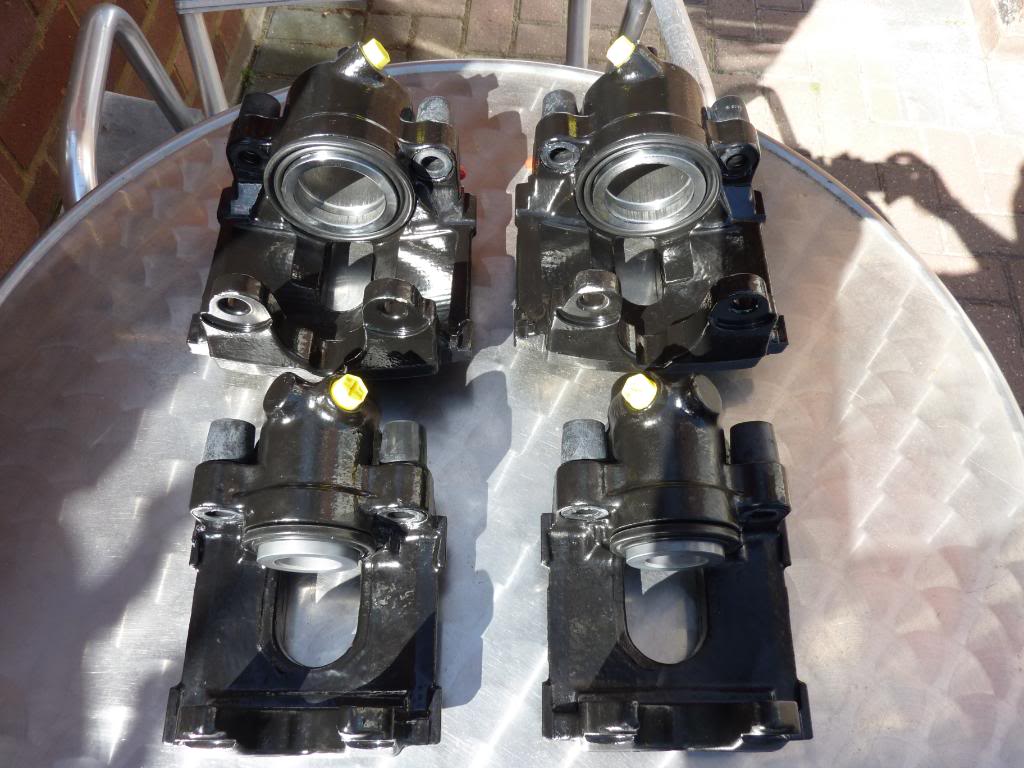 165 by djsyxx6, on Flickr 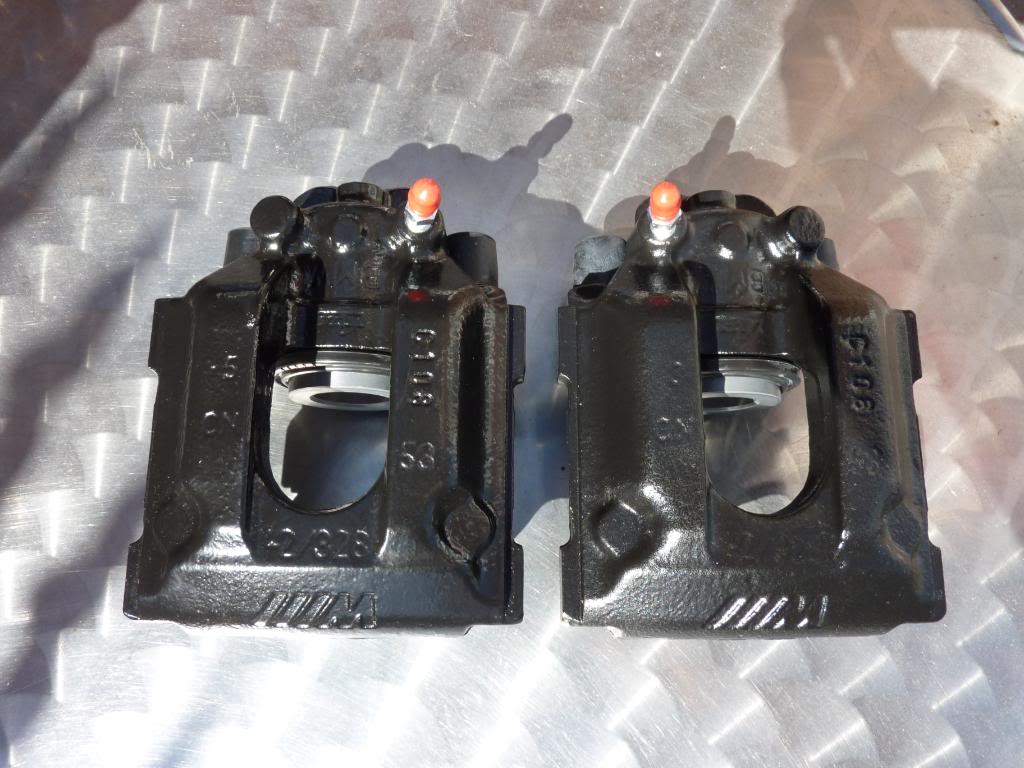 166 by djsyxx6, on Flickr 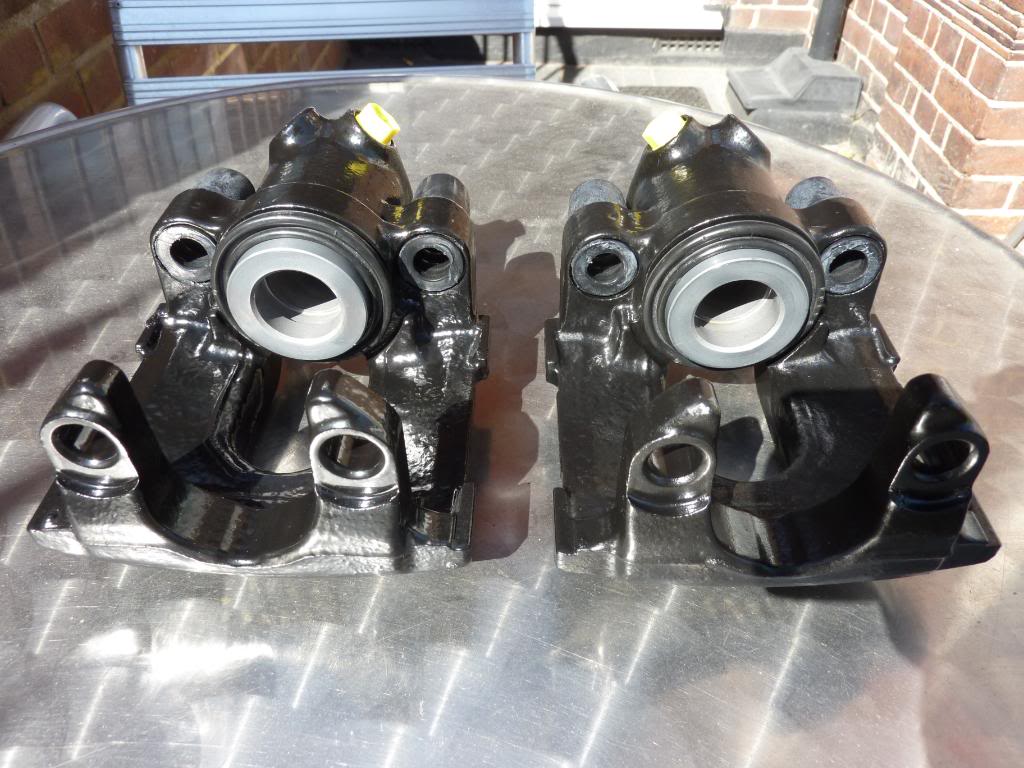 167 by djsyxx6, on Flickr 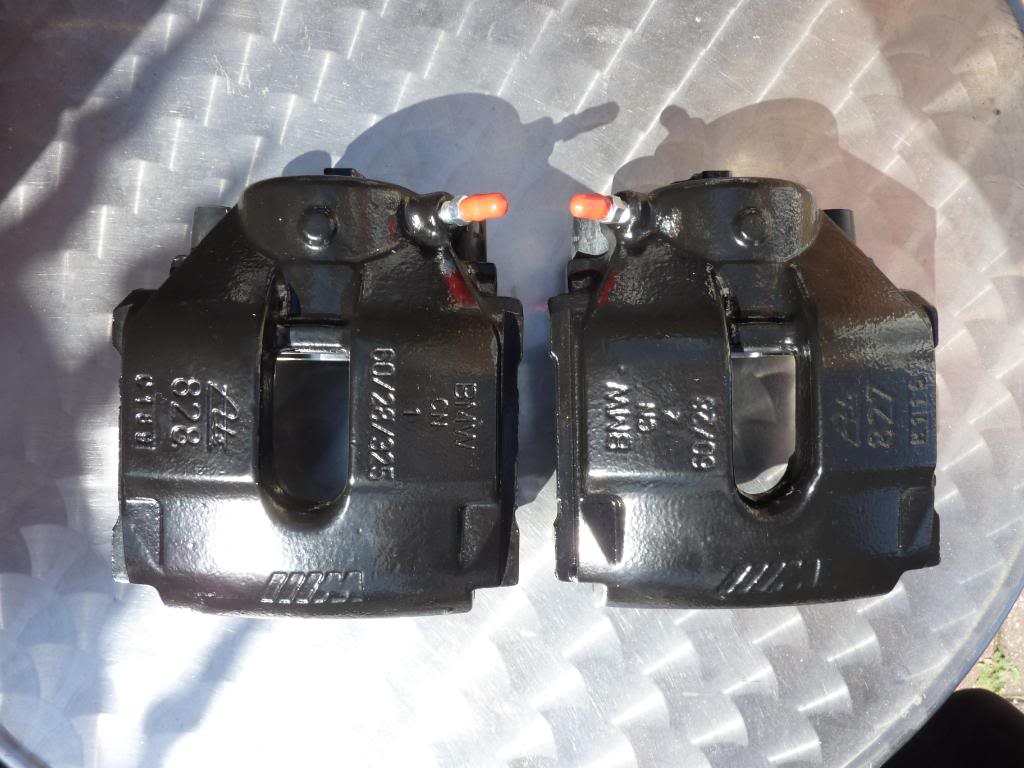 168 by djsyxx6, on Flickr  169 by djsyxx6, on Flickr  170 by djsyxx6, on Flickr Bought new brake fluid: 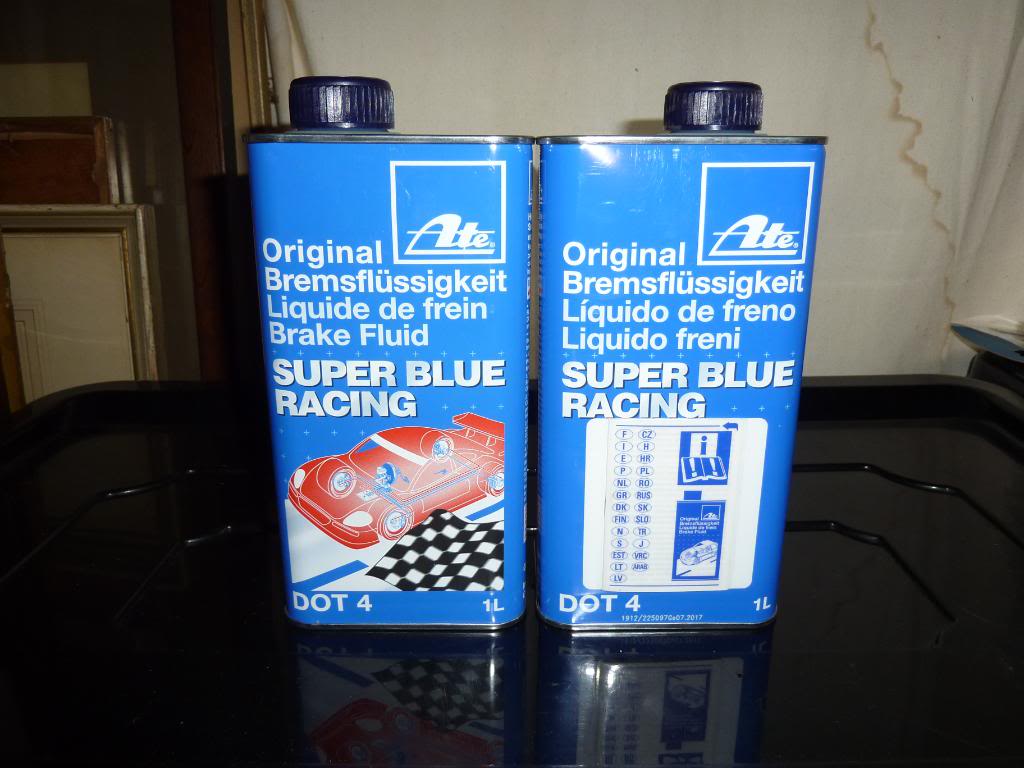 160 by djsyxx6, on Flickr Ordered braided brake hoses from a company called brake-lines.co.uk. Guys a heads up do not use this company. They don't respond back to your emails or answer your calls! So a bit of a dilemma as I had everything ready so I found a company called CAM Auto who had Goodridge hoses in stock so popped down to St Albans to pick them up. 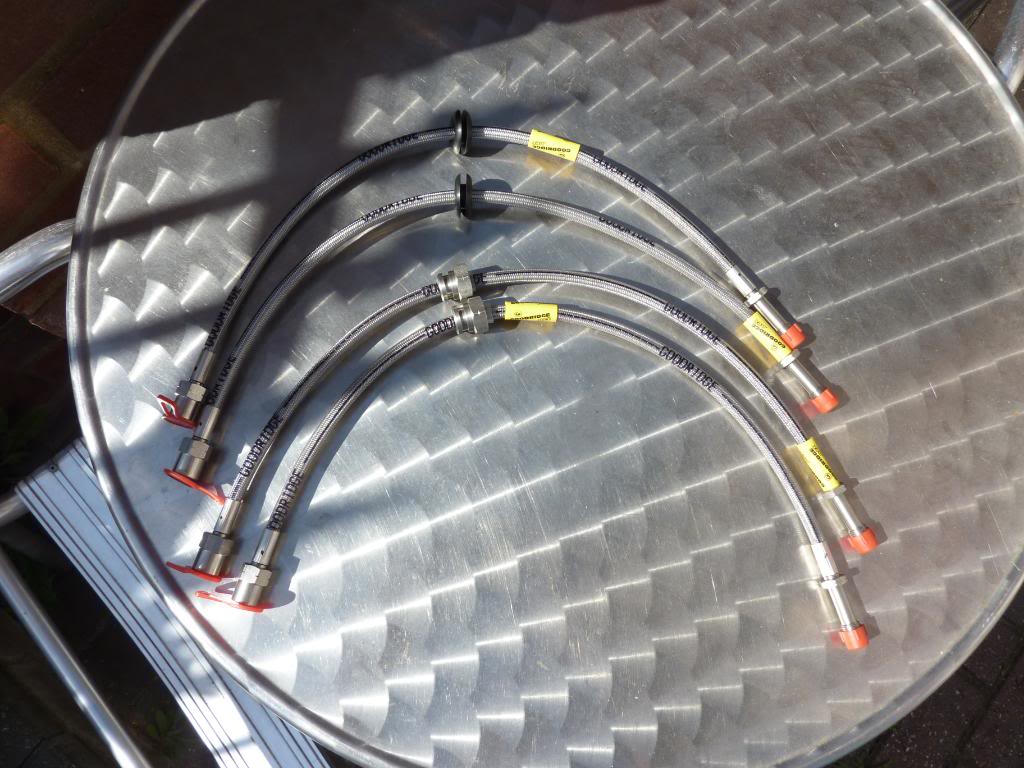 171 by djsyxx6, on Flickr Rears ones you need to remove the bracket which was a b*st*rd as it was rusted and wedged on. Luckily it came off with a bit of persuasion! 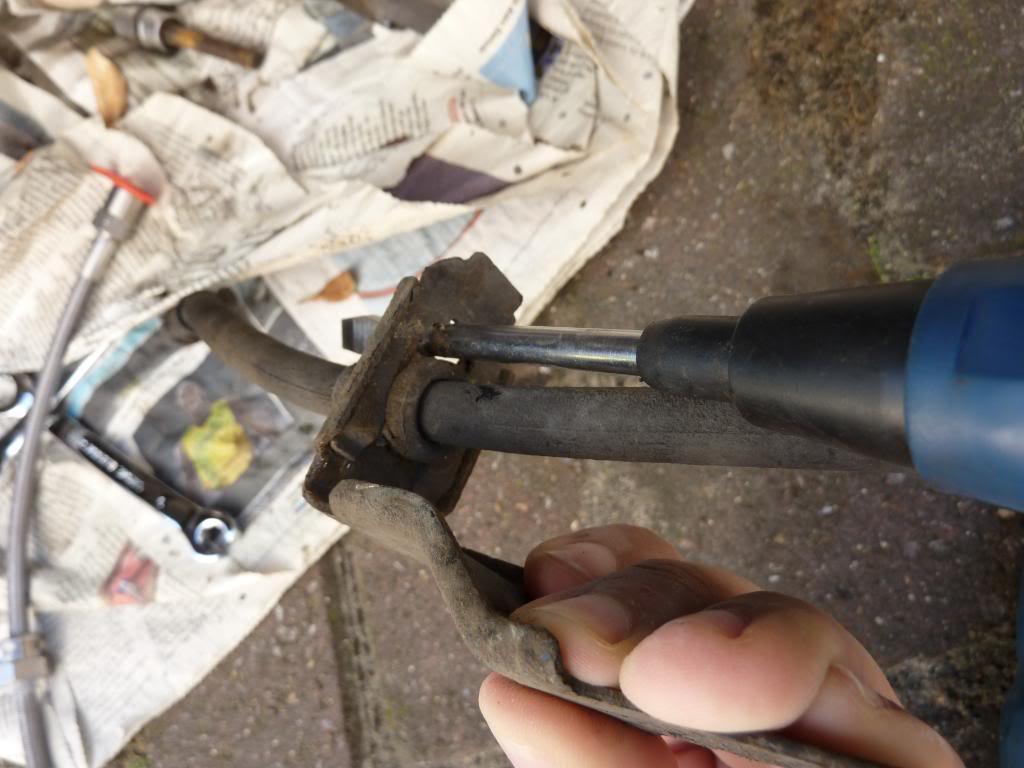 172 by djsyxx6, on Flickr 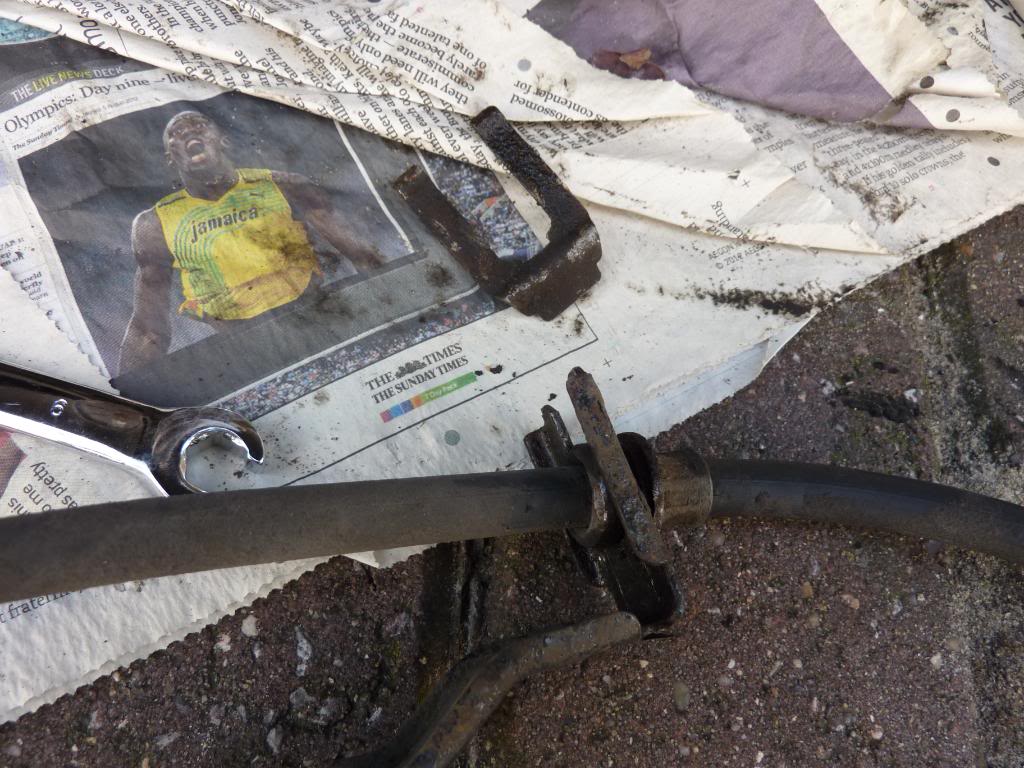 173 by djsyxx6, on Flickr Then clipped in and secured: 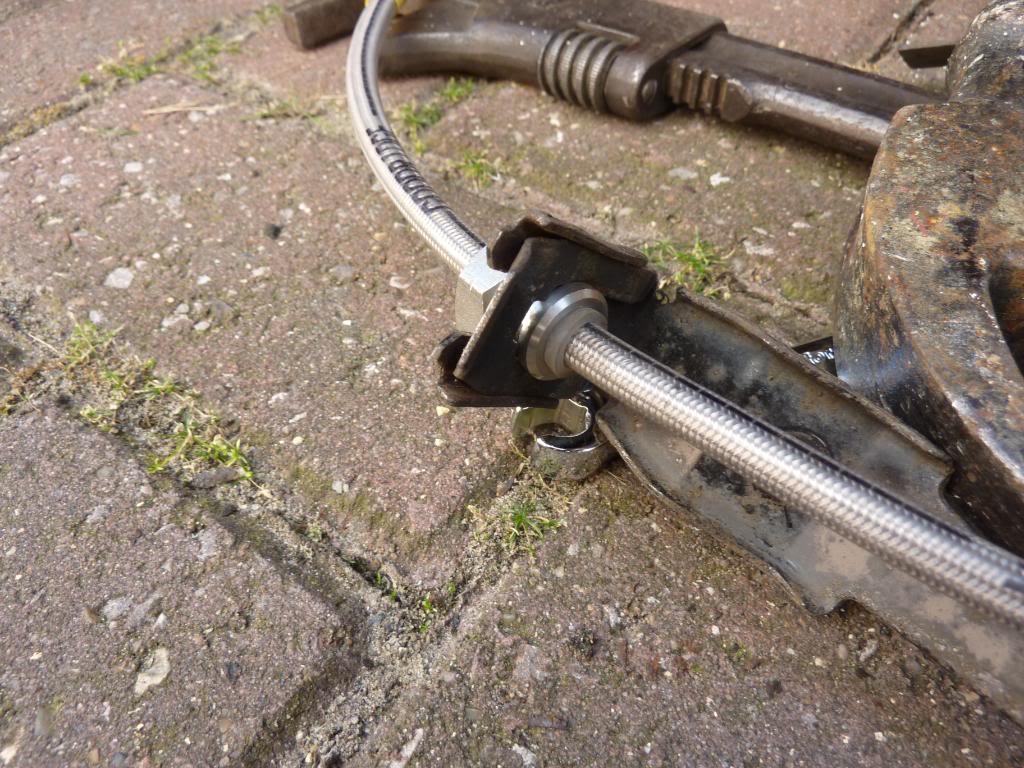 174 by djsyxx6, on Flickr Here's the old one: 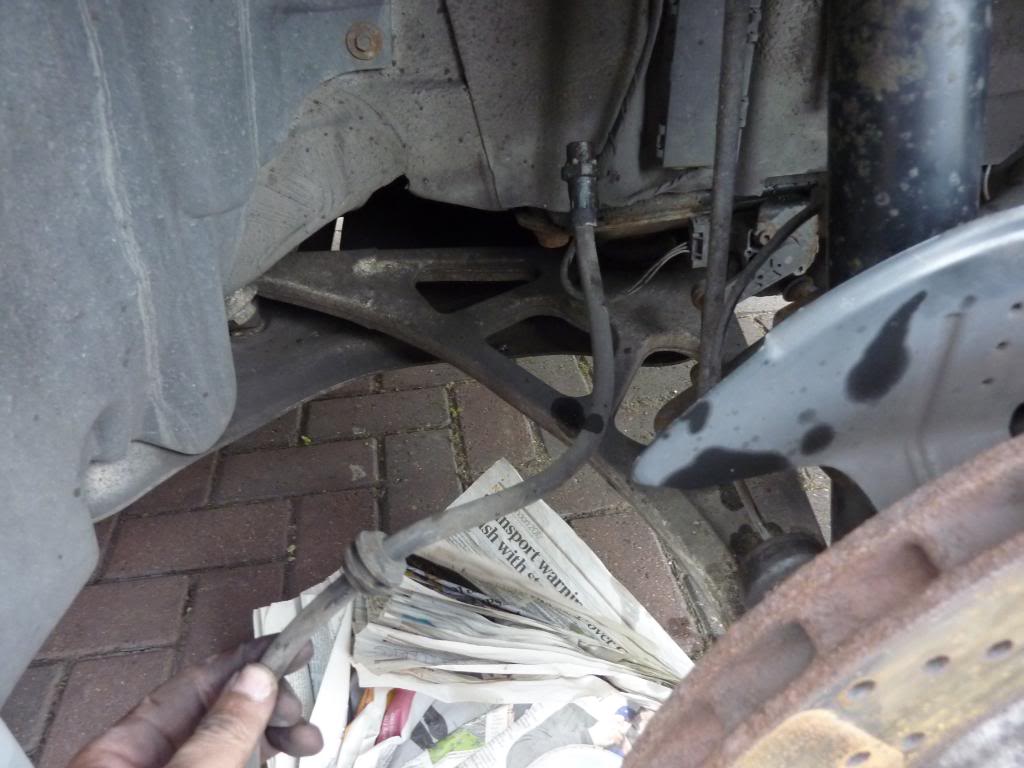 175 by djsyxx6, on Flickr I bought brand new discs all round. Rear ones I purchased off ECP with discount. Front ones I bought off from a Cutters member original ATE cheaper from BM's! I also bought brand new Performance Friction Pads all round. Got them from Performance Prestige Centre via eBay reasonably priced. 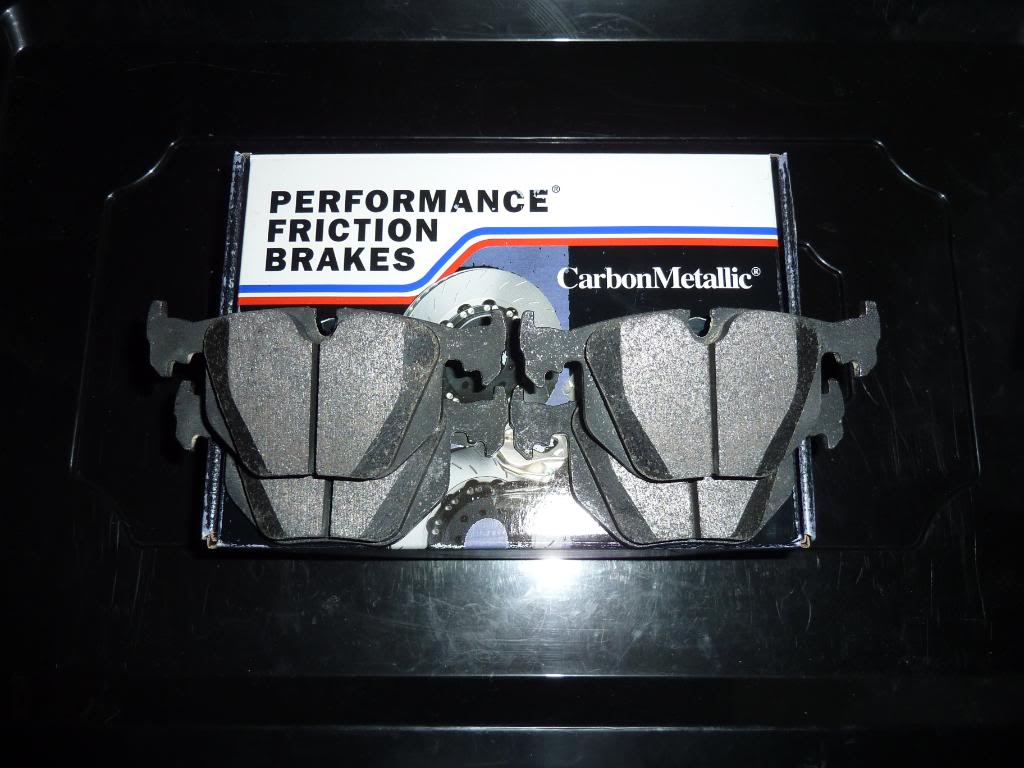 161 by djsyxx6, on Flickr 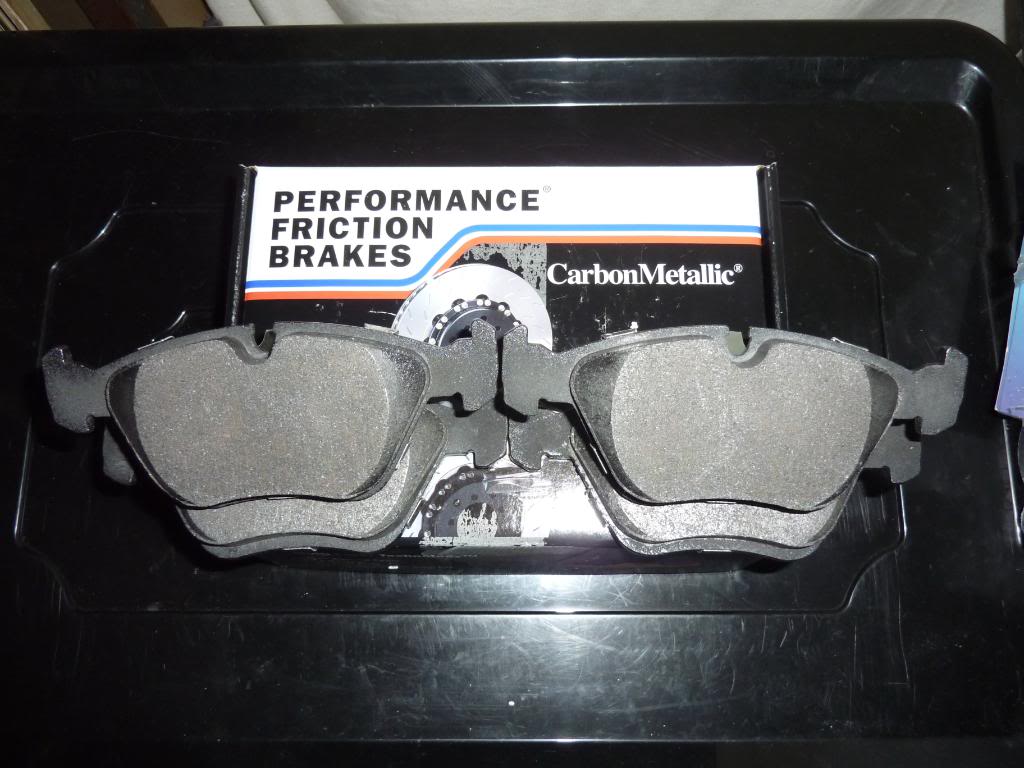 162 by djsyxx6, on Flickr With everything in place was a case of putting it back together: So rears on: 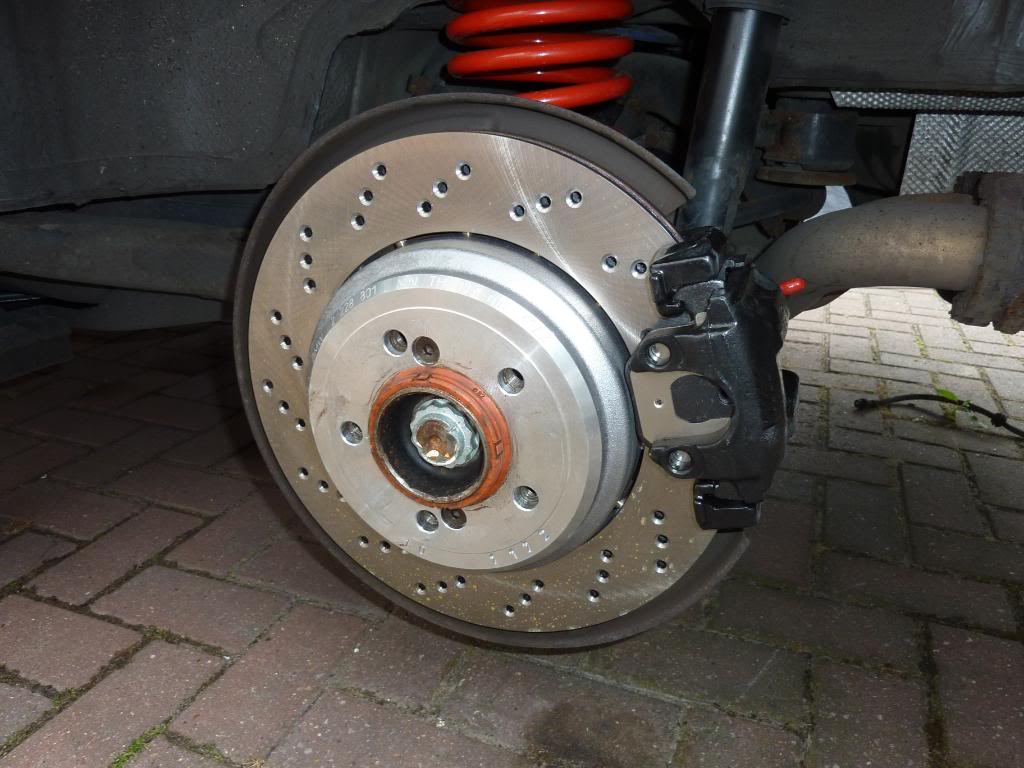 176 by djsyxx6, on Flickr  177 by djsyxx6, on Flickr Front was a real pain trying to take off these two 16mm bolts were incredibly tight so took a long while on both sides to remove them!  178 by djsyxx6, on Flickr Found that my brake pad wear sensor at the front was not connected to the pad and was taped up!  179 by djsyxx6, on Flickr New one fitted: 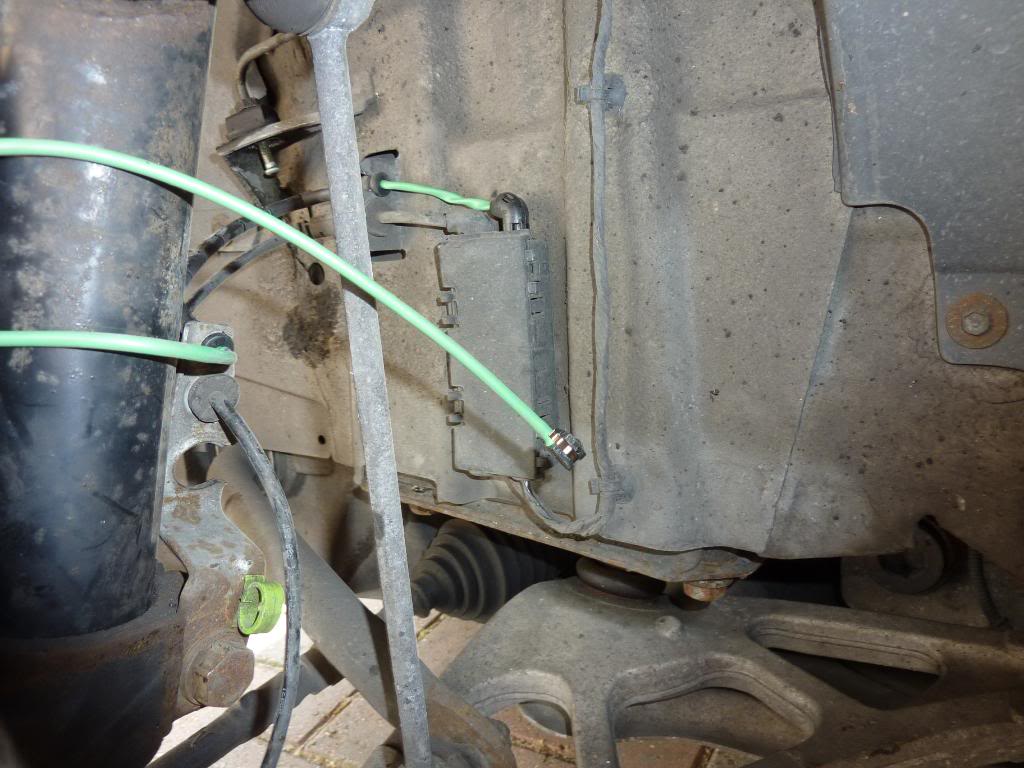 180 by djsyxx6, on Flickr Old hose taken out: 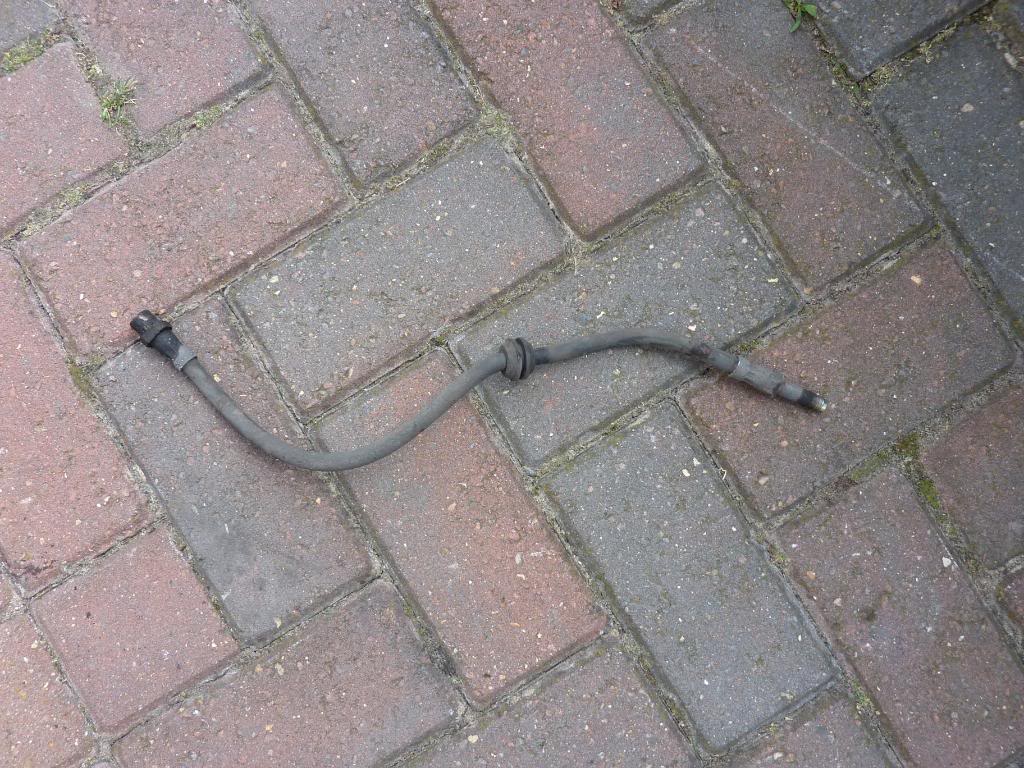 181 by djsyxx6, on Flickr New hose on and this simply slides in at the front. 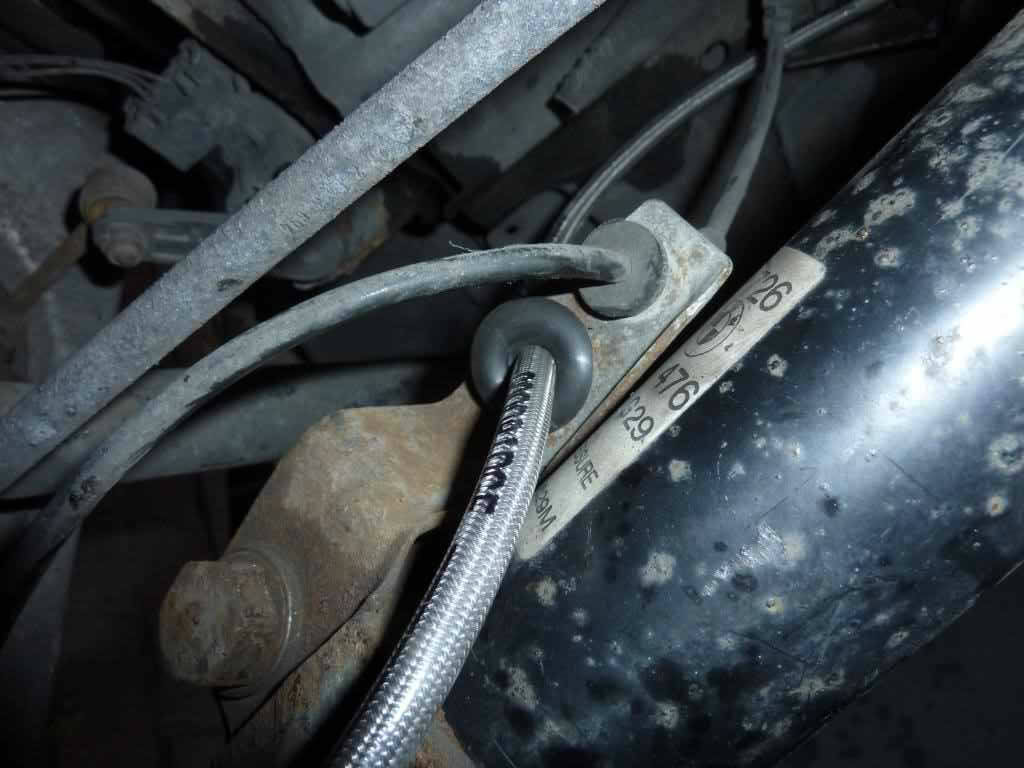 182 by djsyxx6, on Flickr Hoses on both sides:  183 by djsyxx6, on Flickr  185 by djsyxx6, on Flickr And front put back together! 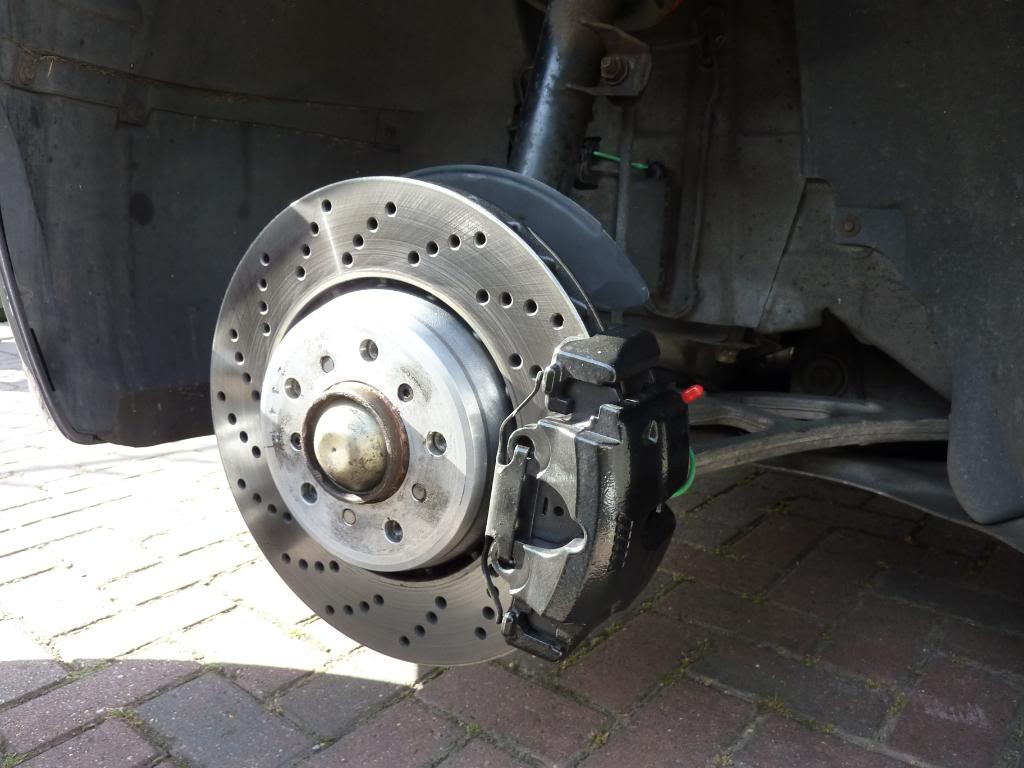 184 by djsyxx6, on Flickr 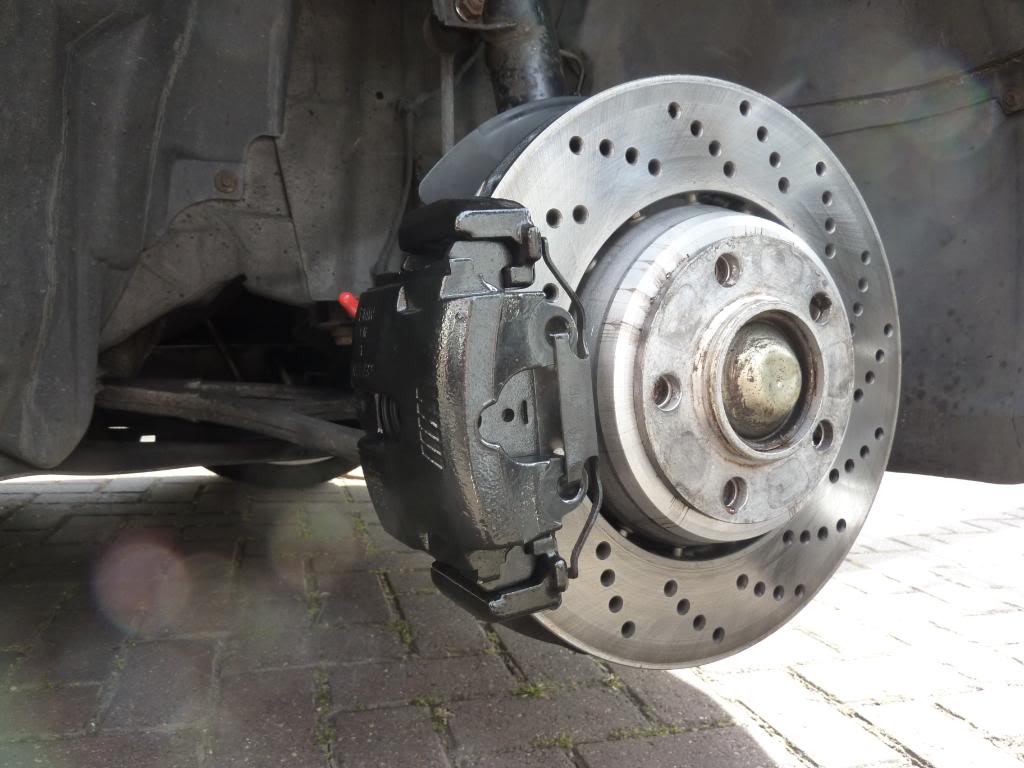 186 by djsyxx6, on Flickr Brakes need bedding but so far are biting better as the car is driven more. No more squeeks or squeals. Was pretty expensive getting all the parts in but labour was free at least! Big thanks to Voldik for helping with the brake bleeding. Next will be getting my splitter painted and fitted. Edited by DJ Syxx - 08 May 2014 at 3:08pm |
||||
|
|
||||
|
||||
|
dteagles
Club Member
Joined: 09 May 2007 Location: UK, Bucks Status: Offline Points: 3476 |
Post Options
Thanks(0)
Quote Reply
Posted: 19 Sep 2012 at 12:53pm |
|||
|
Great thread, car looks great, I'd like to see more like this on our forum, keep the photos coming!
|
||||
 Think about what you can do for the club, not what it can do for you... |
||||
|
||||
|
IEwen
Club Member
Joined: 26 Mar 2012 Location: Birds BMW Status: Offline Points: 19 |
Post Options
Thanks(0)
Quote Reply
Posted: 19 Sep 2012 at 8:54pm |
|||
|
Nice build thread, I might start one too. Good to meet you on Sunday at Players.
Where did you buy the tailpipes from?
|
||||
|
||||
|
AShah
Forum Member 

Joined: 27 Jul 2011 Location: Bridgend, Wales Status: Offline Points: 423 |
Post Options
Thanks(0)
Quote Reply
Posted: 20 Sep 2012 at 9:19am |
|||
|
Car looks really good!
|
||||
|
E36 home of South Wales!
'96 Alpina B3 3.2 Touring '91 325iSEA 4 Door Old: '93 325 Coupe '96 318is Coupe '92 320 Coupe '96 318is Coupe '97 328 Cabriolet '95 M3 4 Door '99 323 Sport Tourer |
||||
|
||||
|
FwordM3
Club Member

Joined: 18 Jan 2009 Location: United Kingdom Status: Offline Points: 309 |
Post Options
Thanks(0)
Quote Reply
Posted: 20 Sep 2012 at 7:43pm |
|||
|
Your doing well mate!

|
||||
|
||||
|
DJ Syxx
Club Member
Joined: 07 Sep 2012 Location: London Status: Offline Points: 208 |
Post Options
Thanks(0)
Quote Reply
Posted: 21 Sep 2012 at 12:30am |
|||
Thanks mate.
Likewise! Tailpipes were purchased from Cricmcn, forum sponsor on M3 Cutters. 
Thanks mate.
Getting there! lol  Edited by DJ Syxx - 21 Sep 2012 at 12:31am |
||||
|
||||
|
dips
Club Member

Joined: 15 Jul 2009 Status: Offline Points: 85 |
Post Options
Thanks(0)
Quote Reply
Posted: 21 Sep 2012 at 9:34am |
|||
|
looking good
|
||||
|
||||
|
DJ Syxx
Club Member
Joined: 07 Sep 2012 Location: London Status: Offline Points: 208 |
Post Options
Thanks(0)
Quote Reply
Posted: 01 Oct 2012 at 12:16am |
|||
|
Since having my Intrax springs fitted I found the rear a bit too low compared to the front. I had looked into other springs but didn't really find what I was looking for so looked for an alternative. So I read up about spring pads. I looked on the US sites and found Turner Motorsport sell spring pads which are 14.5mm and when fitted don't drop the rear where it appears lower at the back compared to the front. In my case it was to aid in raising the rear a little so that the drop visually looks more even and also gives me a better chance of refitting my rear spacer back on.
So I ordered the spring pads from BM Minibits. They are from the US Xi models and as mentioned the US boys use them. Part number is 33 53 1094754. They were £22 delivered for the pair. These are the spring pads: 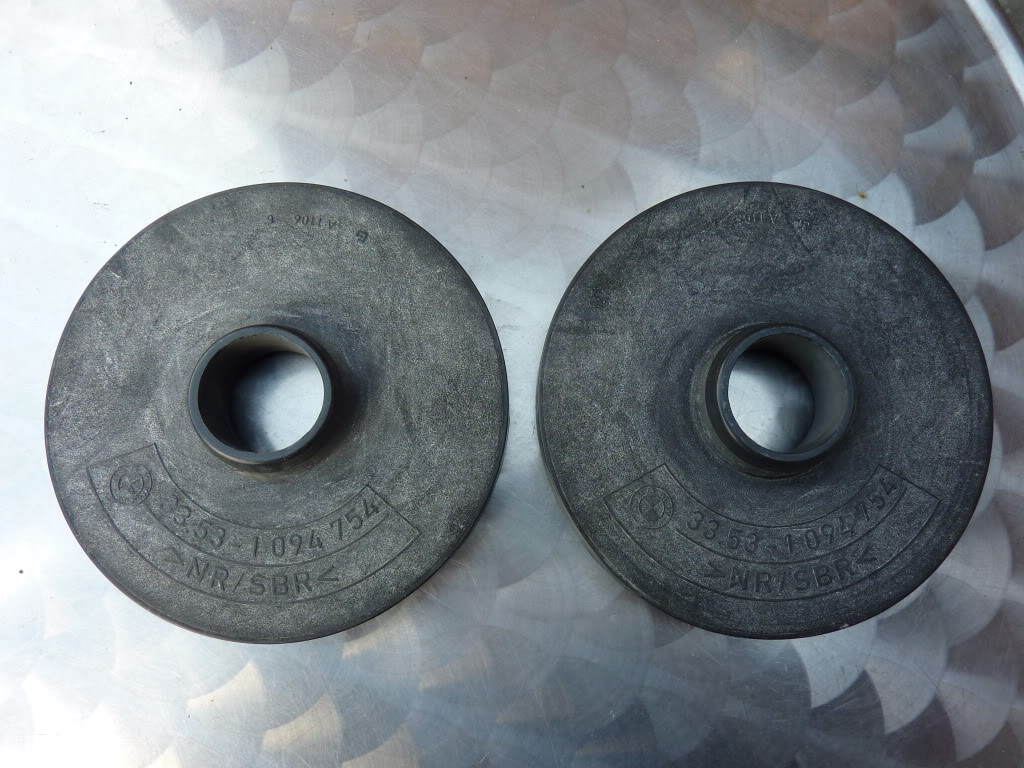 187 by djsyxx6, on Flickr And this is a comparison pic of the original 5mm I removed and the 14.5mm. 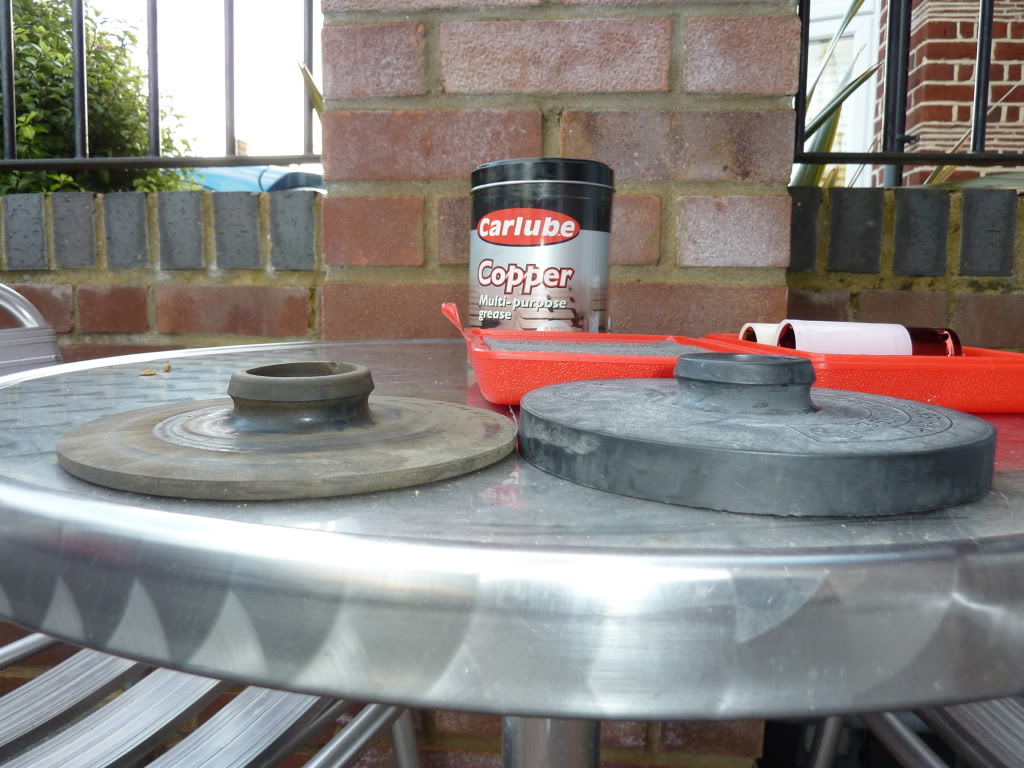 189 by djsyxx6, on Flickr Yesterday I fitted them on and it has worked, the aim being to see the tyre tread.  190 by djsyxx6, on Flickr 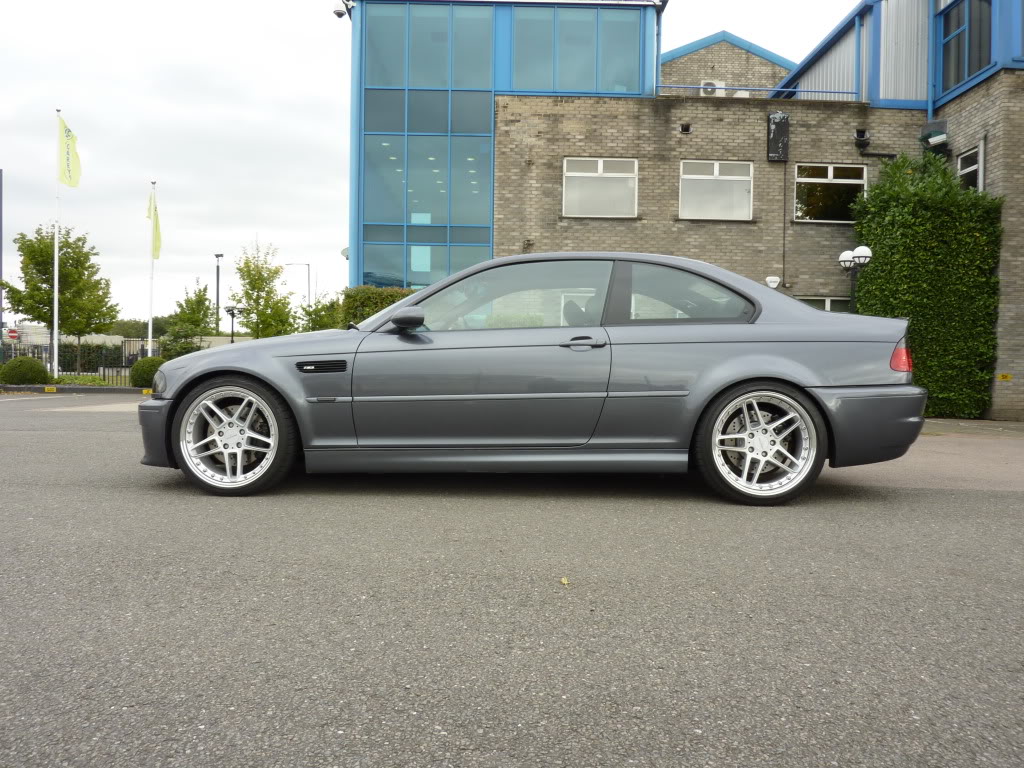 191 by djsyxx6, on Flickr Next update will be splitter being painted as we speak and hopefully will be on early this month. Edited by DJ Syxx - 08 May 2014 at 3:09pm |
||||
|
|
||||
|
||||
|
Cabrio
Register Chair
E30 Register & Competition Secretary Joined: 24 Aug 2006 Location: United Kingdom Status: Offline Points: 6625 |
Post Options
Thanks(1)
Quote Reply
Posted: 01 Oct 2012 at 8:18am |
|||
|
Good work great to see - the E46 is now affordable and it's great that that you have made improvements and mods that improve the look an drive as its still a road car
|
||||
|
E30 Register joint coordinator - Competition Secretary - Contact name Neil for PM and Email - cabrio_e30@yahoo.co.uk - be aware addicted to E numbers
|
||||
|
||||
|
DJ Syxx
Club Member
Joined: 07 Sep 2012 Location: London Status: Offline Points: 208 |
Post Options
Thanks(0)
Quote Reply
Posted: 20 Oct 2012 at 8:06pm |
|||
|
As some of you know I bought a little something at Gaydon show a few months back. I finally got it sprayed and fitted with Dips & Custom Cars and its now on as some saw at the Harrow meet. Its a full length replica strassenstassennnmassentech lip or whatever you call it it with the carbon insert which matches up well with my rear diffuser. Think it really fills out the front more and gives a nice meaner presence. Took some pics today after a quick wash. Comments as always welcome.
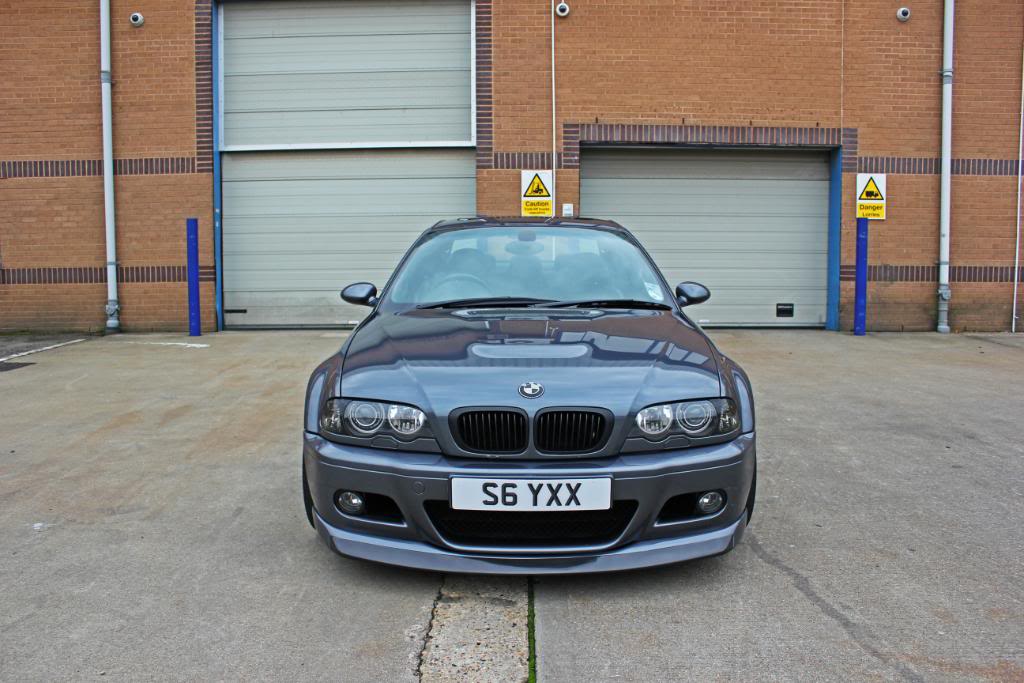 216 by djsyxx6, on Flickr 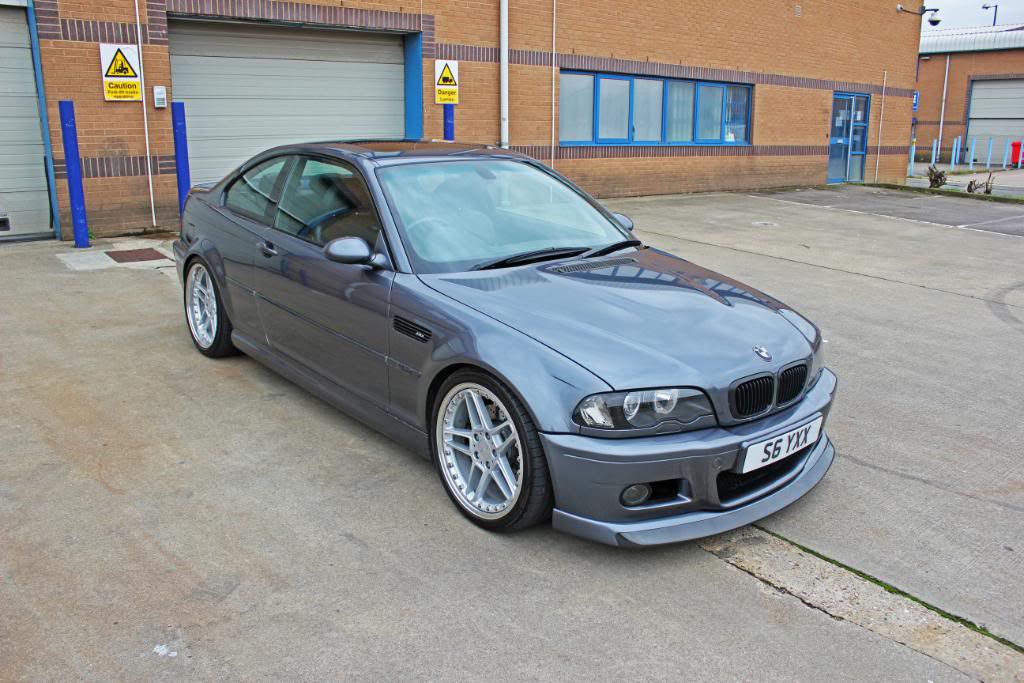 219 by djsyxx6, on Flickr 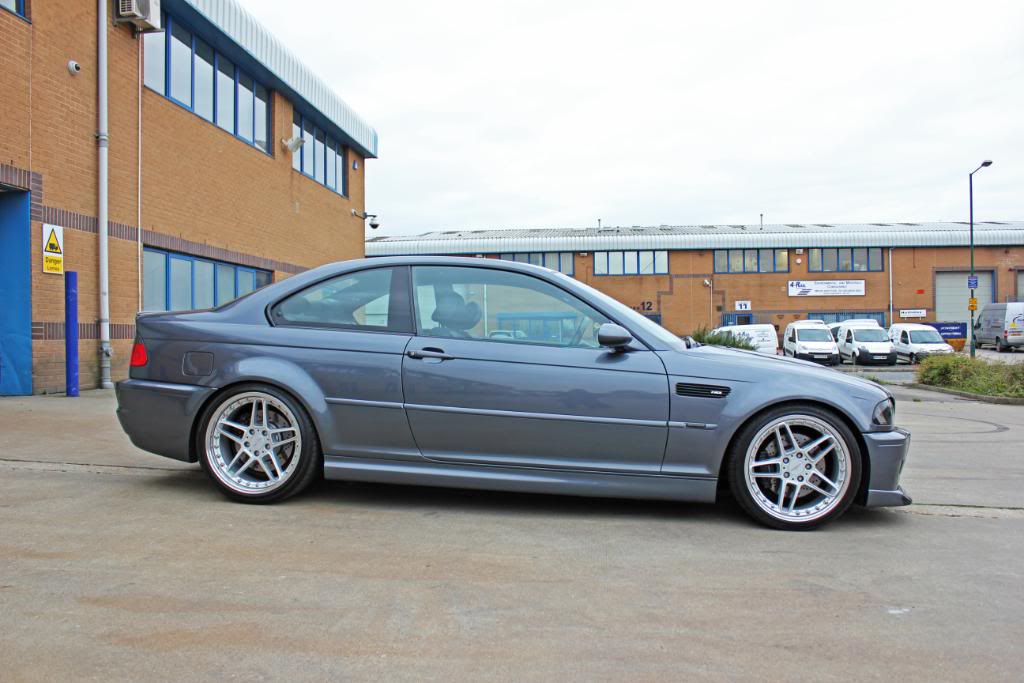 220 by djsyxx6, on Flickr 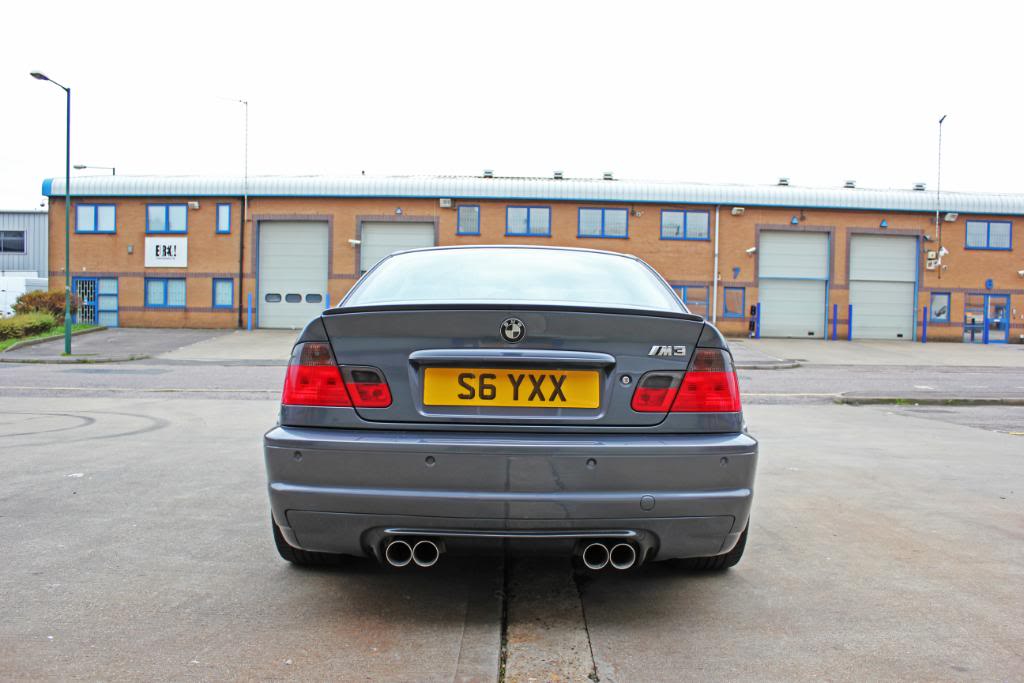 222 by djsyxx6, on Flickr 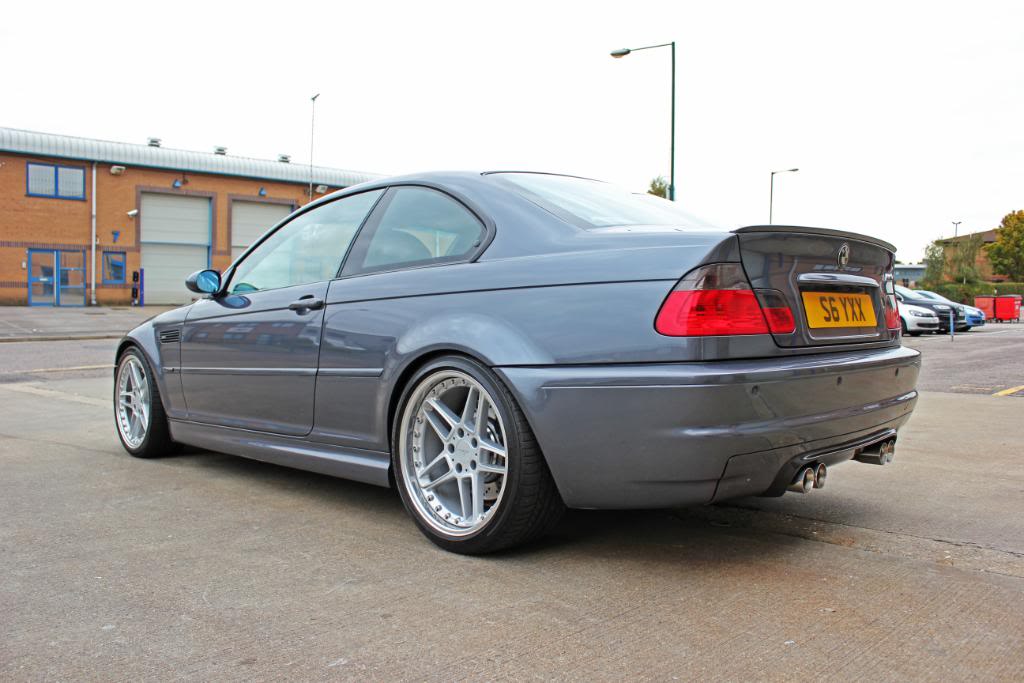 224 by djsyxx6, on Flickr 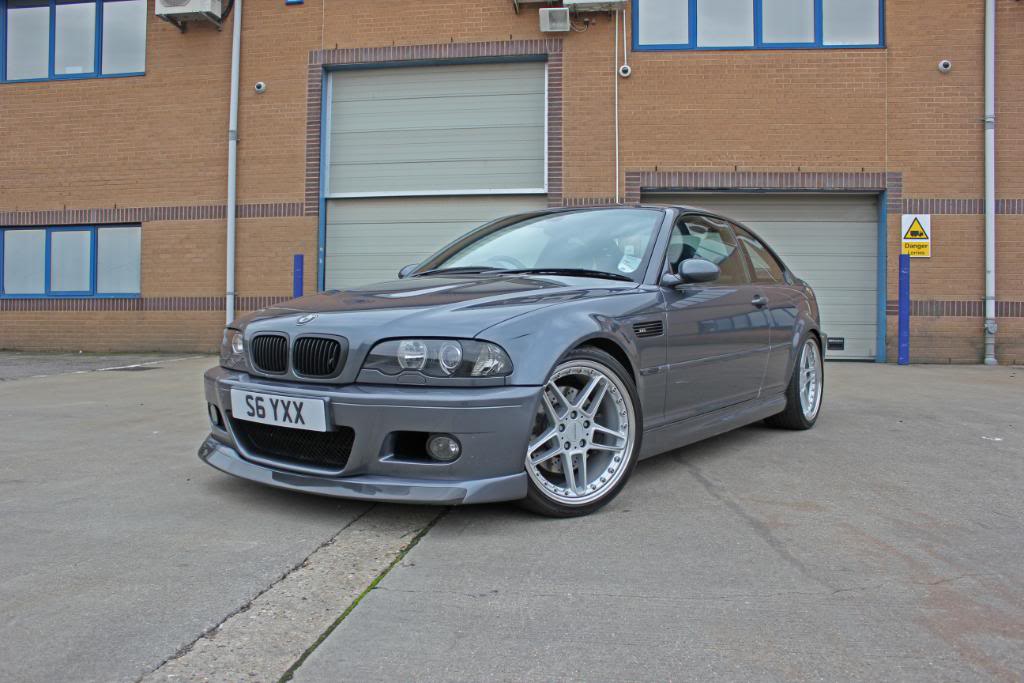 228 by djsyxx6, on Flickr 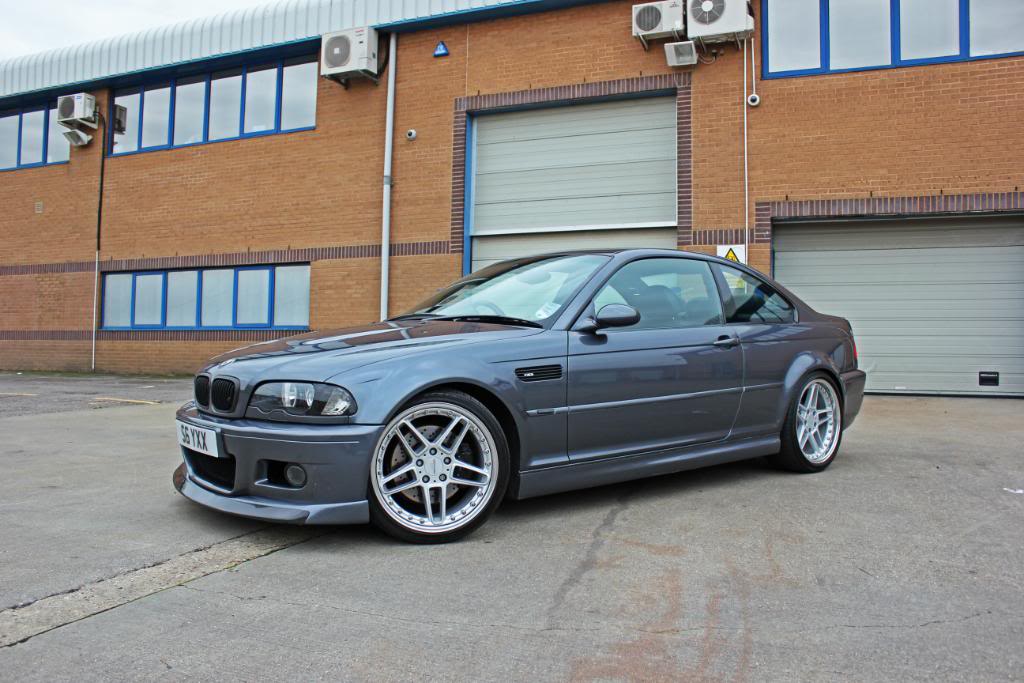 230 by djsyxx6, on Flickr 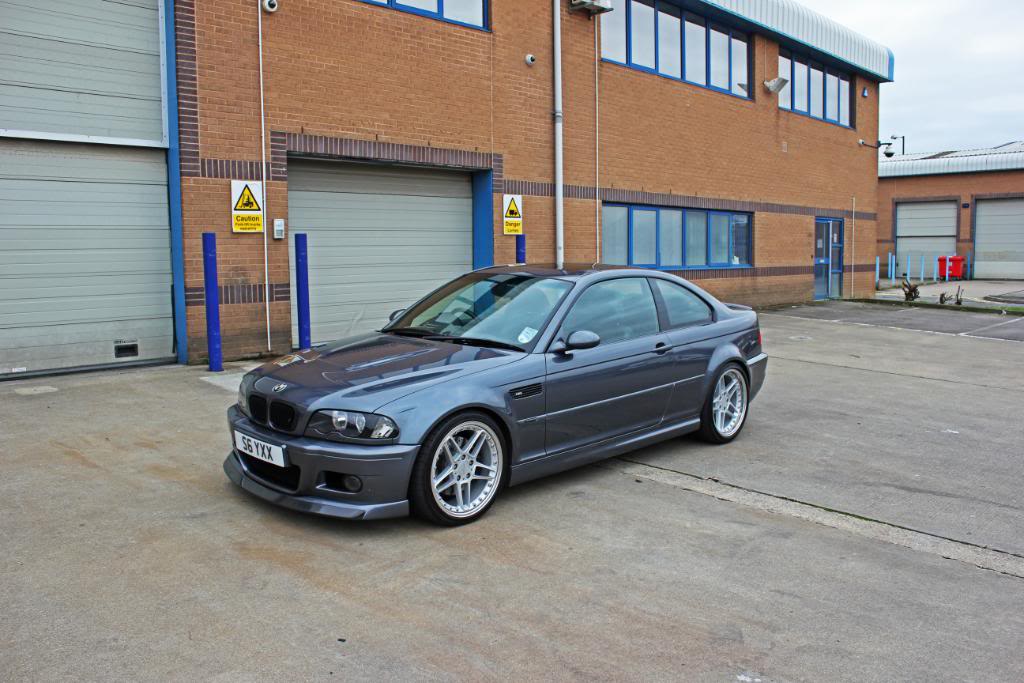 232 by djsyxx6, on Flickr 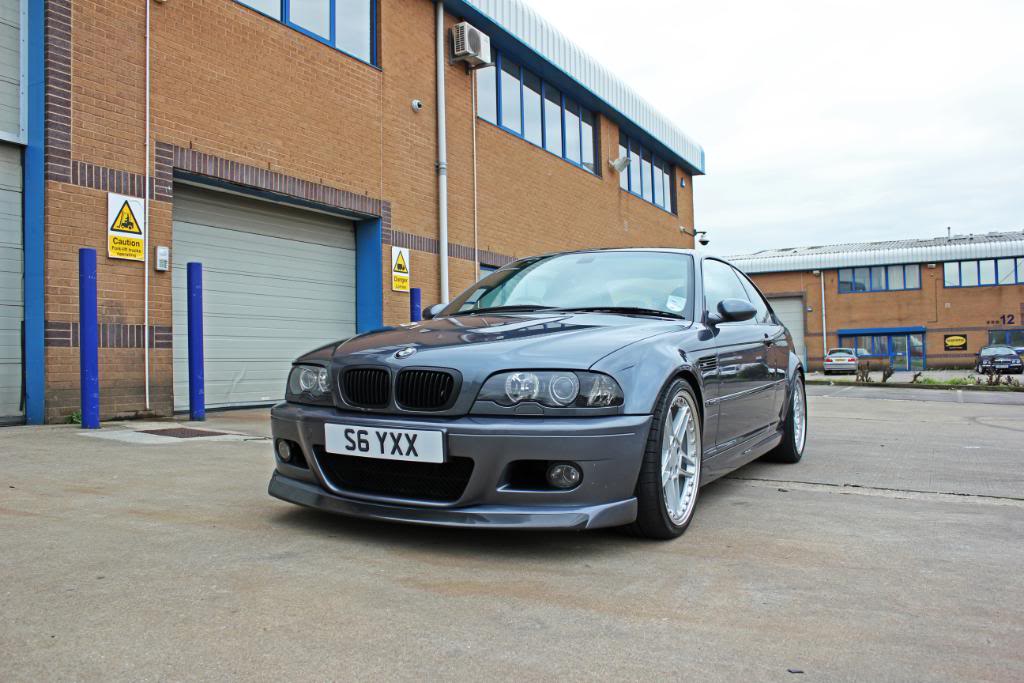 235 by djsyxx6, on Flickr  236 by djsyxx6, on Flickr Want a CSL or CSL style bootlid next so will look into getting one around spring next year. For now this is the last kind of major update on the car for this year..........................or is it.............????? Edited by DJ Syxx - 08 May 2014 at 3:10pm |
||||
|
|
||||
|
||||
|
dteagles
Club Member
Joined: 09 May 2007 Location: UK, Bucks Status: Offline Points: 3476 |
Post Options
Thanks(1)
Quote Reply
Posted: 21 Oct 2012 at 8:57am |
|||
|
That chin spoiler reminds me of the E30 Evo II chin spoiler:
 |
||||
|
Think about what you can do for the club, not what it can do for you... |
||||
|
||||
|
DJ Syxx
Club Member
Joined: 07 Sep 2012 Location: London Status: Offline Points: 208 |
Post Options
Thanks(0)
Quote Reply
Posted: 21 Oct 2012 at 2:19pm |
|||
|
Yeah it does look similar from the posted pic of the E30.

|
||||
|
||||
|
DJ Syxx
Club Member
Joined: 07 Sep 2012 Location: London Status: Offline Points: 208 |
Post Options
Thanks(0)
Quote Reply
Posted: 20 Aug 2013 at 11:24pm |
|||
|
Well its been a while since I've updated this build thread and a fair bit has happened so here goes lol.
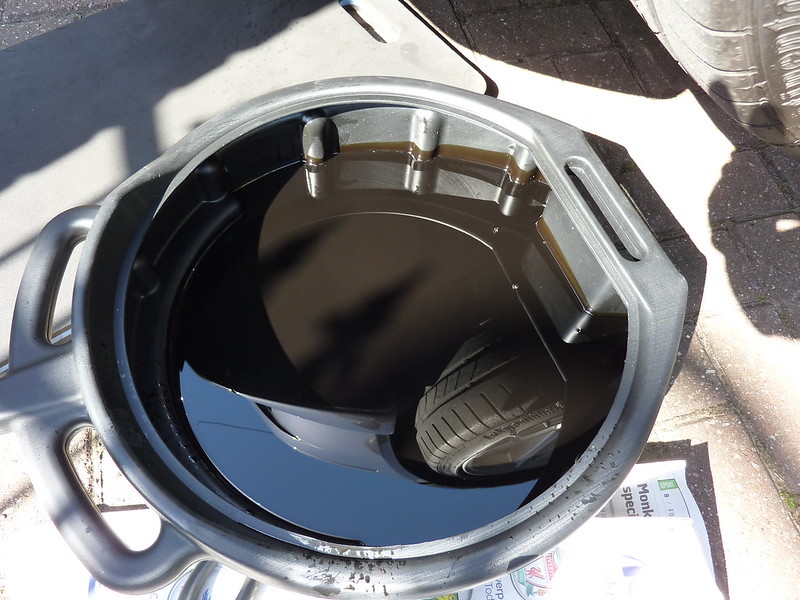
Late last year I took my car to an underground car park and got a few nice shots of it. I also managed to get the wheels I always wanted the ACS type 3 one piece in staggered M3 fitment. These now serve their purpose as my winter wheels. 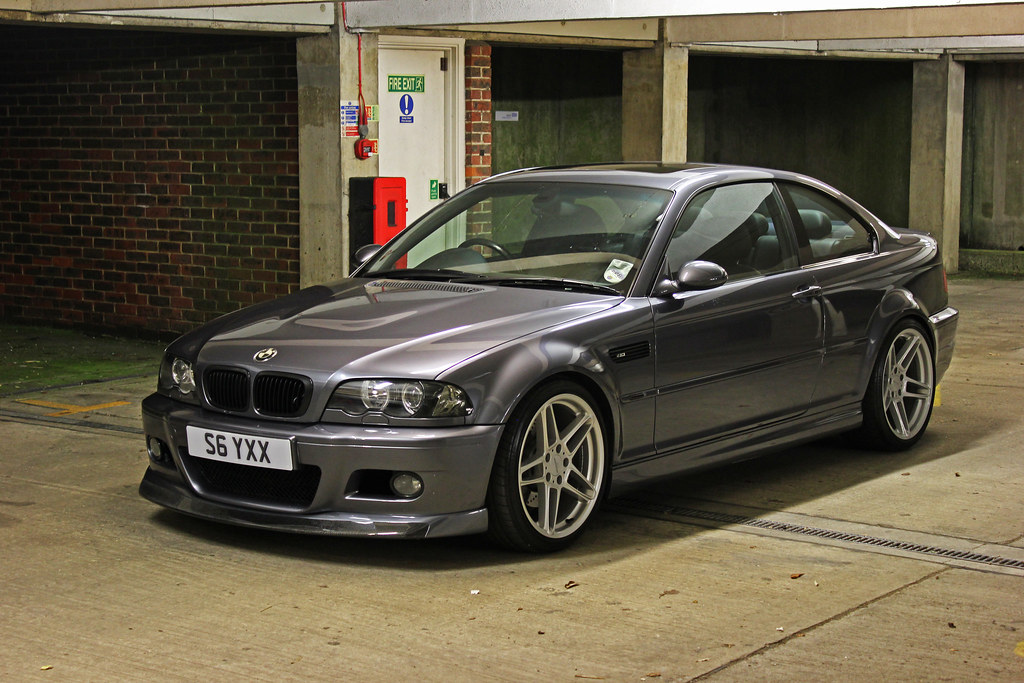 260 by djsyxx6, on Flickr 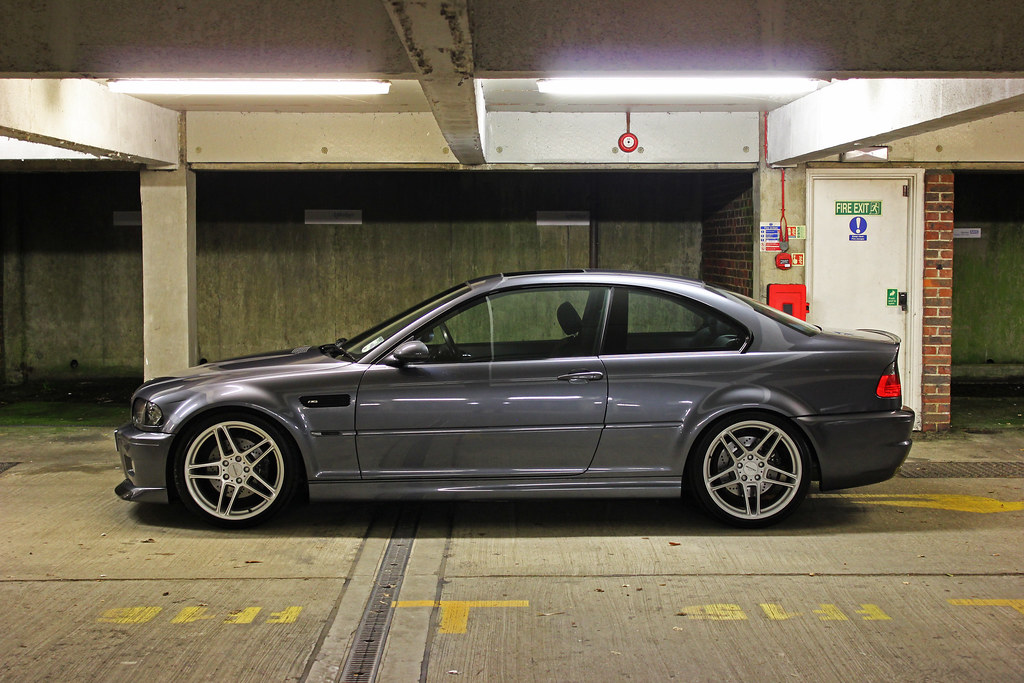 262 by djsyxx6, on Flickr 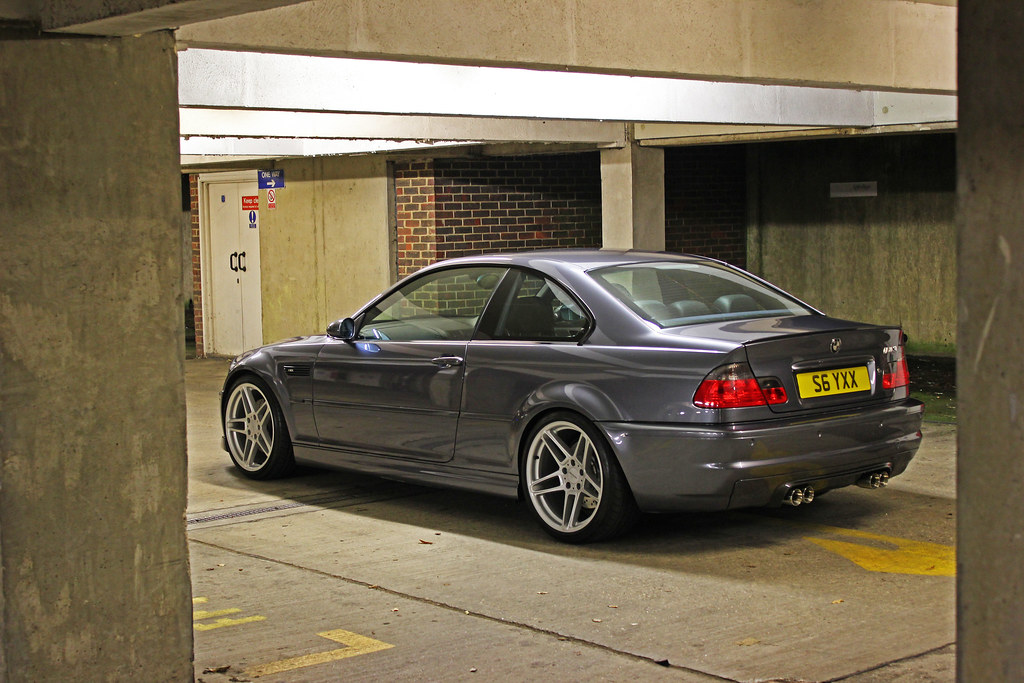 263 by djsyxx6, on Flickr  265 by djsyxx6, on Flickr 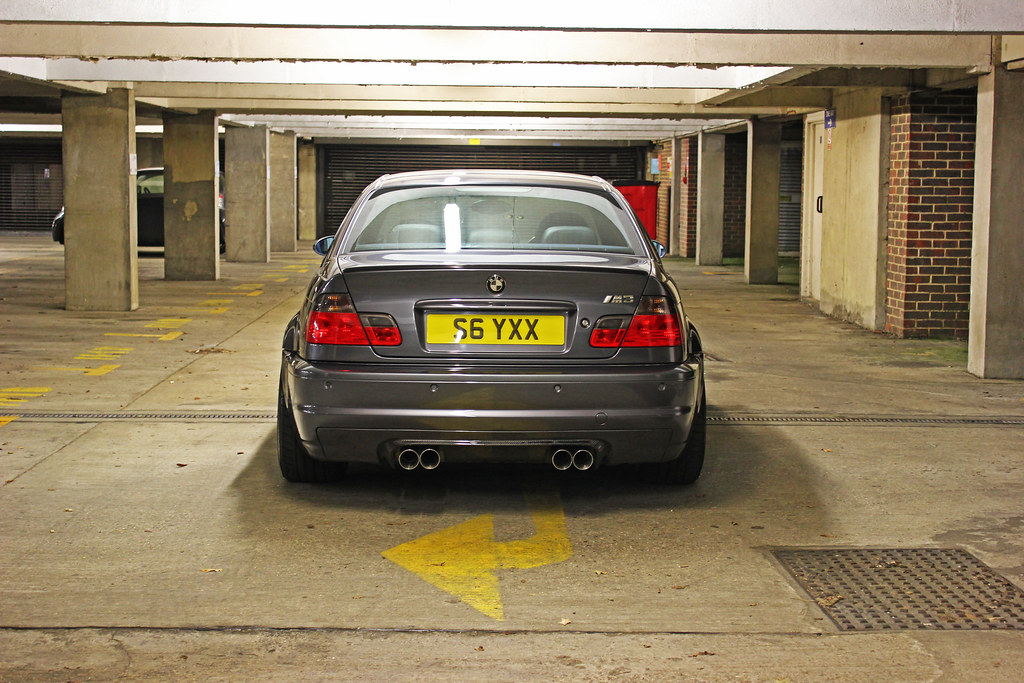 268 by djsyxx6, on Flickr  270 by djsyxx6, on Flickr  266 by djsyxx6, on Flickr I managed a few months later (early 2013) to get a very rare set of Cinnamon leather interior which really goes so well with the steel grey paintwork: Pics before:  P1070043 by djsyxx6, on Flickr  P1070045 by djsyxx6, on Flickr And after: 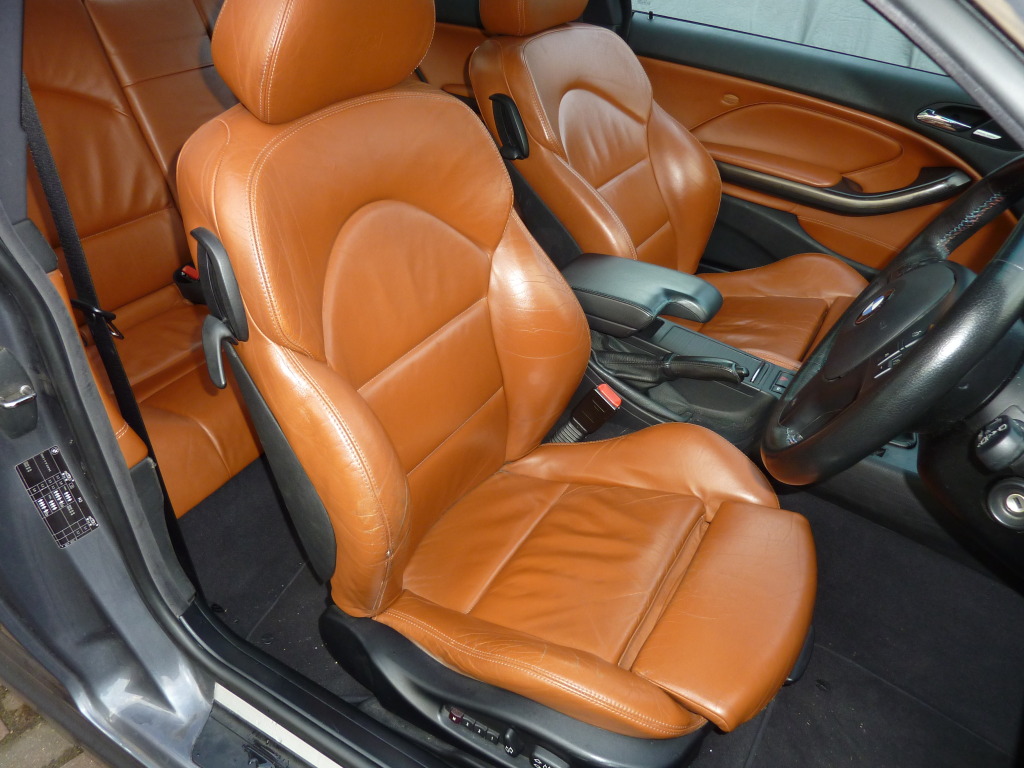 271 by djsyxx6, on Flickr  272 by djsyxx6, on Flickr I managed to source the design element spoke inserts for my AC splits from Rossiters. So these are the wheels before: 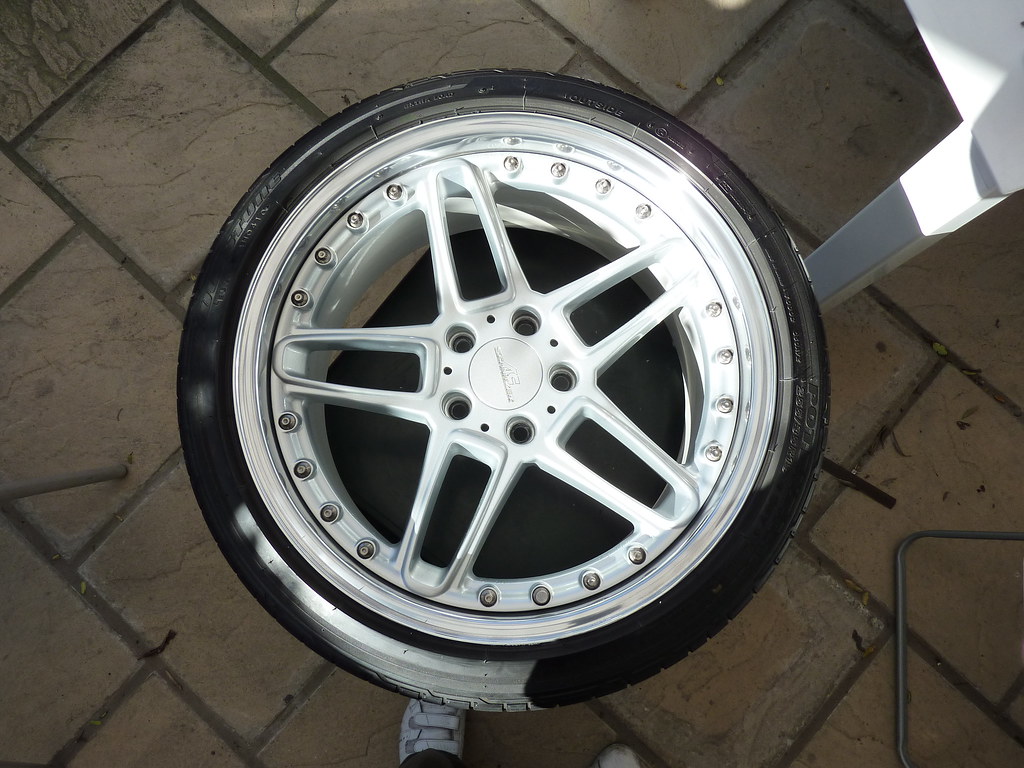 275 by djsyxx6, on Flickr These are the elements which clip into the spokes: 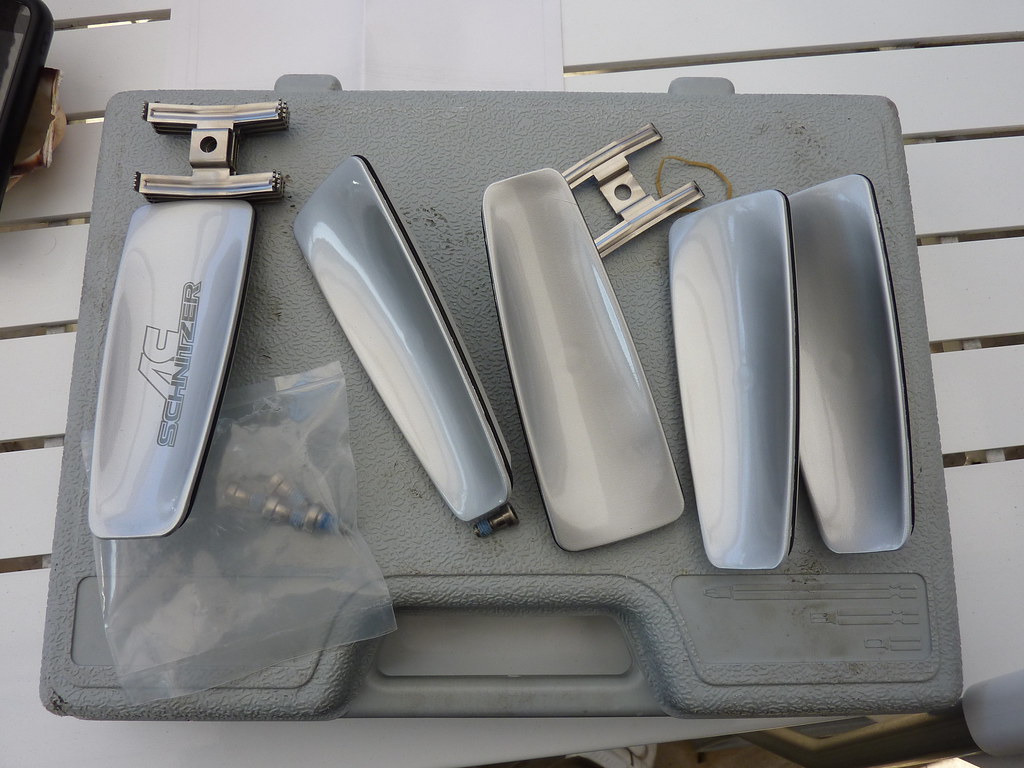 276 by djsyxx6, on Flickr And fitted to the wheel: 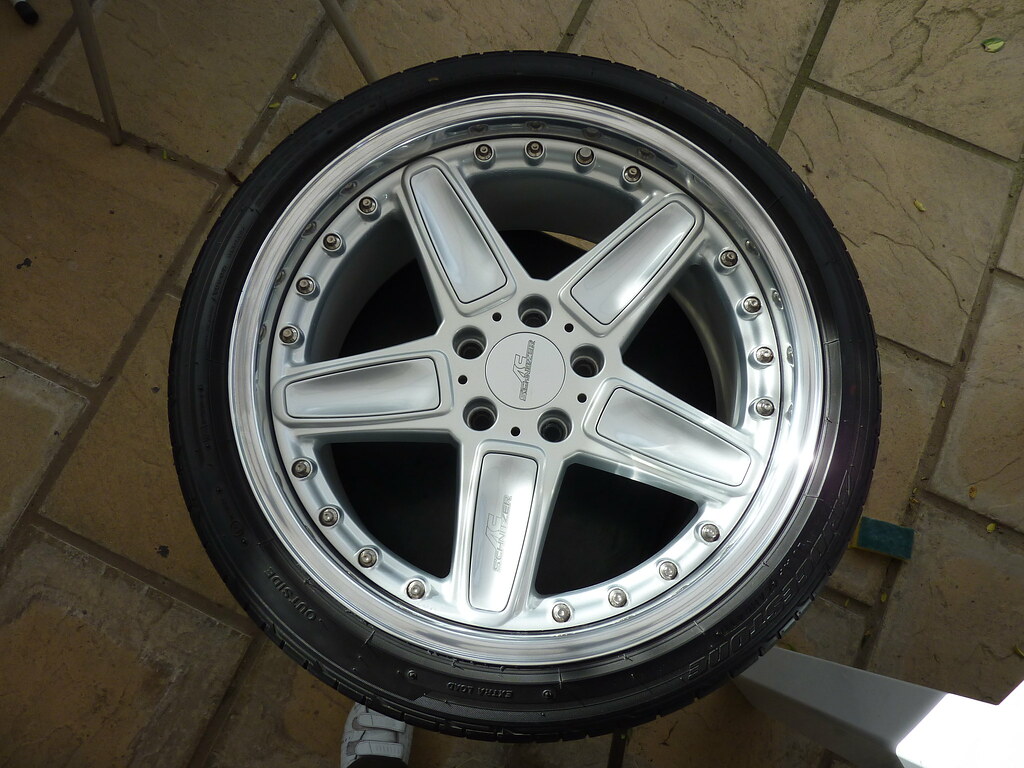 277 by djsyxx6, on Flickr  Did a little bit of minor maintaince on the M around Spring time, dropped the oil and replaced with fresh and new filter last month. I finally found my vanos filter kit which I was looking for every where as was buried under a pile of crap! Its not something that is on the service schedule but is worth replacing for the hell of it. I've seen some pictures and videos showing the filter having crud on there so was expecting the same with mine. Simple DIY job, locate the vanos filter cartridge bolt, its a 22mm socket: 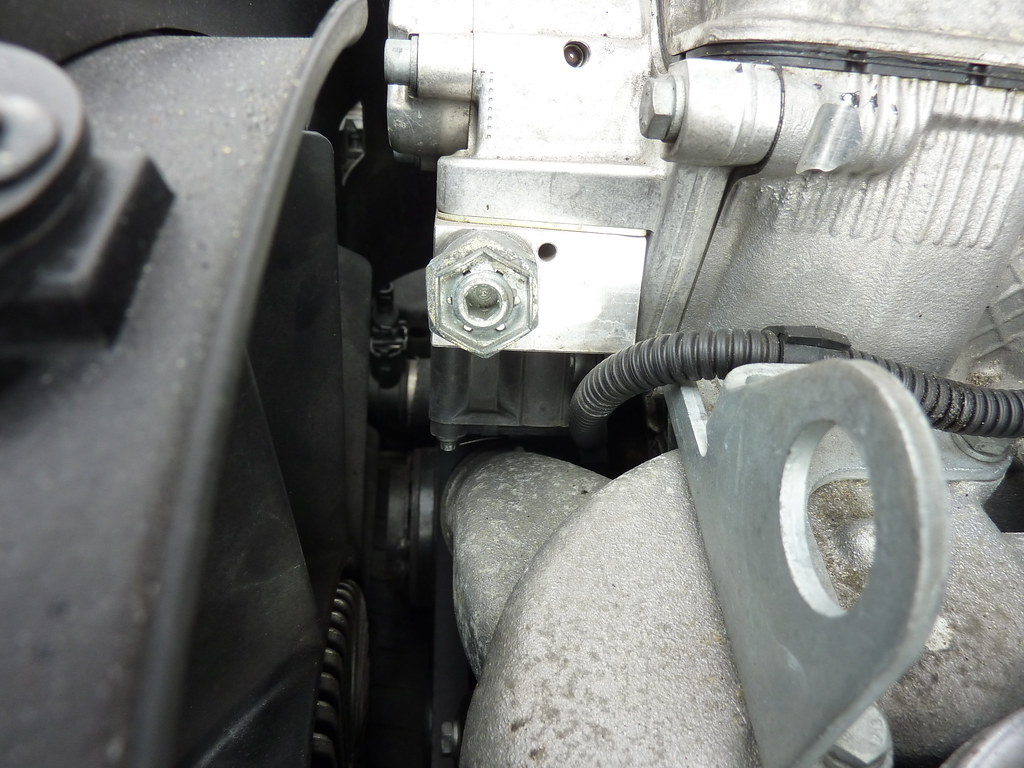 278 by djsyxx6, on Flickr Place some paper towels or a thick cloth underneath the bolt to stop any oil dripping and simply undo the bolt and carefully remove. You need three things part numbers are: The Filter Cartridge: 11361401971 Small black O-Ring: 11311318659 Bigger brown O-Ring: 11361403325 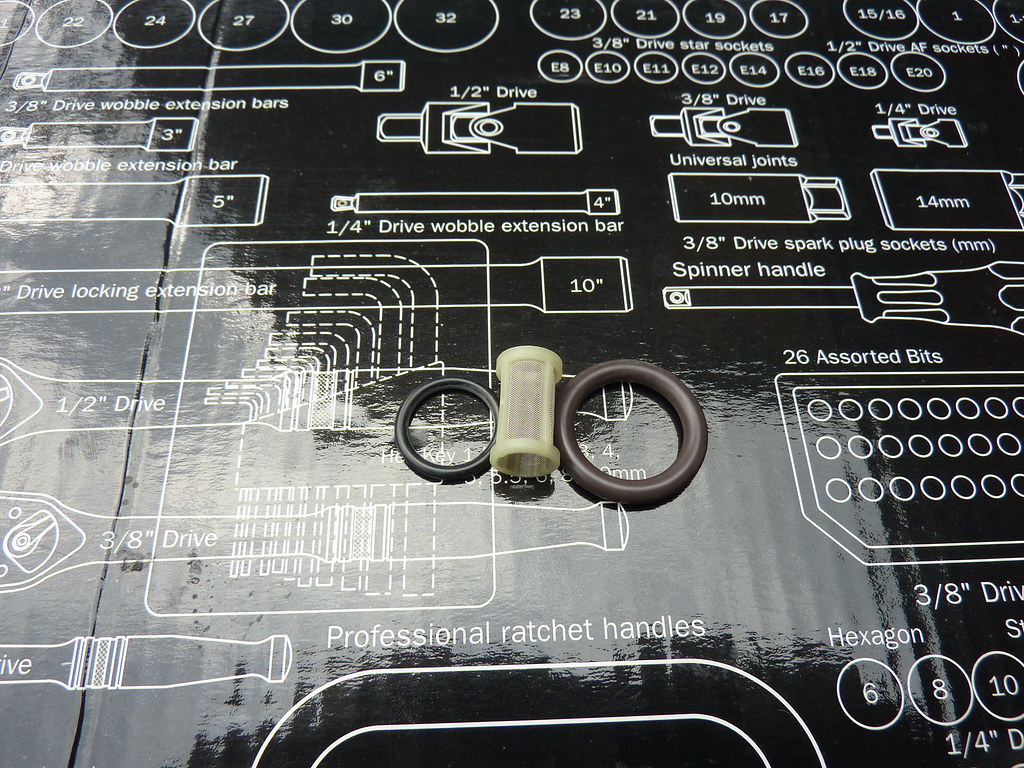 279 by djsyxx6, on Flickr This is the filter cartridge and I was surprised as to how fairly clean it was:  280 by djsyxx6, on Flickr Simply remove the filter cartridge first with some needle nose pliers. The O-rings, remove the black one first followed by the brown one. Using a small flat head screw driver works best to remove them.  281 by djsyxx6, on Flickr Refit the brown O-Ring first, followed by the smaller black one and finally clip on the new vanos filter cartridge. 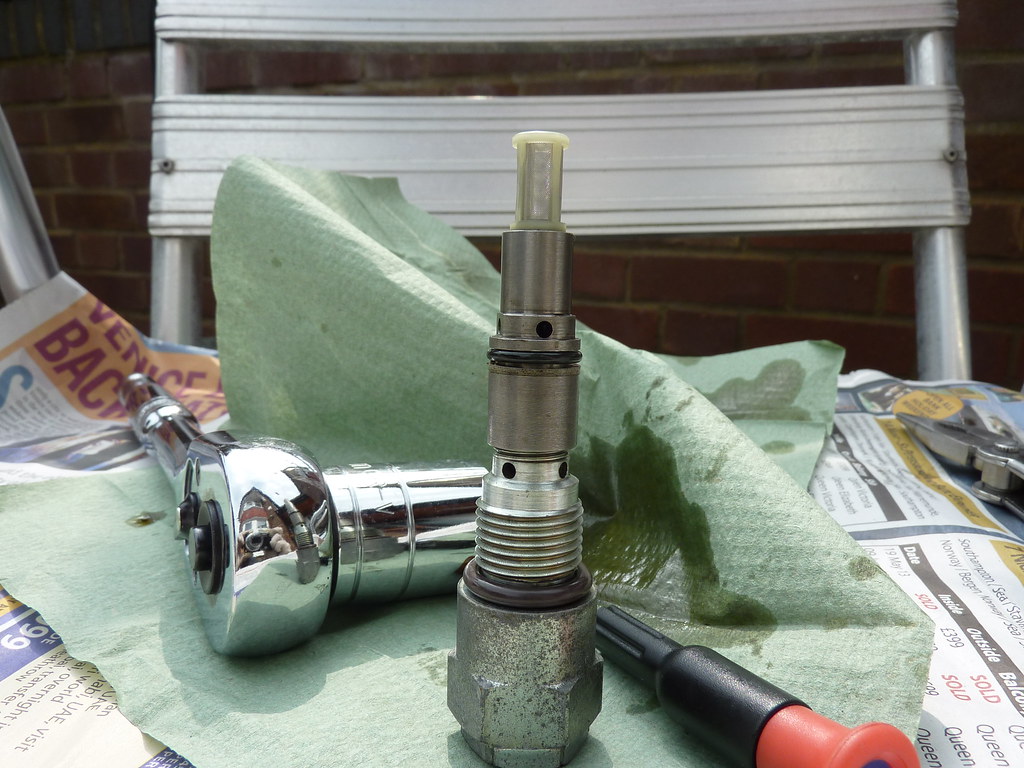 282 by djsyxx6, on Flickr Then simply refit back into your vanos job done. Bought amber indicators for the front and side repeaters. Had a spare set of rear lights and used amber lamin-x and got hold of facelift boot lights for a cheap price on ebay. 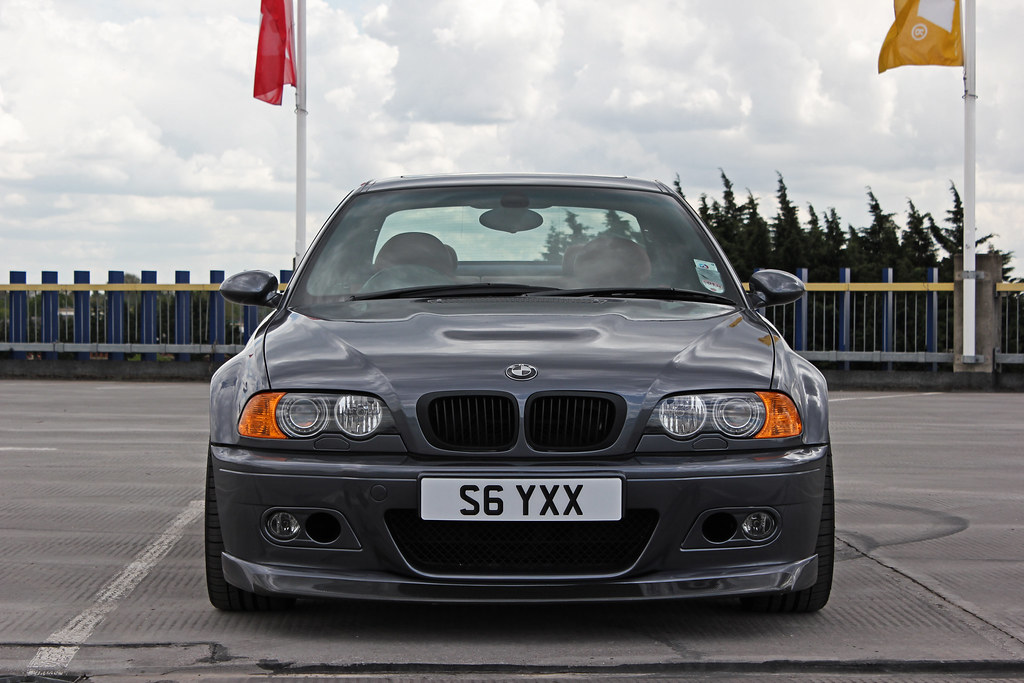 IMG_1581 by djsyxx6, on Flickr 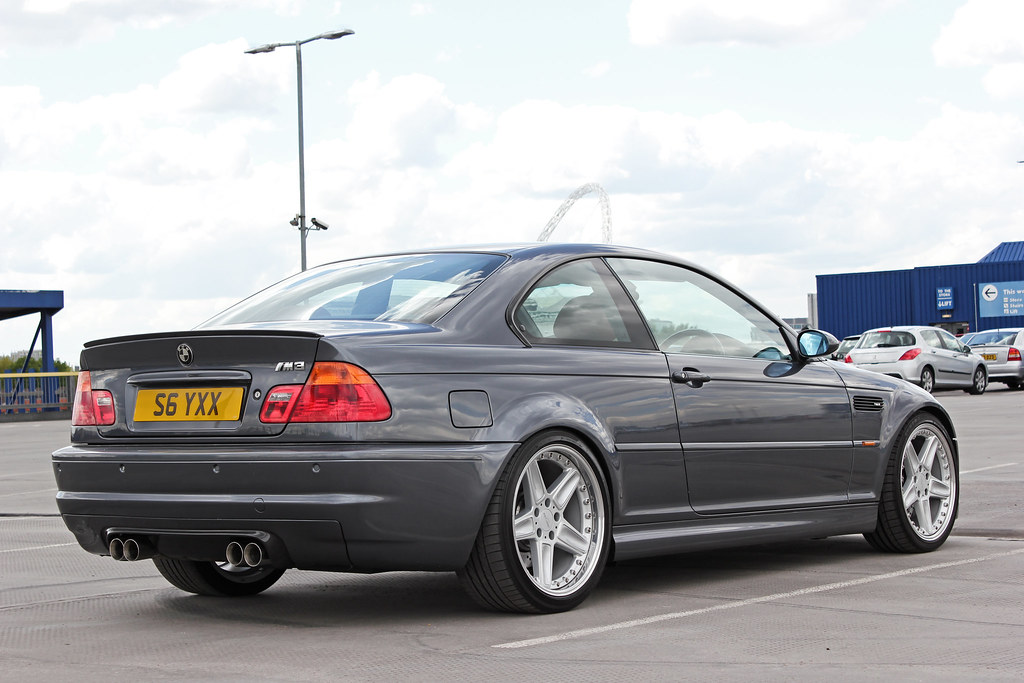 IMG_1575 by djsyxx6, on Flickr 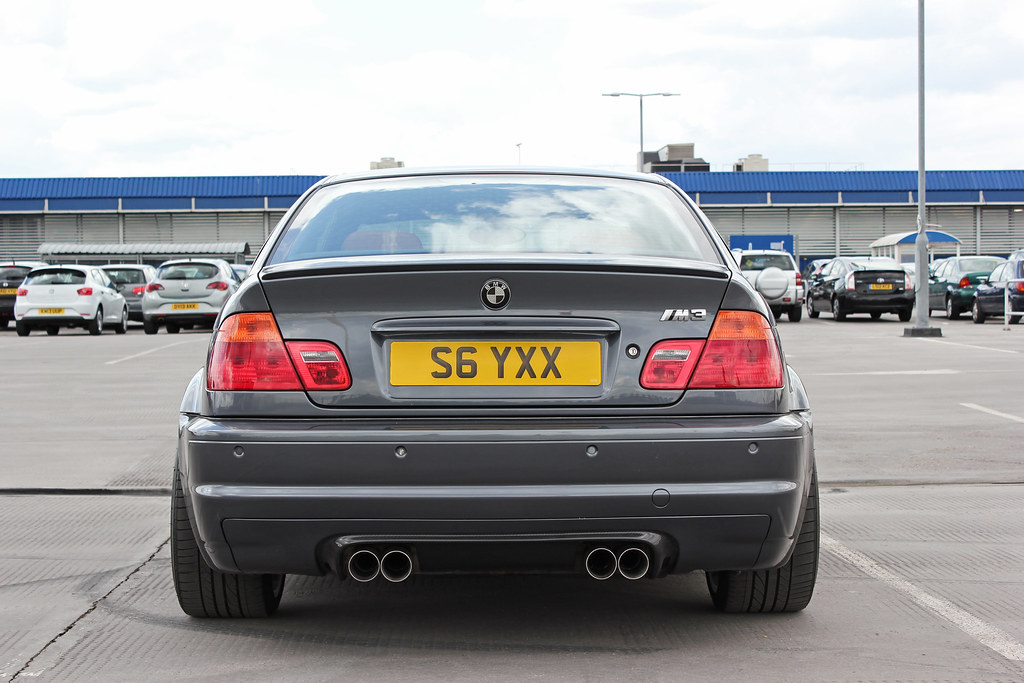 IMG_1574 by djsyxx6, on Flickr 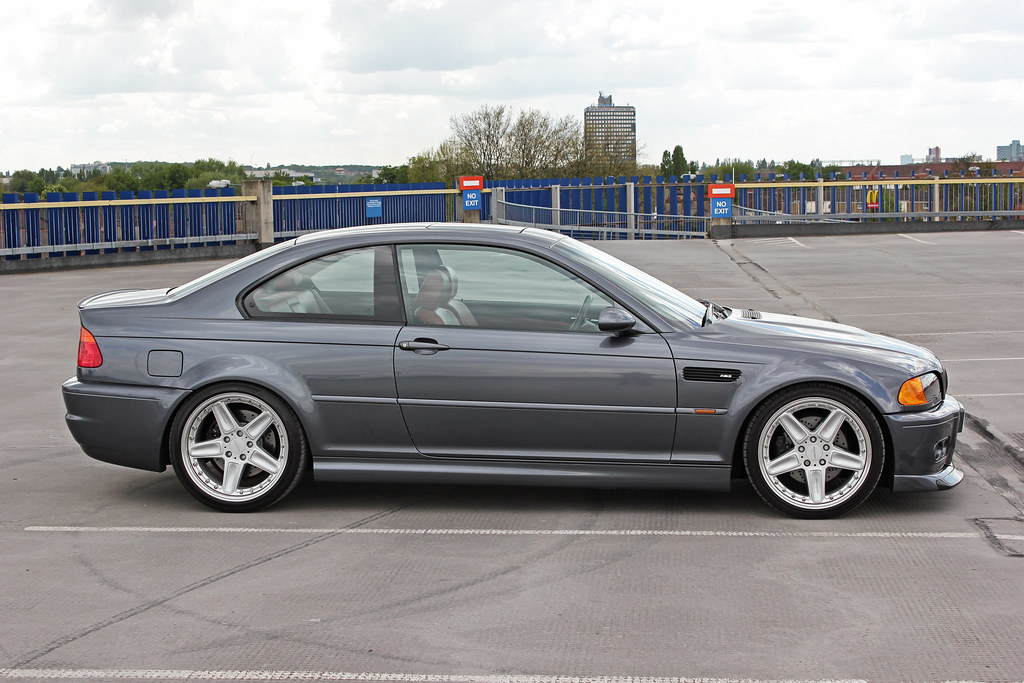 IMG_1587 by djsyxx6, on Flickr Finally got round to fitting my stud conversion I bought from CA Auto (Thanks to Phil). These literally replace your normal wheel bolts and you use an open lug nut to secure bolts. Benefits of it makes it easier to take wheels on and off specially if your doing it regularly and also zero chance of cross threading your hubs, worst case you cross thread the lug they can be easily replaced cheaply. Mounting wheels is a lot easier as the lugs hold the wheel etc.. So before: 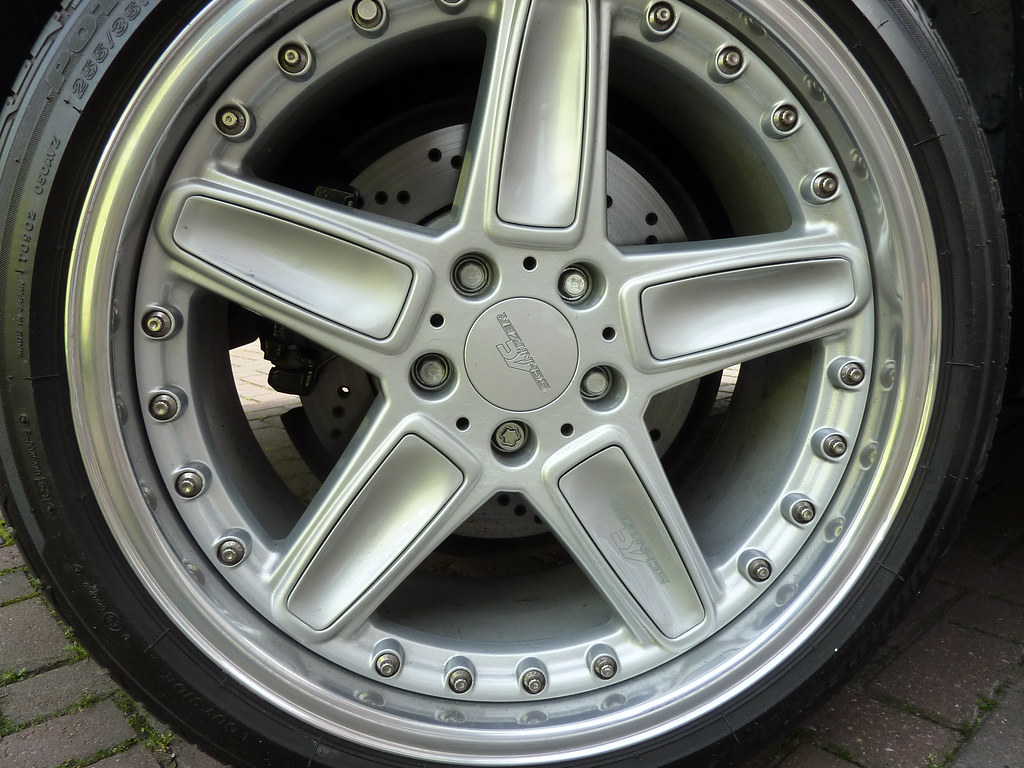 305 by djsyxx6, on Flickr Gave the threads a bit of clean to get any lodged dirt out:  306 by djsyxx6, on Flickr Need to add a drop of loctite for bolts:  307 by djsyxx6, on Flickr Tighten them up: 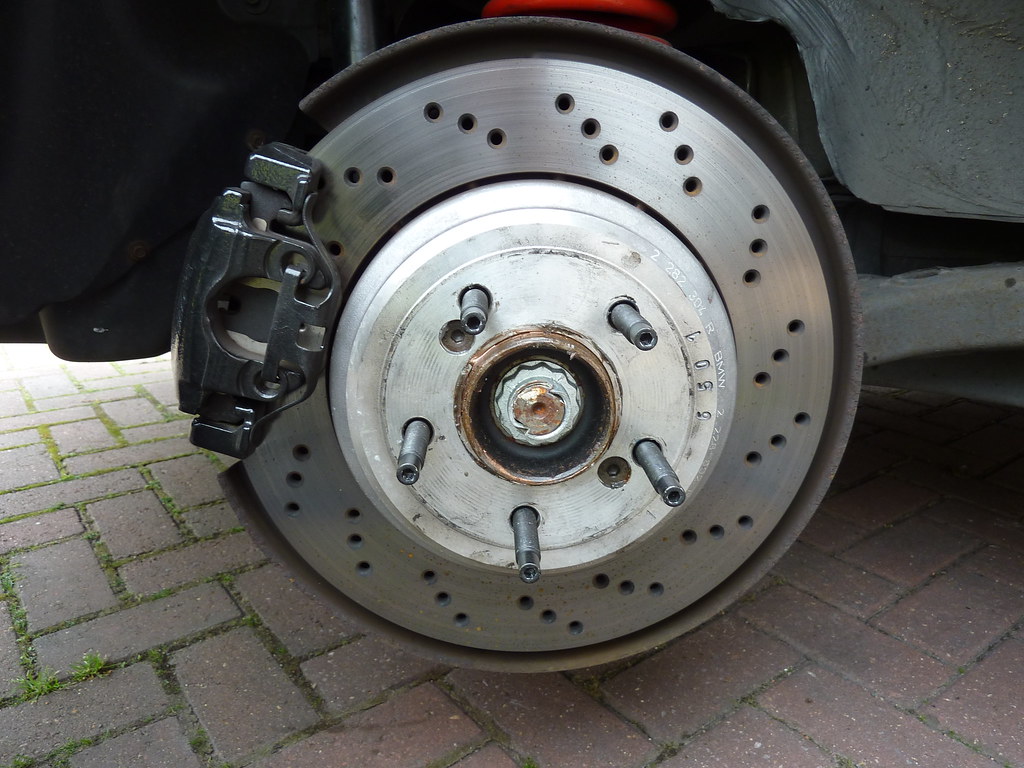 308 by djsyxx6, on Flickr And job done: 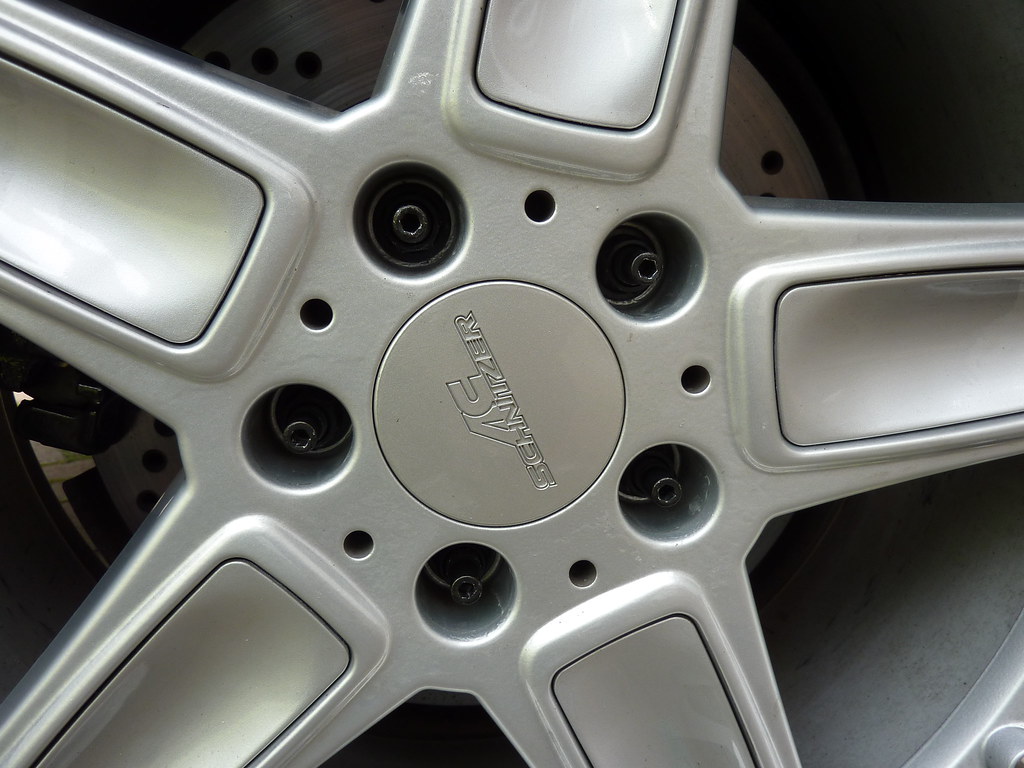 309 by djsyxx6, on Flickr Cheers Steve :thumbs-up: Being a little OCD sometimes when it comes to my car I just felt my car needed the valve clearances to be checked. There's a guy on M3 Cutters by the name of M3Carbon who does valve clearances and decided to get them done. So off came the rocker cover plugs etc. 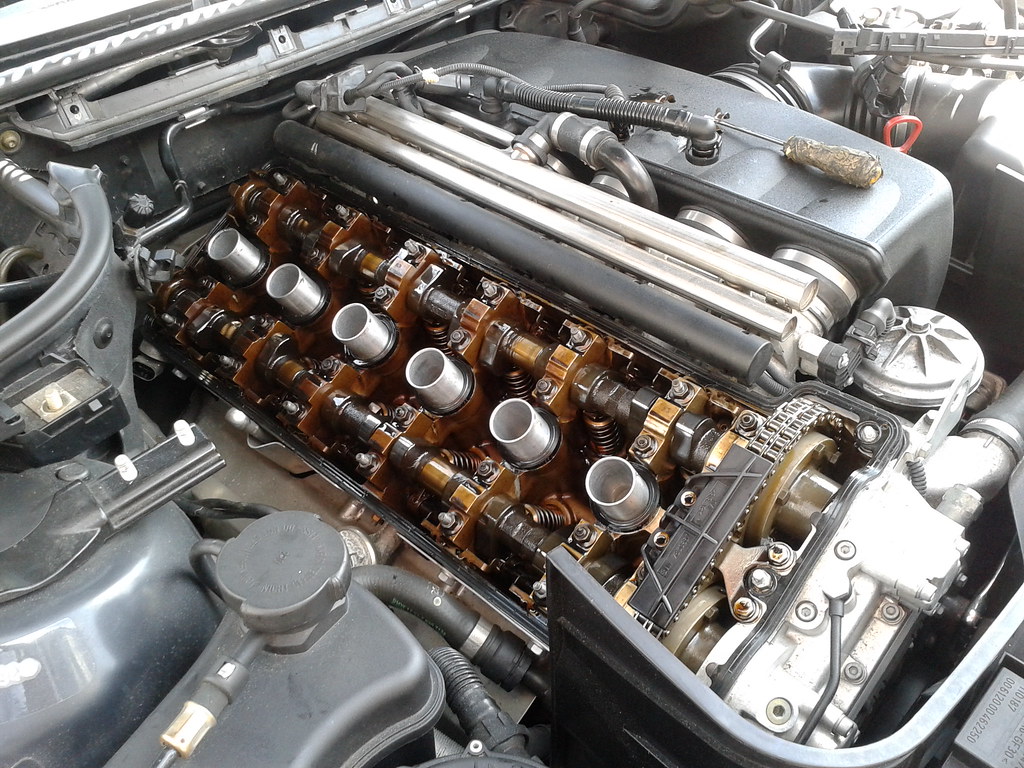 310 by djsyxx6, on Flickr Mike inspected all 24 shims and he found 8 were not in spec. They got replaced and happy to report that the engine is that bit smoother and is a little more perkier too. It was definitely a worthwhile thing to get done and I would recommend if you haven't had them checked or your not sure when they were last checked do it as its a one of the most important things to do on these engines after oil changes. Which now brings me up to date with this next lot:  311 by djsyxx6, on Flickr 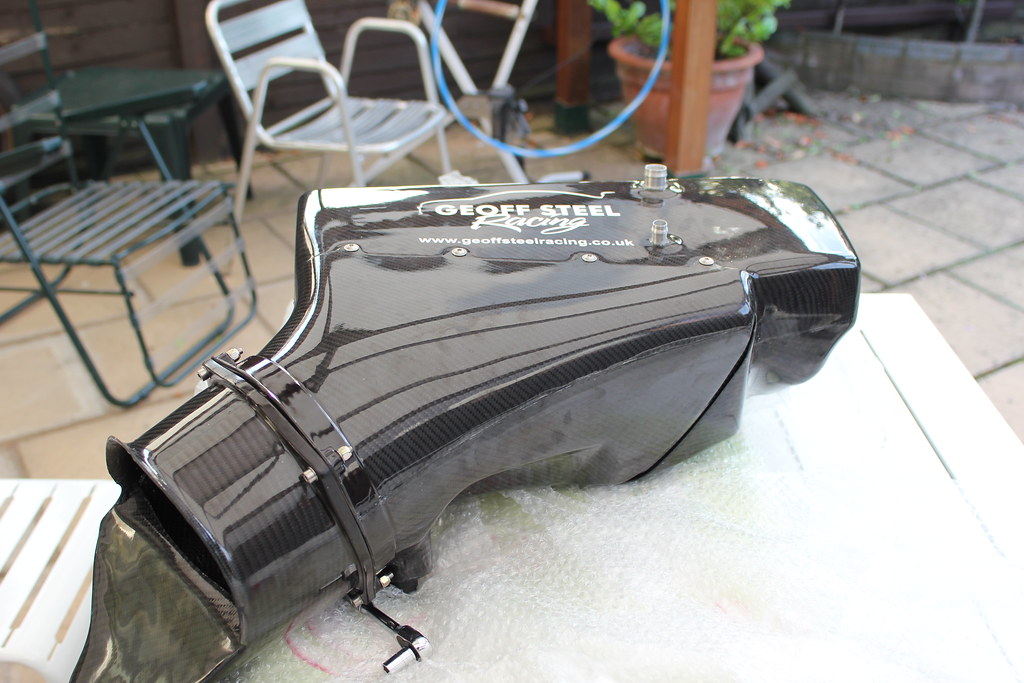 312 by djsyxx6, on Flickr 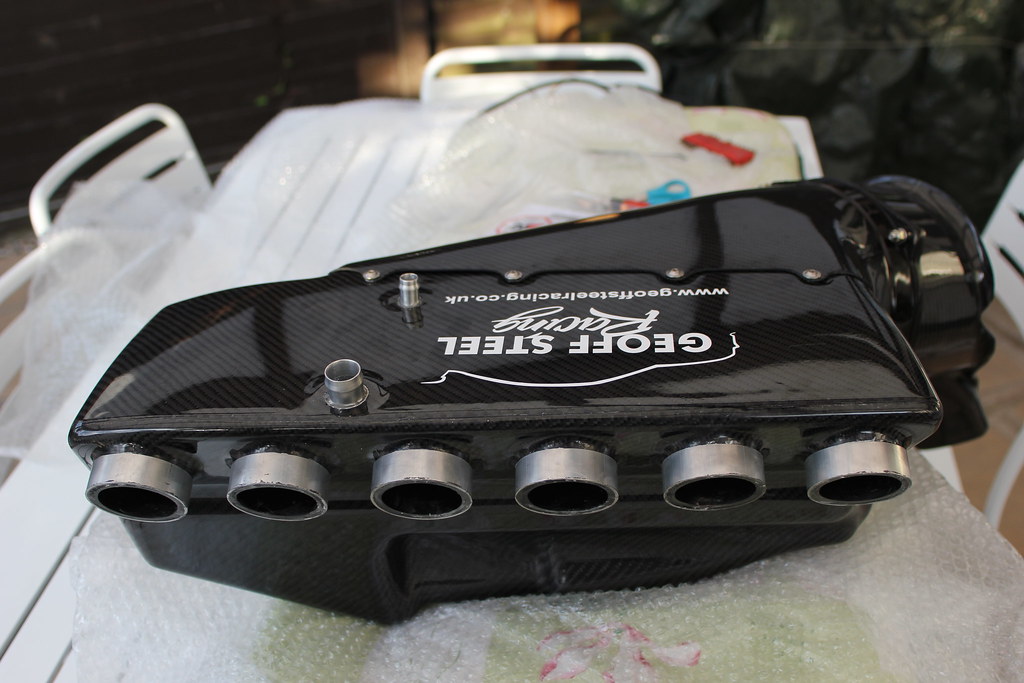 313 by djsyxx6, on Flickr So got on with stripping the intake manifold and airbox out. There is a youtube guide which shows pretty much how you take it out. So I viewed it and thought OK this is looks awkward. So undeterred I got underway with it and found it was actually straight forward and the youtube video guy makes too much of a meal of it! lol. To give you an idea of what is involved and parts you need: Vent Hose 11 15 7833649. £18 from BM Mini Parts Air shut-off valve 11 61 7833647 £51 from BM Mini Parts M5 Clamps x6. 07 12 9952125 £4.60 from BM Mini Parts Optional: 6x new throttle body clips. And you will need a CV boot crimp tool for the throttle body clips to help remove them. Started by removing the intake plastic, undo the airbox, remove the MAF sensor which you will need a security torx bit (T15) to remove.  314a by djsyxx6, on Flickr See ya later MAF sensor! 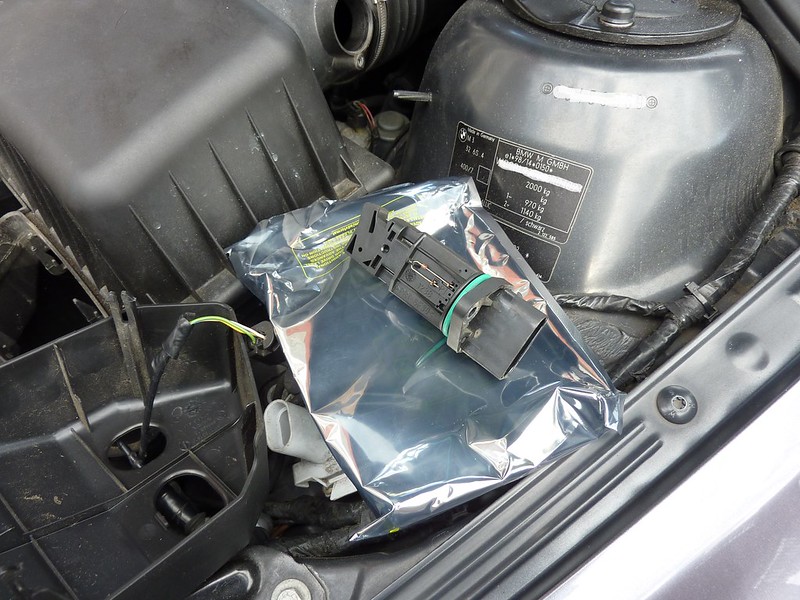 315a by djsyxx6, on Flickr Unbolt the airbox, there is a hidden bolt under the Xenon ballast and undo the hose clamps and simply remove. You will need to remove the pollen filter housing and unclip the battery lead and hose from the cable tidy attached to it and remove the breather hoses attached to it and unbolt the dipstick think its 10mm bolt for that one. The intake manifold is attached on with two 10mm bolts attached to a metal V bracket under the box. You simply need to put your head in and you will see it. A ratchet spanner will be handy to remove them both. The tricky bit will be removing the hose clamps attached to the throttle bodies specially as you go further up as space is limited. Now if your prepared unlike me you would get a CV boot crimp type tool. You have to squeeze it and the clamp detaches so you can remove. I used needle nose pliers with a screw driver to remove. While not the correct way of doing it got the job done but I would recommend getting the tool bit as you will likely be able to reuse the clips again. Can't use mine again as they are a little weak and bent so will get new ones at a later date with the tool to put them on. Wiggle the box and eventually will free itself from the throttle bodies. At this stage you want to just loosen it away as you have two breather hoses attached to the bottom of the intake, one fat, one slim. The fat one is nearest to you and you will see it by lifting the box up and simply unclip. 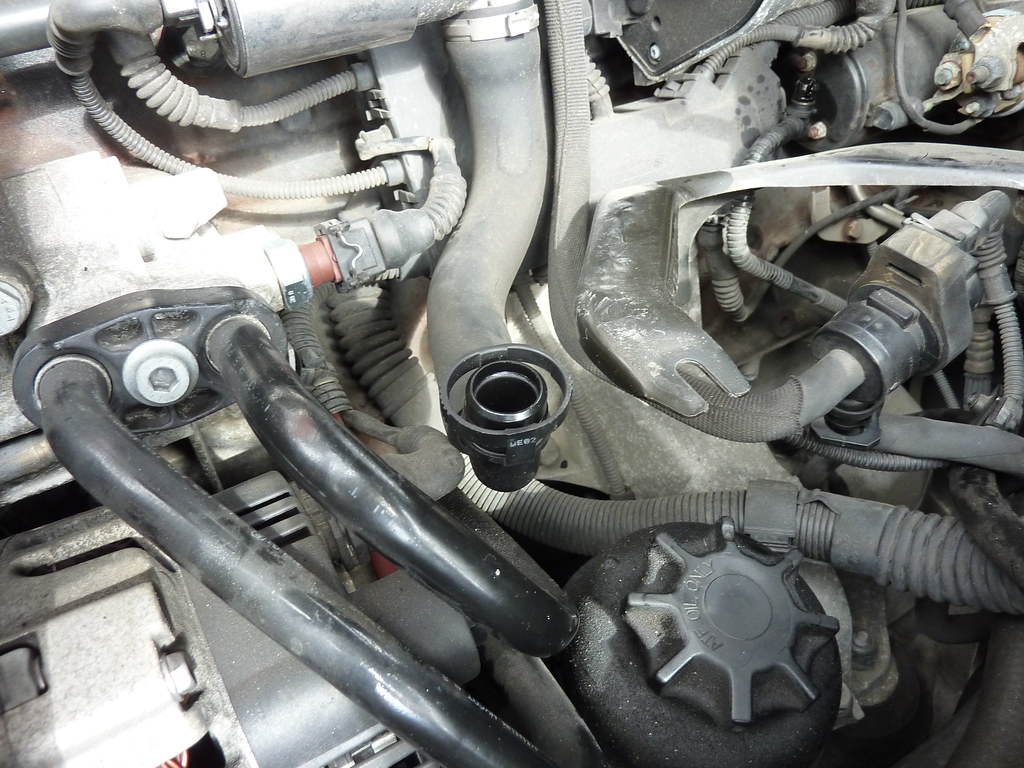 318 by djsyxx6, on Flickr The slim one is further at the back and will require you to put your hand under and feel. Once you find it unclip then the box can come out.  319 by djsyxx6, on Flickr If you have spare time now is a good chance to clean the throttle bodies and was left with this. 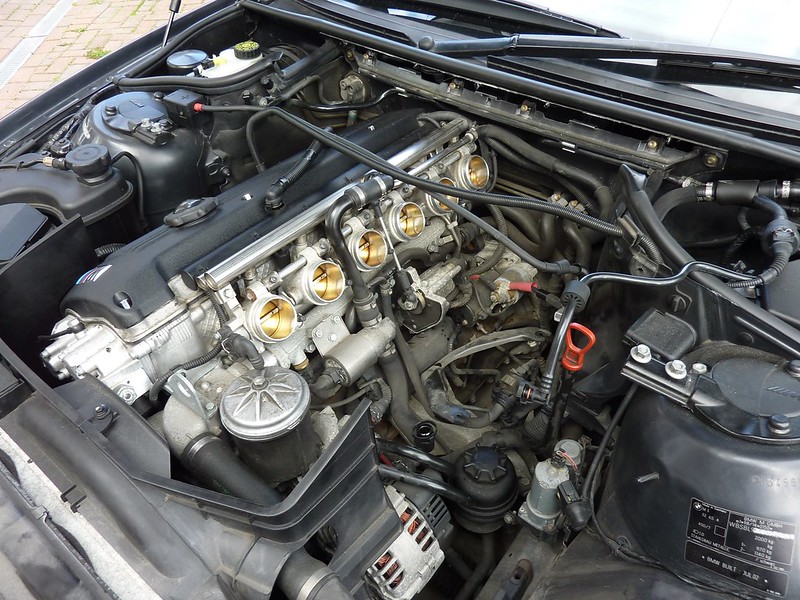 316a by djsyxx6, on Flickr 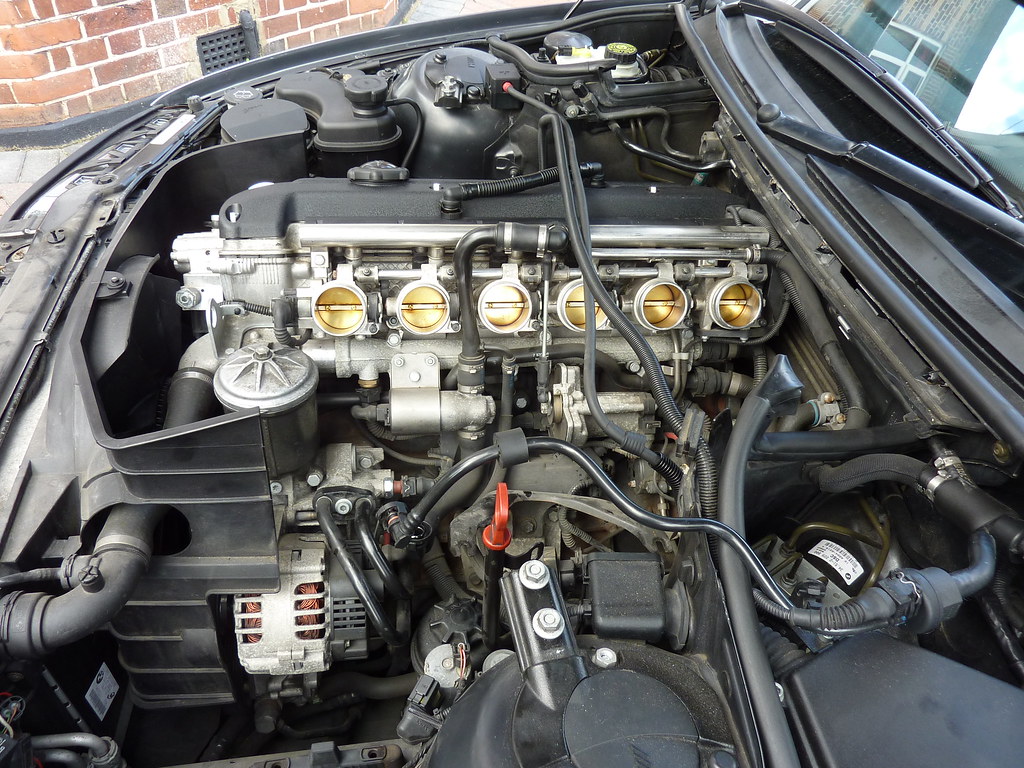 317 by djsyxx6, on Flickr The dipstick needs to be moved to the side in order for the carbon box to sit. You simply need to move it over the side, grab top and bottom of it and give it a bit of bend just far enough so that it sits behind the strut brace right near the MAF wiring loom case. I used some black cable ties and wrapped it round the dipstick bracket to keep it into position. 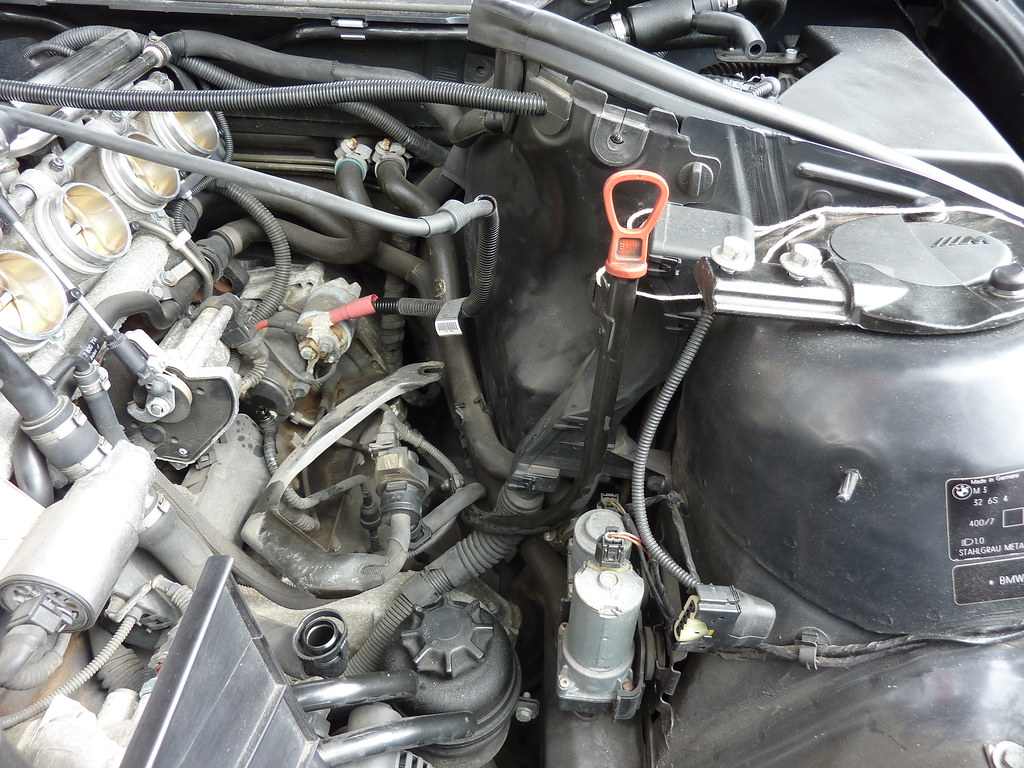 320 by djsyxx6, on Flickr Prepared the airbox by taking the old rubbers off the old plenum by unscrewing them. On the inside of the rubbers it has a plastic clip which you simply remove. Do this for all 6 and then fit onto the new airbox.  321 by djsyxx6, on Flickr 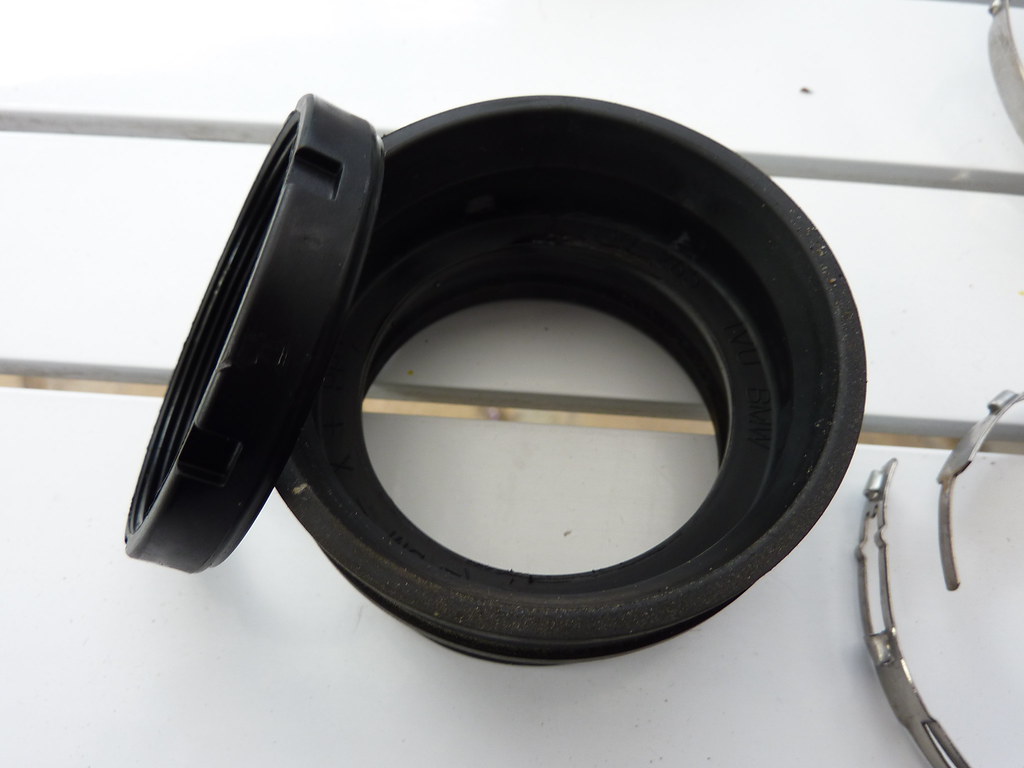 322 by djsyxx6, on Flickr Rubbers attached to the airbox: 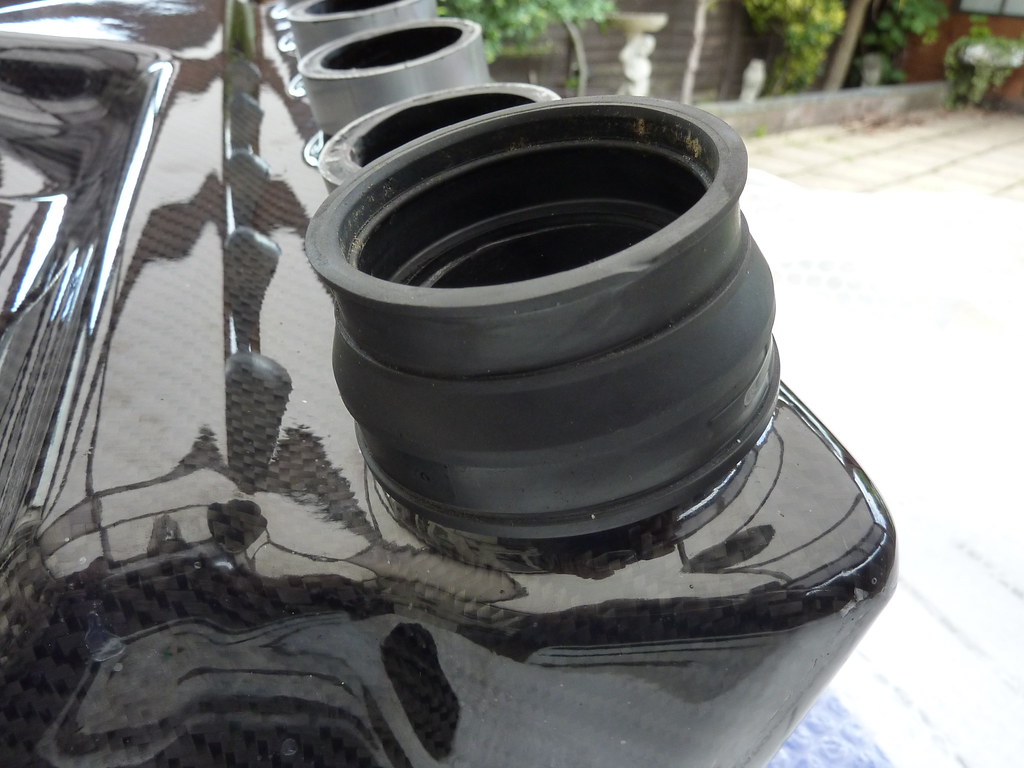 323 by djsyxx6, on Flickr 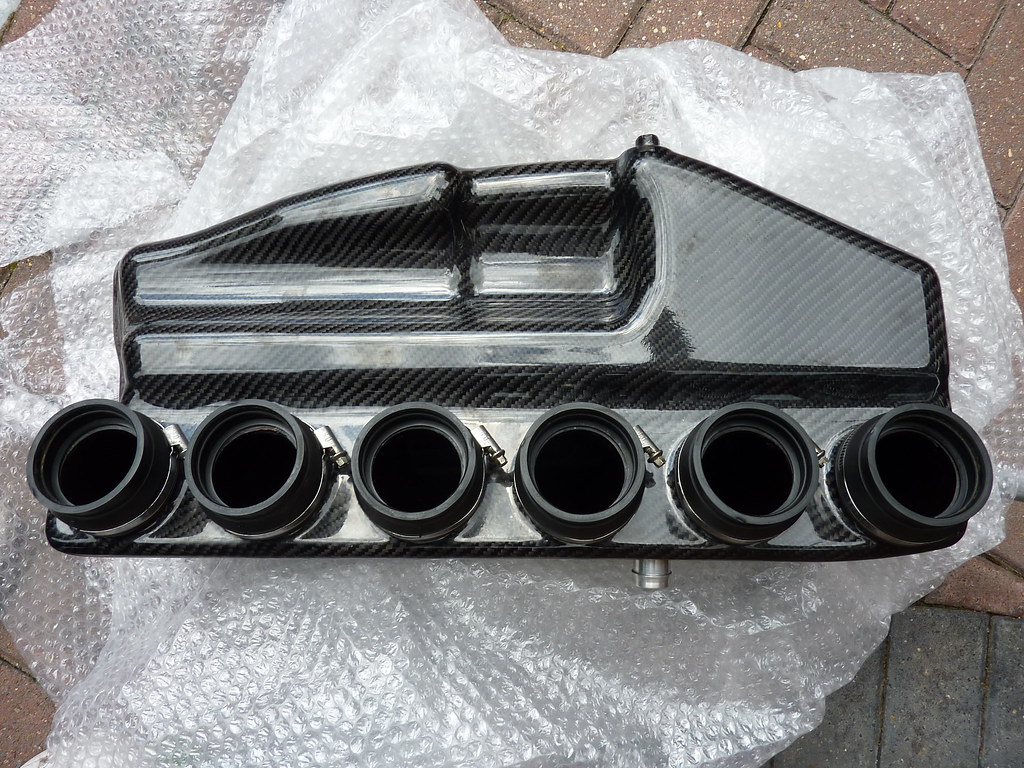 324 by djsyxx6, on Flickr Attach the clamps and get them on tight except for the throttle body side end which you want a little loose and can tighten later. Now before you fit the box on myself and a few others have found the breather hose attachment underneath the box (the slim one) seems to split easily. I was speaking with Crapbag who experienced this and as a consequence the slim hose is a bit loose when you clip it in. I used a cable tie and tightened it up hard to join the split together. Crapbag recommends self amalgamating tape which he used. I will speak to Will at GSR to speak to him about this as I think it needs strengthening or a slight tweak to stop this from happening. Fitted the box onto the throttle bodies, best to get the ones furthest into the engine bay first and work it in. Now you can tighten the hose clamps on the throttle bodies. I am using normal screw clamps at the moment as mentioned as I screwed up the existing clips. If you use normal screw clamps ensure they don't foul the throttle linkages and are positioned correctly. Next you want to connect the two hoses underneath, connect the slim one by putting your hand underneath. It should make a loud click when it is in place. I found on mine by having the cable pointing in the 3 o'clock position it clipped in properly. The fat one is straight forward simply push it on. Next stage I had to do was modify the rubber intake coming from the brake duct bumper area. As Crapbag showed on his thread he cut his and squeezed it into the rubber. I decided to butcher mine and cut the top half of it so that the mouth piece can fit in and aids in getting it into the engine bay better. At this stage screw on the IAT sensor as this will make life a lot easier. Evolve sent me out the IAT in advance so that it is ready fitted. Mine is located on the mouth piece directly in the path of the airflow which is a good spot for it. 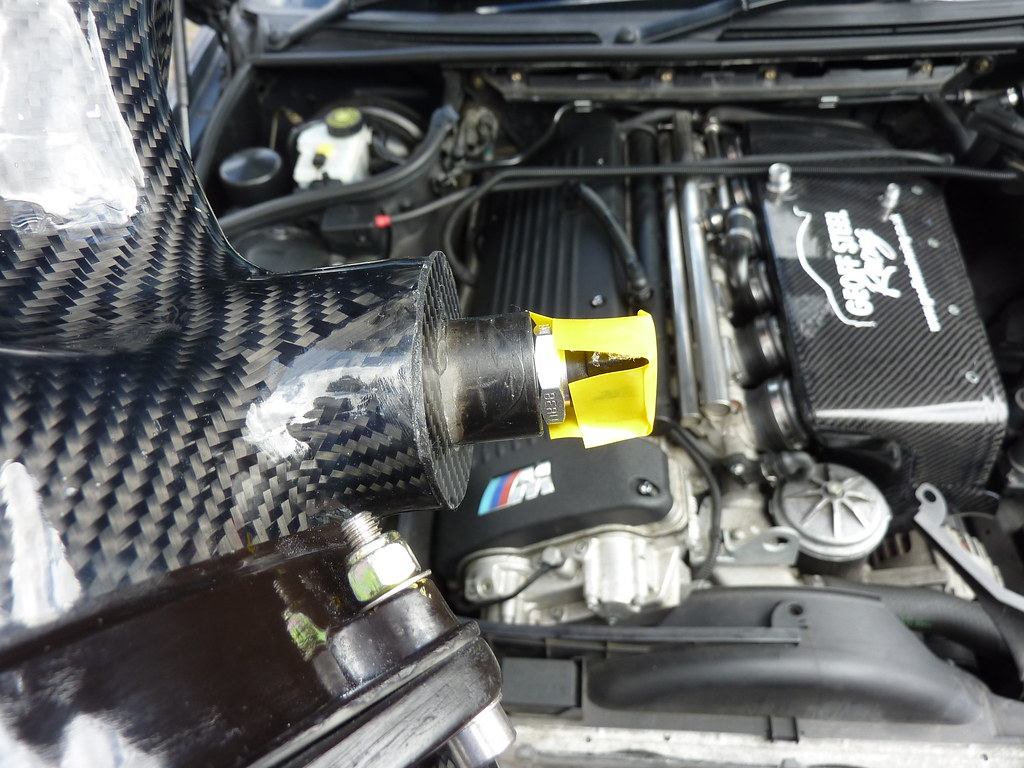 325 by djsyxx6, on Flickr 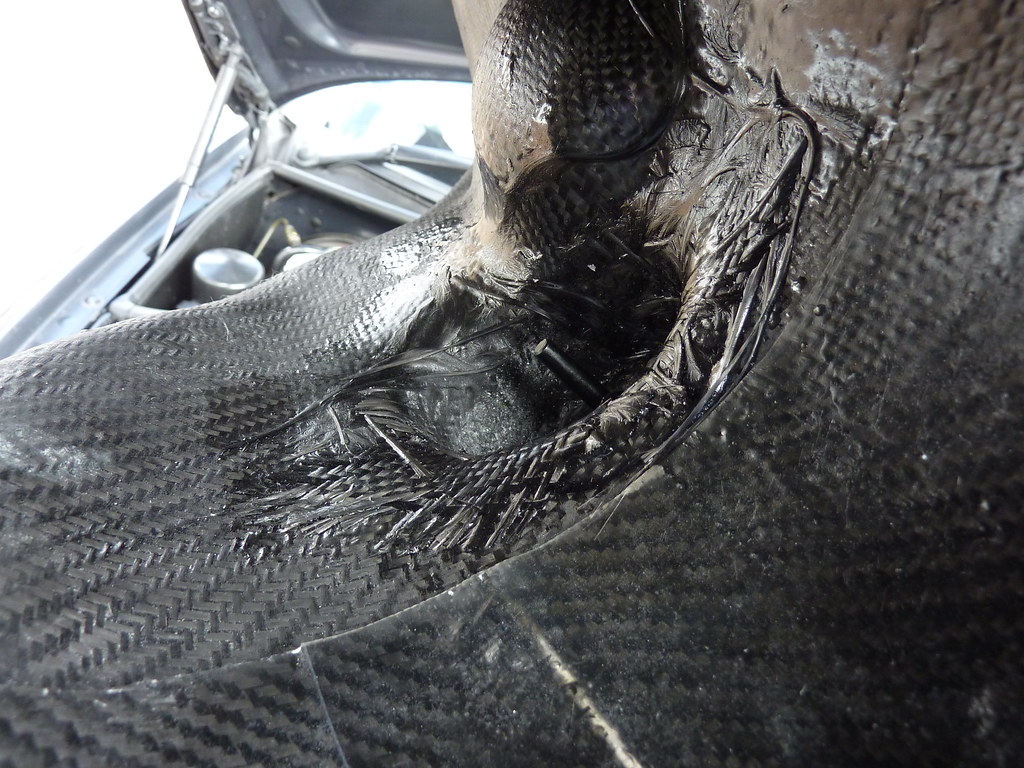 326 by djsyxx6, on Flickr The 4 torx screws that the mouth piece attaches to the box I had to get the middle two on and push at the same time to line up the two outer ones. I found it was best to screw each one in evenly rather than getting just the one in tight. You then need to fit the two new hoses for the top of the box as the existing ones won't fit.  327 by djsyxx6, on Flickr 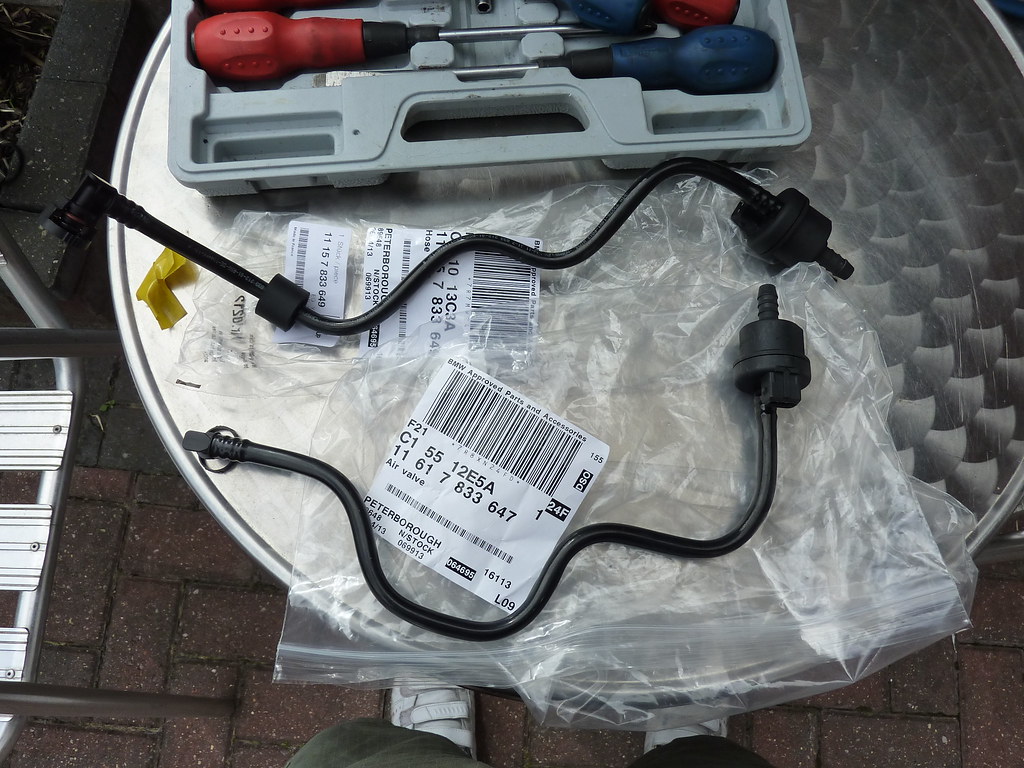 328 by djsyxx6, on Flickr Once that's done I fitted everything back together and started her up to make sure fired up. Got the emissions light on for the MAF sensor which is fine as now have no MAF!  330 by djsyxx6, on Flickr 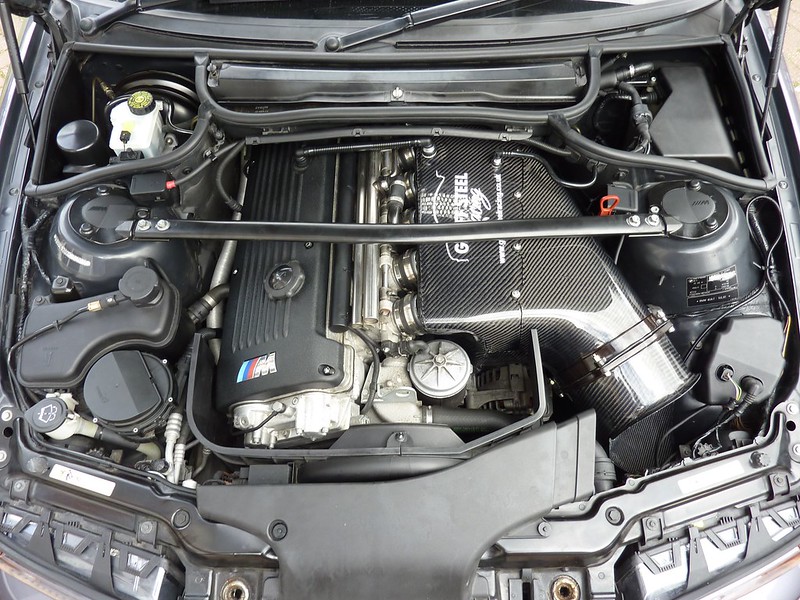 331a by djsyxx6, on Flickr Took the steady drive down to Evolve Automotive for its all important new Alpha N map. Arrived and Imran got on with reading my car via laptop. And Sal later came to wire up the IAT to the MAF wiring loom and upload my new map file. After this was done I jumped in the passenger seat and Sal took me out to check the map was running correctly. He was satisfied with the map and how it was responding to the car. The midrange was improved and you could feel this in the passenger seat in that the car was pulling better. Didn't get the rolling road test done as Sal strongly recommended I do the B&Q mod to funnel the air flow better. Took the car and had to do an errand straight after. I started to noticed the car got better as I was driving and was responding better too. You also have the loud growl from all 6 throttle bodies and with the foot down to the floor it sings at its loudest. I covered over 350 miles now and so far no complaints at all. If your driving around normally round town the car drives and behaves completely normal as it did before and your none the wiser. Is it worth it? The airbox mod and Alpha N map while its not a massive difference its a noticeable improvement from standard. I have noticed the mid range torque from around 3500rpm onwards improve more and pulls better in all the gears. There seems to be a sense of more urgency when you need to accelerate. With the sport button its better still and responds very well when you need it too. If your keeping the car its a worthwhile mod but if your only planning to keep your M3 for a few years I wouldn't recommend to and save the money. To break down costs the airbox was £1100, Alpha N mapping and IAT was £599 and adding the few bits I need call it £1800 all in to have it running. Add a bit extra if your paying someone or Evolve to strip and fit your airbox. Yes you have other options like Supercharging and the money spent on this could have gone towards that route. However I think the M3 is perfect as it is and I think it would take away a bit from the character of the car. Overall I am happy with the airbox and map and enjoying how the car performs and for me this is about as good as it gets. I finally fitted my carbon intake cover made by Josh. Unfortunately with the GSR box the cover fouls the mouthpiece so Craig a.k.a. Crapbag on M3Cutters kindly dremeled my one at Gaydon so that it fits better clears the mouthpiece. So I got one with fitting it and put some double sided tape as well for good measure. All I need now is a carbon rocker cover to finish off my engine bay. 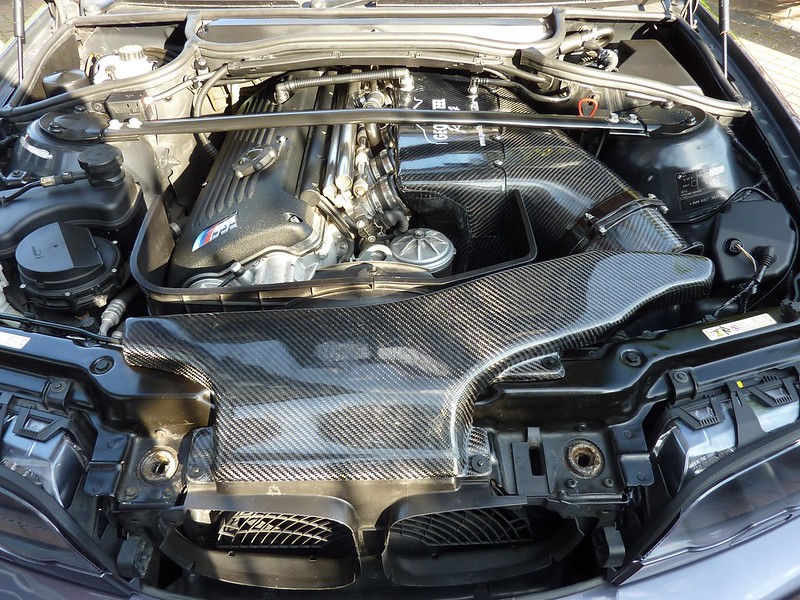 332a by djsyxx6, on Flickr Lastly with the last minute .com modding with the airbox/map done I got the last piece of the puzzle and got the CSL bootlid 4 days before Gaydon. Was a pain to adjust and get it straight on both sides but just required patience more than anything. Put a new wiring loom for the license plate lights but have to say the lights to fit. I can't understand why they fit so bad. But anyway grabbed a few pics and will get some more later this really finishes the car off nicely.  IMG_2279 by djsyxx6, on Flickr  IMG_2281 by djsyxx6, on Flickr Edited by DJ Syxx - 08 May 2014 at 3:18pm |
||||
|
|
||||
|
||||
|
steveH
Club Member
Concours Chairman Joined: 16 Aug 2006 Location: United Kingdom Status: Offline Points: 1065 |
Post Options
Thanks(1)
Quote Reply
Posted: 24 Sep 2013 at 10:52pm |
|||
|
Please speak to Matt (Editor) and get this into the mag as a feature to show what is possible with the e46 cars.
Well done.
|
||||
|
Tell it how it is the Northern way.
|
||||
|
||||
|
issus
Region Chair

Joined: 02 Jun 2010 Location: Northants Status: Offline Points: 1337 |
Post Options
Thanks(1)
Quote Reply
Posted: 28 Oct 2013 at 8:39pm |
|||
|
DJ 6's E46
Great article and very well planned too. About the best Build Enhancement on an E46 I have seen on any BMW Forum. Well done and congratulations as your efforts are appreciated. regards Tony |
||||
|
E46 320d Sport Myst Blue 054 reg - probably the best BMW ever
|
||||
|
||||
|
FwordM3
Club Member
Joined: 18 Jan 2009 Location: United Kingdom Status: Offline Points: 309 |
Post Options
Thanks(1)
Quote Reply
Posted: 03 Nov 2013 at 9:13pm |
|||
|
Seeing all the pics again shows how much work has gone into it - well done mate!
|
||||
|
||||
|
DJ Syxx
Club Member
Joined: 07 Sep 2012 Location: London Status: Offline Points: 208 |
Post Options
Thanks(0)
Quote Reply
Posted: 10 Dec 2013 at 7:23pm |
|||
Thanks Steve will probably do so once I get some more work done on the car.
Thanks Tony means a lot. Haven't done a lot since the last update so going to lift it from journal on other forums: I obtained an engine cover in carbon, got a temp M badge on but will need to get the original one at some stage. Completes the engine bay. 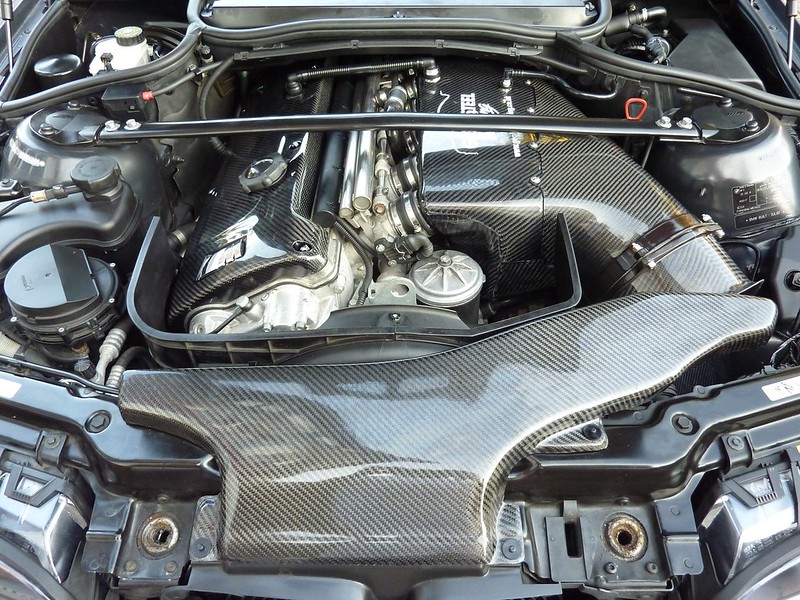 333a by djsyxx6, on Flickr 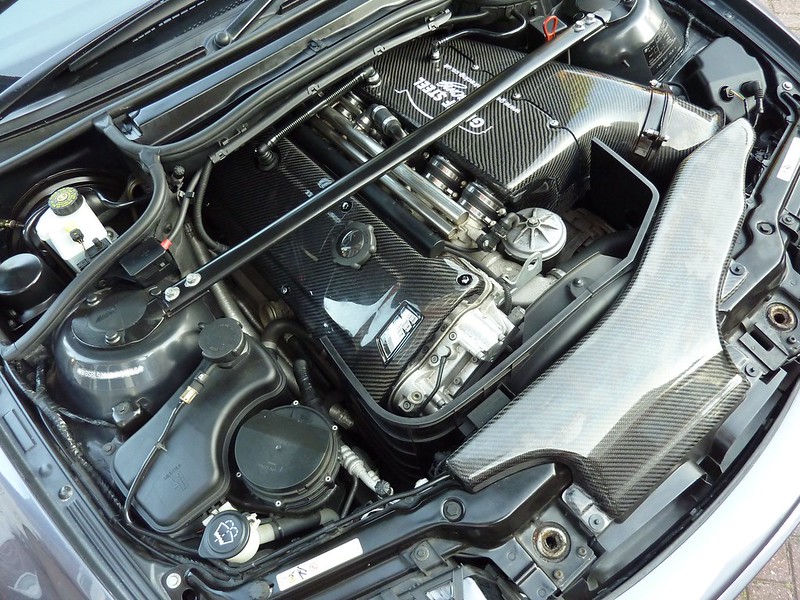 334a by djsyxx6, on Flickr 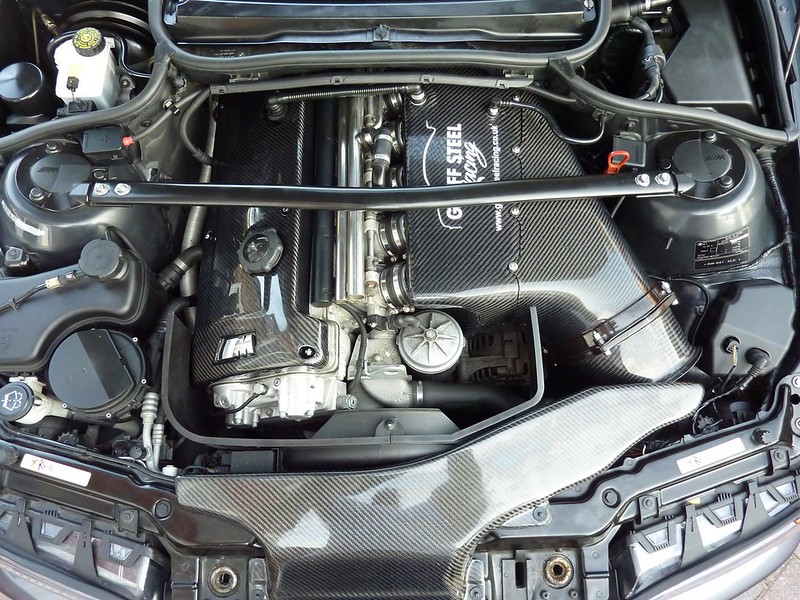 335a by djsyxx6, on Flickr Attended a car show called Rollhard at the Duxford War Museum. It was held on the 14th Sept I decided to put my winters back on so just a few pics of it with the Ambers which have now been taken off.  IMG_3048 by djsyxx6, on Flickr 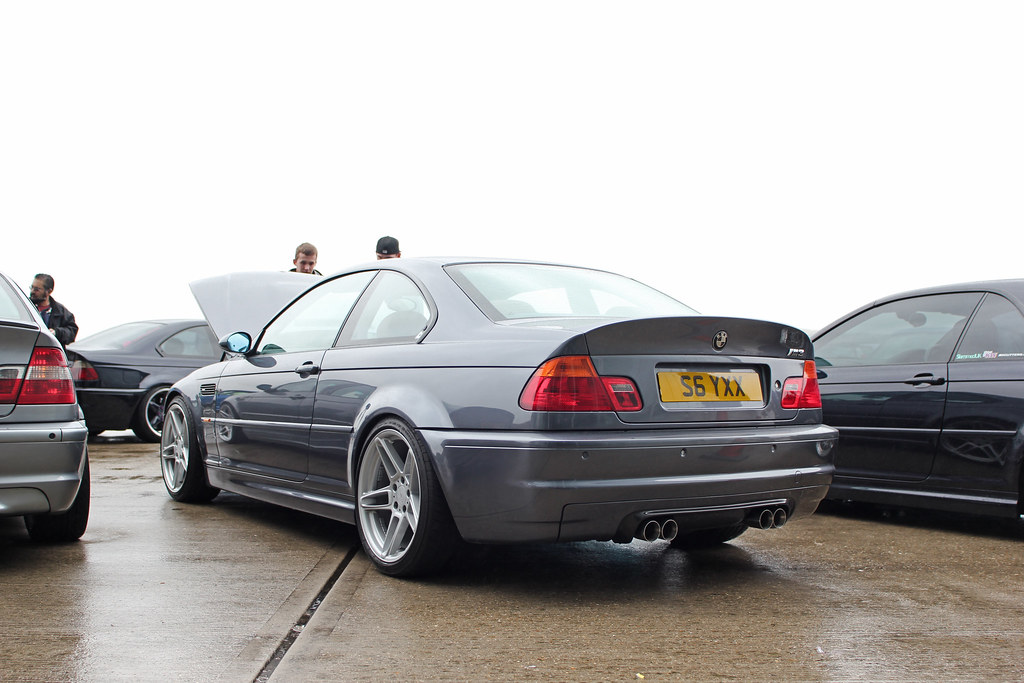 IMG_3051 by djsyxx6, on Flickr 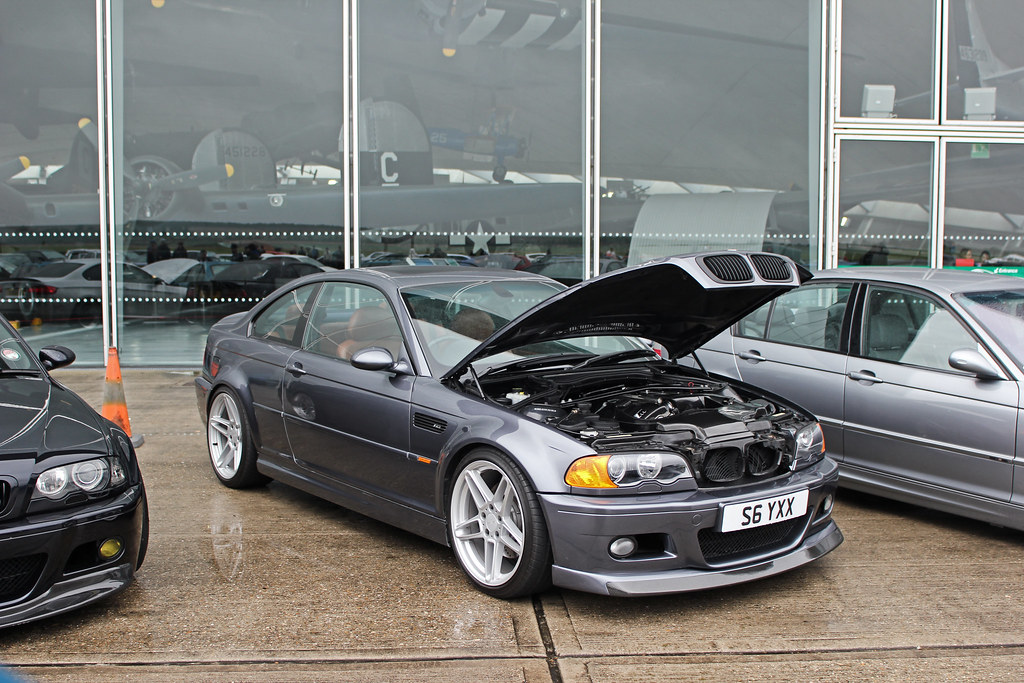 IMG_3058 by djsyxx6, on Flickr 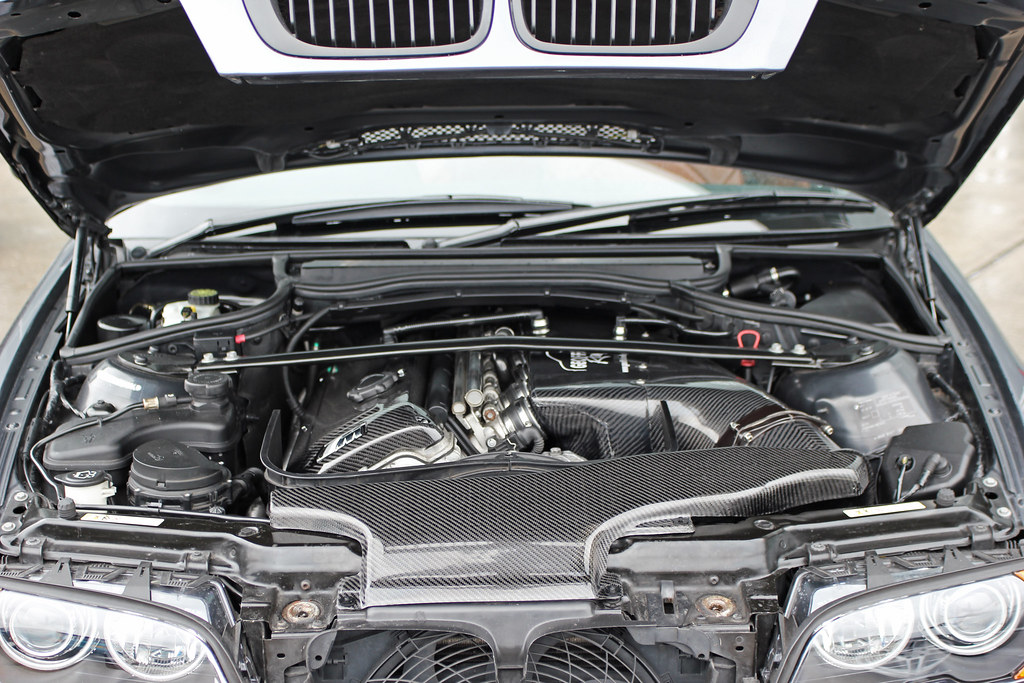 IMG_3059 by djsyxx6, on Flickr Onto the bad news but not the end of the world. I was working on the car a few days ago recoating my rear arches and while waiting for the coats to dry I decided to check my subframe for any potential problems as it is known that the E46's have subframe floor issues. The most common place for them to go is on the rear left handside. I checked the right but it is a little difficult as there is more things in the way but seemed ok. However upon inspection of the left handside I had noted some corrosion starting to appear on the spot welds around the subframe bush mount which is one telltale sign of a potential problem. Secondly above the antiroll bar where the floor folds upwards on the seam I spotted a small few mm corrosion forming. I didn't get a chance to see if the corrosion continued upwards but there is a good chance it is as its an unusual place for corrosion to form which means there is a crack developing. First two pictures you can see corrosion has started around the spot welds and in the last picture I have circled the small corrosion area. There maybe a possibility that there is other cracks forming possibly under where the subframe bush mounts to the body but obviously won't know once the whole back end gets dropped. Click these links to get a full zoom picture where you can see it clearly. http://www.flickr.com/photos/101120460@N04/10300011663/sizes/o/in/photostream/ http://www.flickr.com/photos/101120460@N04/10299892086/sizes/o/in/photostream/ http://www.flickr.com/photos/101120460@N04/10300075576/sizes/o/in/photostream/ So the next thing will be to get this repaired with the subframe kit Redish Motorsport sell and Dips at Custom Cars will be carrying out the repair.  [/url] [/url]P1070418 by djsyxx6, on Flickr 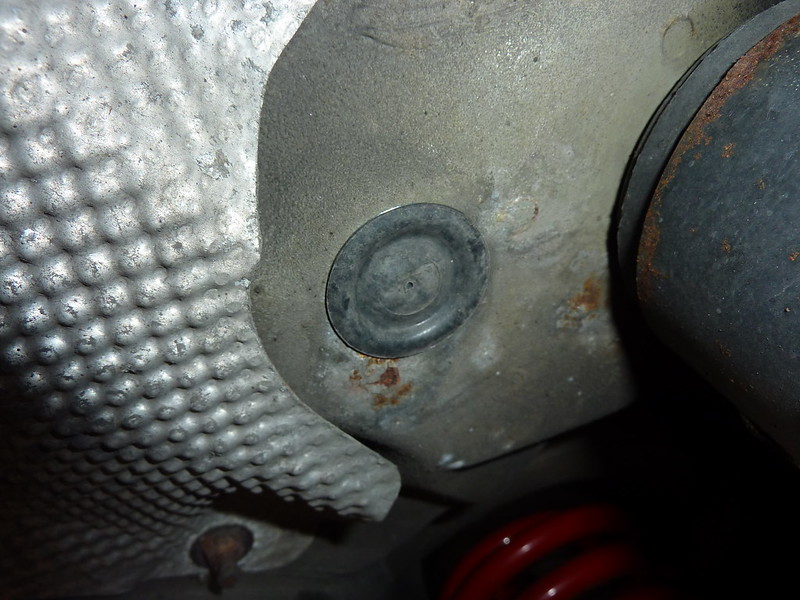 P1070419 by djsyxx6, on Flickr 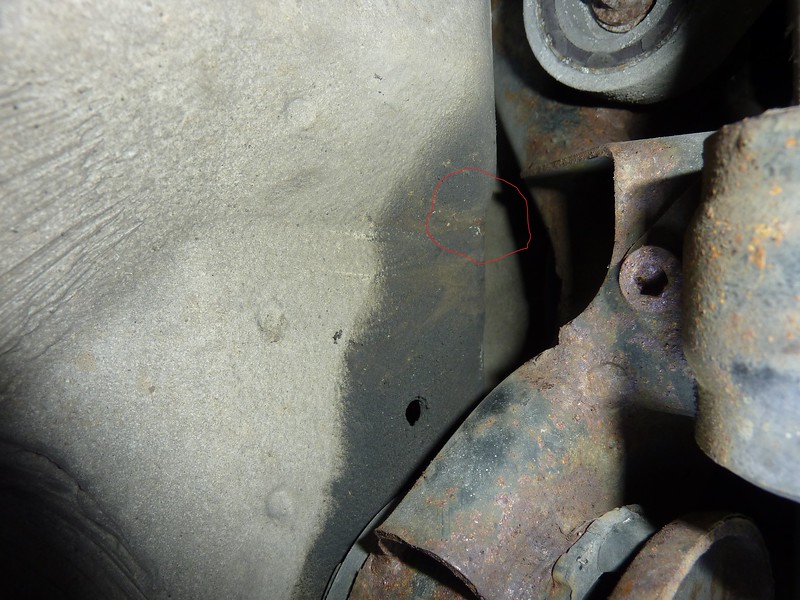 P1070421a by djsyxx6, on Flickr Edited by DJ Syxx - 08 May 2014 at 3:20pm |
||||
|
|
||||
|
||||
|
DJ Syxx
Club Member
Joined: 07 Sep 2012 Location: London Status: Offline Points: 208 |
Post Options
Thanks(0)
Quote Reply
Posted: 10 Dec 2013 at 7:24pm |
|||
|
Before the car gets it surgery and is off road I needed to do one final thing and that was do the Dyno Run of the car since I had the car Alpha N mapped with the GSR airbox.
Back when I had it mapped at the time the dyno run wasn't carried out as I was recommended to do the drain pipe mod and plus the car only just had the map uploaded to it. For those that don't know its a £4 piece of plastic which they use for drains but fits in fog light area and wedges into the air duct area to deflect the air more efficiently (in theory). Whether it makes a massive difference no idea but like Asda every little helps. When it was mapped I was asked to come back another day to carry it out. Just over 3 months have passed and so far the car is settled really well and drives really good so spoke to Evolve to have this carried out. 18 months ago I had the car rolling roaded at a meet and it made 321bhp with 270/lb/ft torque. This wasn't a bad figure at all as most cars run around 320-330bhp and very few ever make stock power. So I had a gentlemens bet with a few friends on what it is making now as I was eagerly curious to see how much of a difference the box and map actually make. One said he thought I would make 360bhp, another 350bhp and I reckoned going by the previous dyno run that it would make 345bhp. Nothing much had changed with the car since that first dyno run. It has been run on V Power (now Nitro+) since I've owned it. Only thing to note is as you will have seen previously is I had 8 shims out of spec when Mike done his checks. Arrived at Evolve, Riz and Sal got underway with getting the car onto the dyno. Getting ready to flex its muscles:  20131209_153158 by djsyxx6, on Flickr 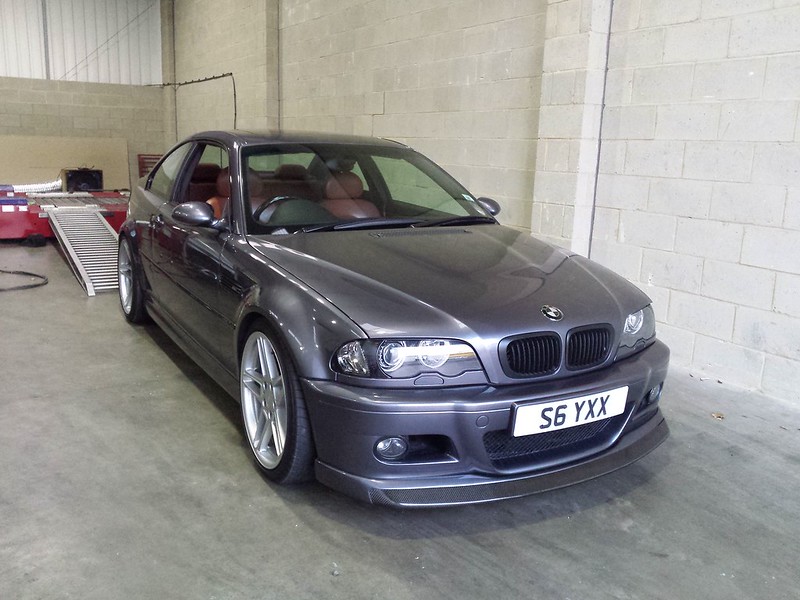 20131209_153210 by djsyxx6, on Flickr On the dyno:  20131209_151338 by djsyxx6, on Flickr A video: http://www.youtube.com/watch?v=XvqGkK8_X0Y&feature=youtu.be After doing about 3-4 runs the figure came back and was slightly more then what I expected, it made 349bhp with 280lb/ft torque. Now it would have been nice to have got a dyno run when Mike done the valve clearances but even so what they say about estimated gains you will get from a carbon airbox and Alpha N is true and you will get approx 20-25. So the proof is in the pudding as they say! Here is the graph:  20131209_1522081 by djsyxx6, on Flickr A thanks goes to Evolve for the mapping and dyno run. Some random pics I took after the dyno run.  336 by djsyxx6, on Flickr 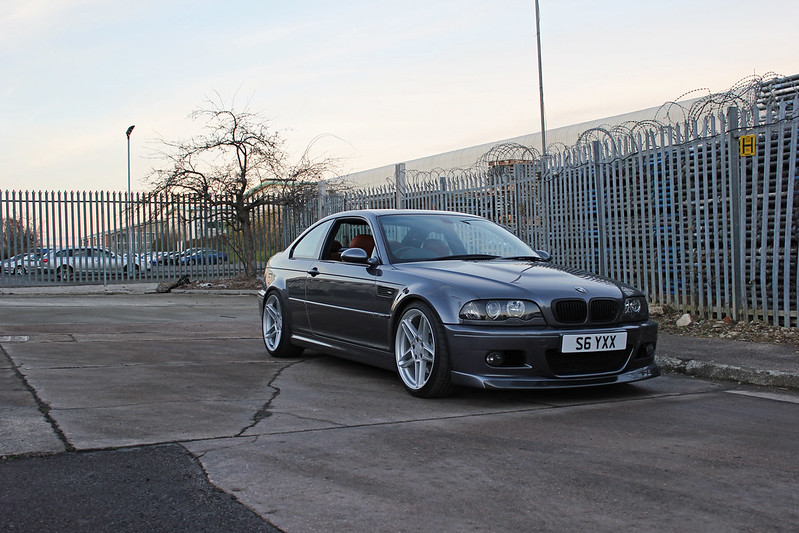 337 by djsyxx6, on Flickr 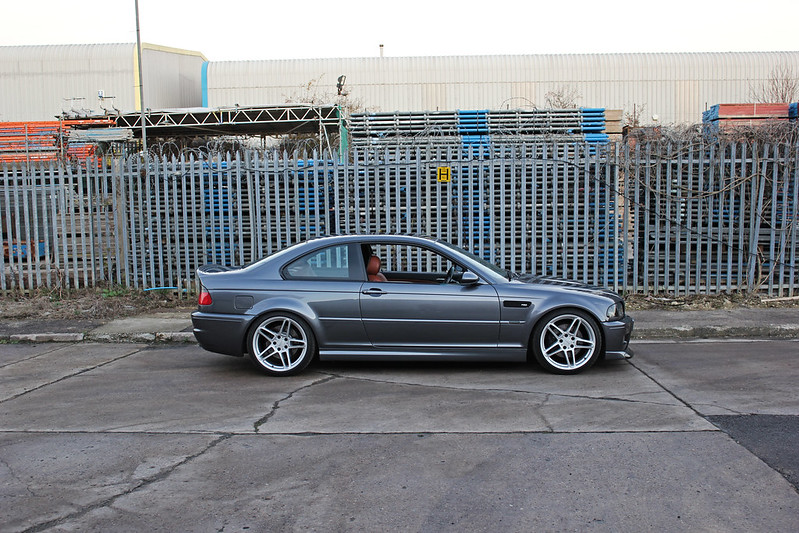 338 by djsyxx6, on Flickr 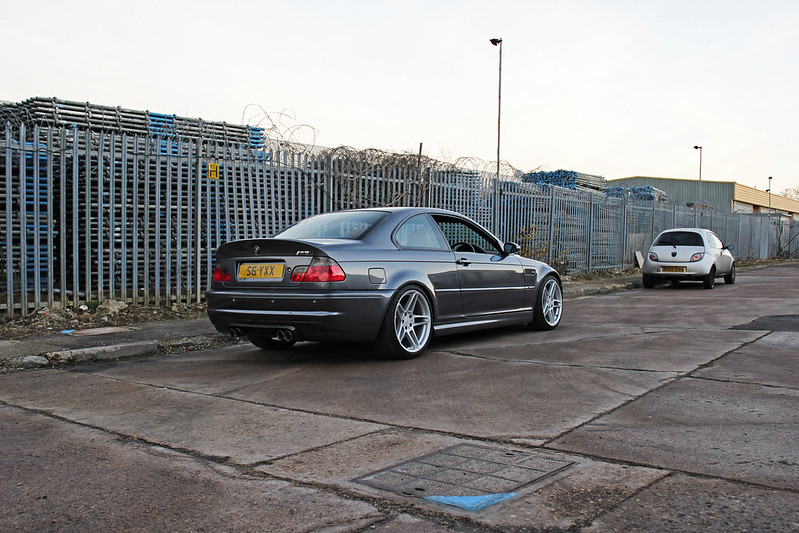 339 by djsyxx6, on Flickr 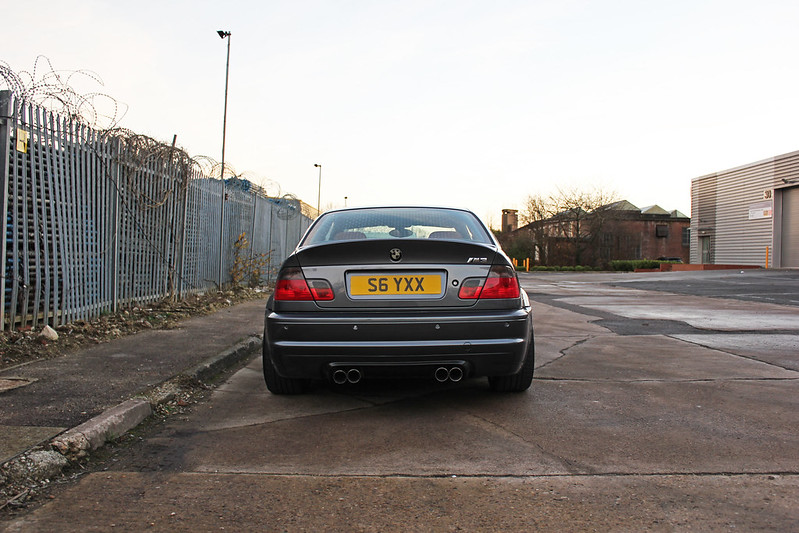 340 by djsyxx6, on Flickr 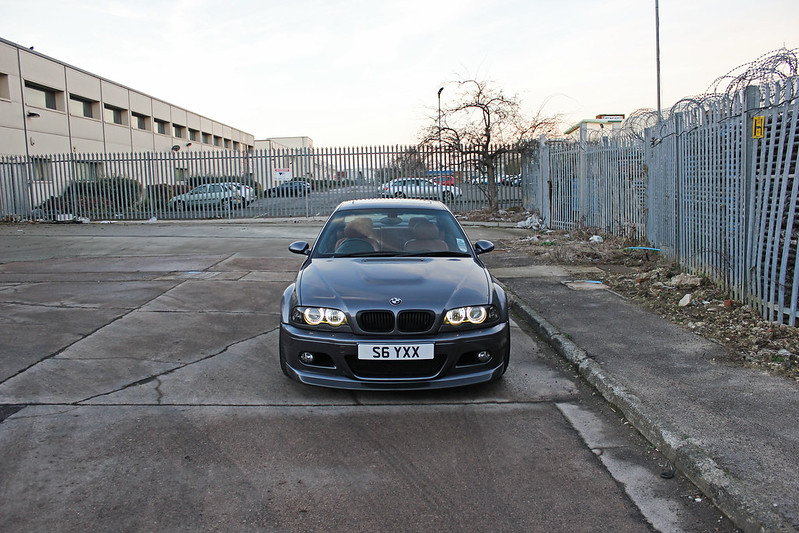 342 by djsyxx6, on Flickr Thanks for looking. Edited by DJ Syxx - 10 Dec 2013 at 7:24pm |
||||
|
|
||||
|
||||
|
Paul Rice
Club Member
Joined: 17 Aug 2011 Location: Doncaster Status: Offline Points: 748 |
Post Options
Thanks(0)
Quote Reply
Posted: 10 Dec 2013 at 8:23pm |
|||
|
Nice write ups just found this great work
|
||||
|
Paul 2003 Z4 2.5 Sterling grey
2024 218 Grand Coupe Misano Blue In love with driving again |
||||
|
||||
|
kentdriver
Club Member
Joined: 04 Oct 2008 Location: United Kingdom Status: Offline Points: 50 |
Post Options
Thanks(0)
Quote Reply
Posted: 01 Mar 2014 at 2:21pm |
|||
|
Nice one, everything compleated to detail. A lovely car made perfect. As a mater of interest, how many miles on the clock?
Decided to keep mine close to standard. Only with 26,000 miles. i've kept it for 10 years now.
Cheers,
Mike.
 |
||||
|
||||
|
DJ Syxx
Club Member
Joined: 07 Sep 2012 Location: London Status: Offline Points: 208 |
Post Options
Thanks(0)
Quote Reply
Posted: 20 Mar 2014 at 9:30pm |
|||
|
Thanks Mike, mileage is not as low as yours but its on 59k now. I recognise your car btw from an E46 zone meet ages ago from the plate and colour.
|
||||
|
|
||||
|
||||
|
DJ Syxx
Club Member
Joined: 07 Sep 2012 Location: London Status: Offline Points: 208 |
Post Options
Thanks(0)
Quote Reply
Posted: 08 May 2014 at 3:21pm |
|||
|
Been a while since I done an update what with winter so just been driving the car sporadically over the winter period giving it a good run etc. I also been keeping a lookout on my rear subframe and so far no change and no cracks have developed yet.
Spring round the door step and show season nearly here it was time to make a start to prepare the car for this year. Over winter I had a think with the car and wanted to step the game up a little. This meant a bit more lows. So after speaking to many respected people on the scene like Dips, Gaz, Easykam etc. D2's were the coilover of choice. So I went ahead and bought brand new D2's. Its a nice bit of kit, it comes complete with everything you need, camber adjustable top mounts and rear top mounts for the shocks etc. and has 36 way adjustable dampening from soft to hard. So didn't need to buy anything in addition other than two gaskets for the rear shocks.  344 by djsyxx6, on Flickr I also bought brand new D2 adjustable rear arms so I can have more control on camber adjustment. Which brings me to my next thing as to why I bought coilovers, wheels. 18's seem to sit very well with the E46 if spaced out correctly with the right ride height so as some of you know via Instagram I put up a teaser pic along with tags as the potential candidates of what they could be. 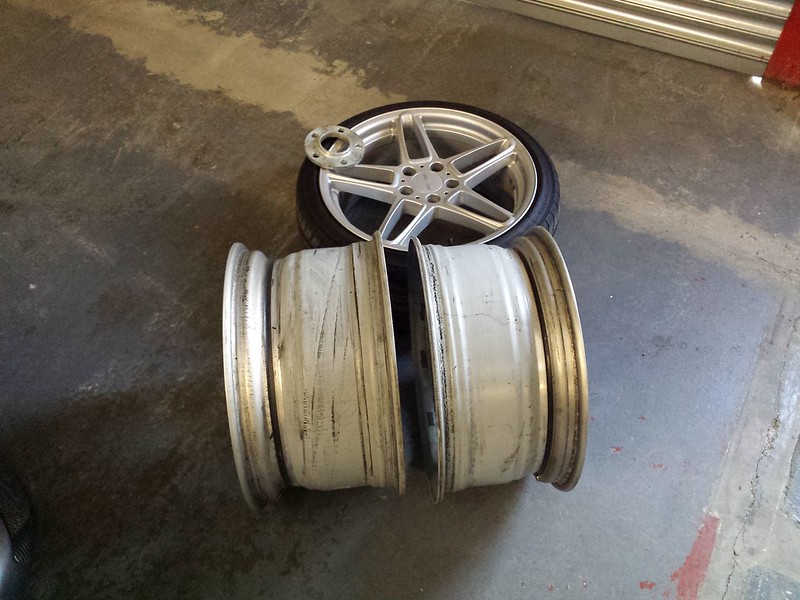 New wheels by djsyxx6, on Flickr They are 3 piece so opens up options on how I want the spec. They were imported over so not something that's off the shelf or bought from the UK. In terms of rarity not sure but to put it this way you don't see many if that with them over this side of the pond let alone across. They are with Dips who will do the magic on them to bring them out like new. So this past week with the weather being on my side I decided to crack on with fitting the coilovers. So started with the fronts: Need a 16mm spanner and 16mm socket to remove the drop link from the shock and roll bar. Once that was done the 18mm shock clamp bolt needed to be removed.  345 by djsyxx6, on Flickr 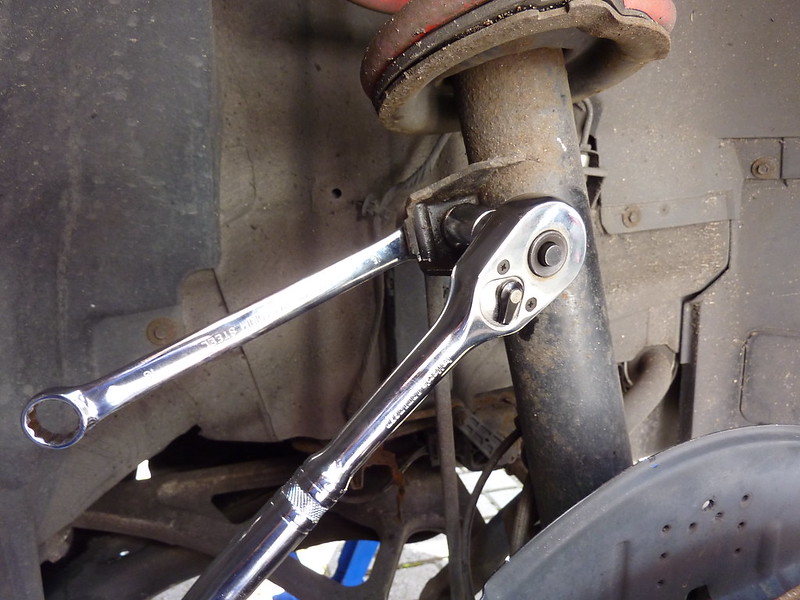 346 by djsyxx6, on Flickr Once that was done removed the 13mm nuts on the top:  347a by djsyxx6, on Flickr The shock then slides off the clamp and can be removed out. I inspected the current drop links which seems in good condition till I spotted one of them with the rubber bushing slightly off: 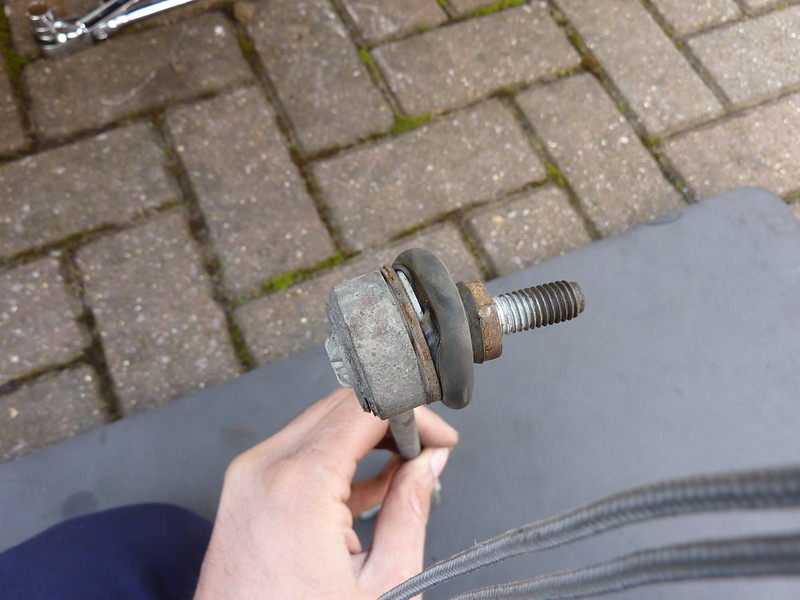 348 by djsyxx6, on Flickr I had on standby 2 new Lemforder drop links from ECP. 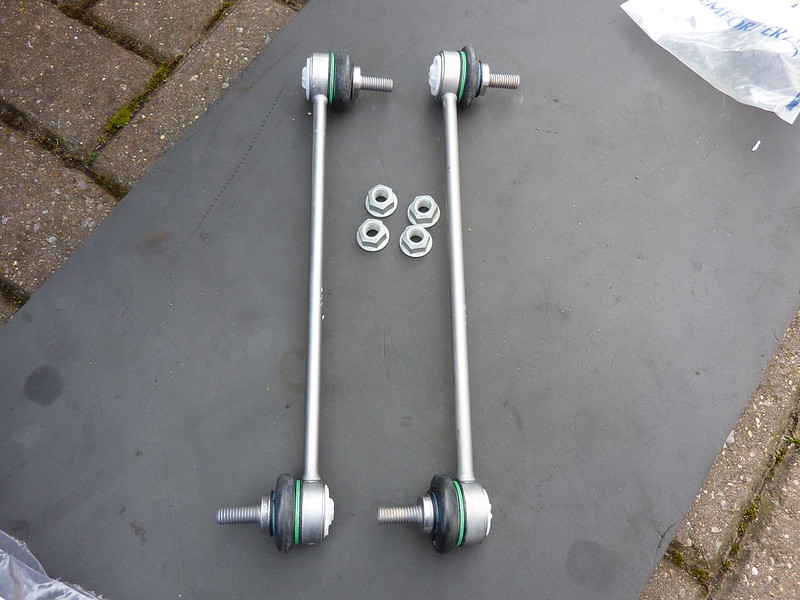 352 by djsyxx6, on Flickr The D2 coilovers are labelled left and right so can't get it wrong so were fitted to relevant sides. They also have a pin type groove which basically slides into the gap on the shock clamp so you know its gone in. With the help of the trolley jack raised up the knuckle so that I could get the coilover to go into the mount. So fitted and make sure the coilover sits all the way down the bottom of the shock collar ring:  349 by djsyxx6, on Flickr 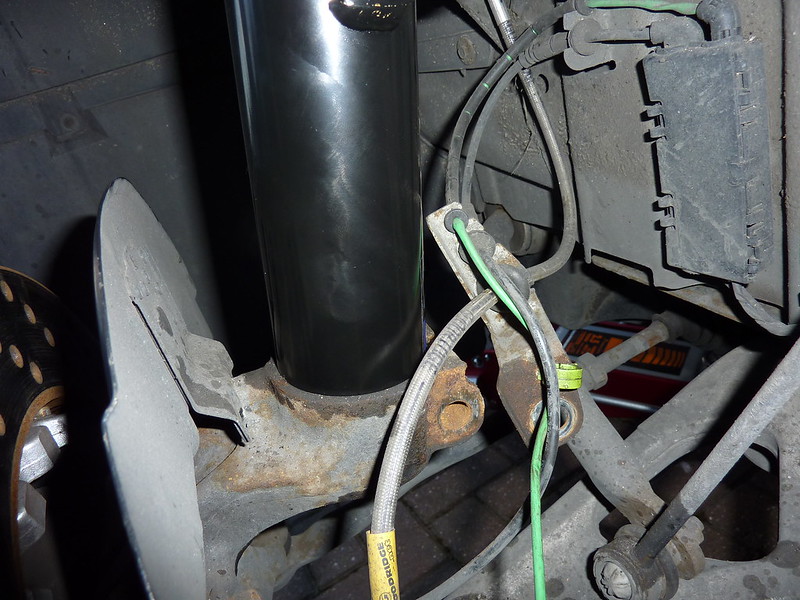 351 by djsyxx6, on Flickr Lined up note the easy access to camber adjustment: 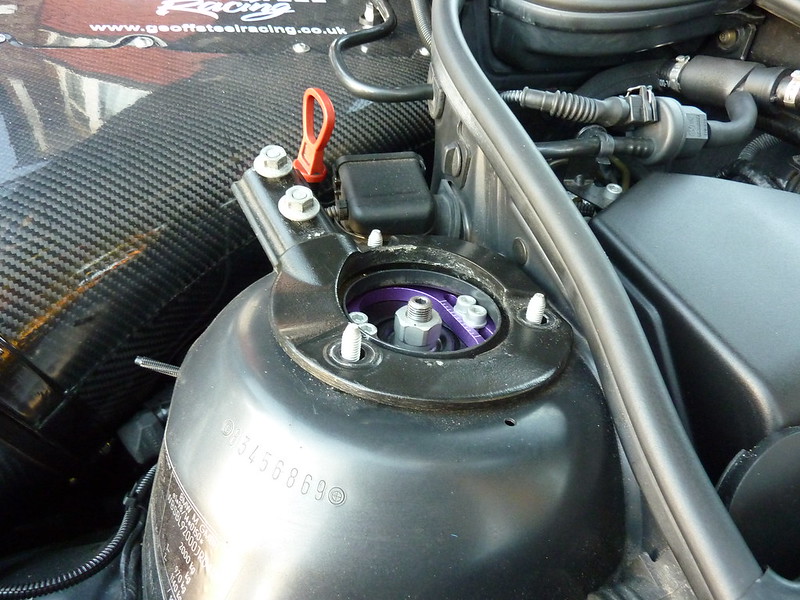 350 by djsyxx6, on Flickr Fitted the new drop links: 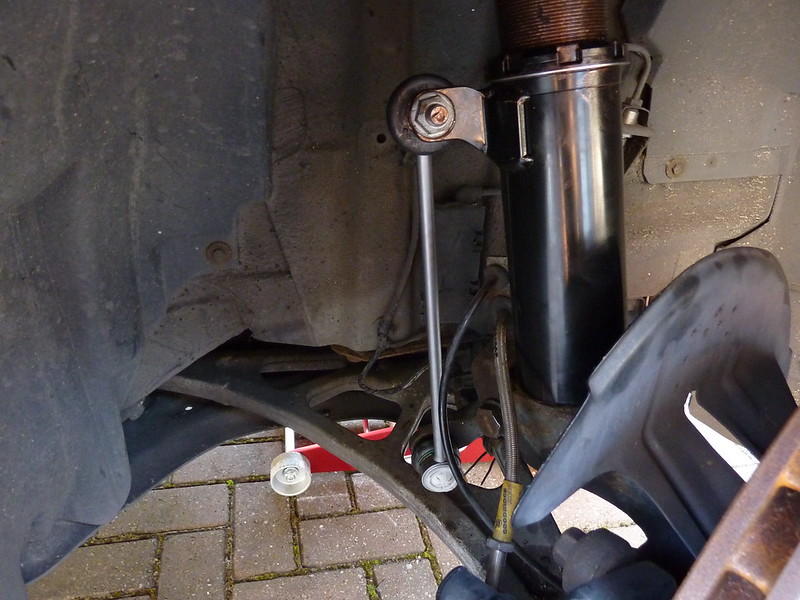 353 by djsyxx6, on Flickr Note if your buying a Lemforder drop link from ECP, you need an 18mm spanner to hold it so you can do up the nut. You also need a very slim spanner to do the job as a normal 18mm is too thick. I ended up having to buy one from Halfords which was slim enough to grip without getting stuck once the nut was done up. Future reference be aware of this or buy from BM which should be 16mm both sides. With the fronts taken care of moved to the rears. 18mm shock bolt needs removing, make sure the knuckle is supported so that it doesn't suddenly pop off:  354 by djsyxx6, on Flickr Once this was done you need to remove the boot trim both sides. It is straight forward just requiring removal of the boot tray trims and a few pop rivet clips to gain access. Two 13mm nuts need removing:  355 by djsyxx6, on Flickr Then used the jack just to support it so it didn't suddenly drop out when undoing the bolts once done its out:  356 by djsyxx6, on Flickr Rear spring on the platform so just required to be pushed down to remove the spring:  357 by djsyxx6, on Flickr Bought new 5mm spring pads as I was previously using 14.5mm for the Intrax springs.  358 by djsyxx6, on Flickr 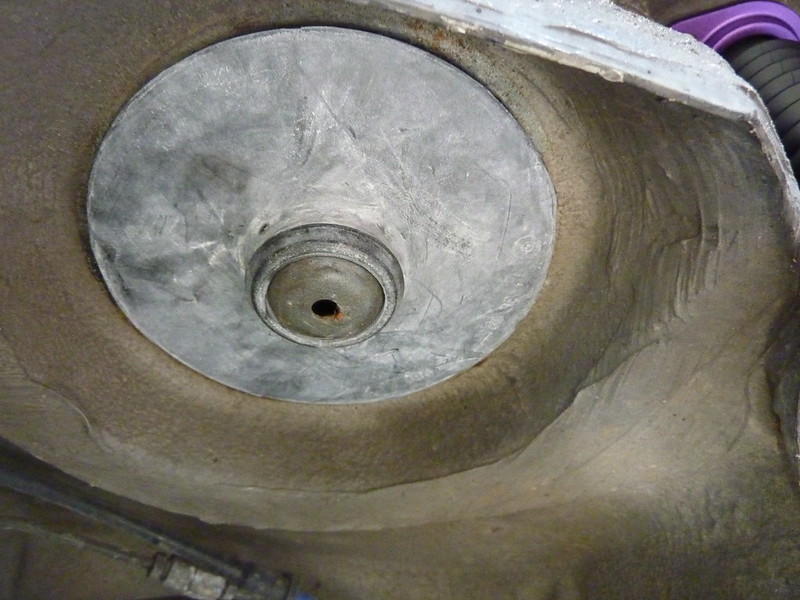 359 by djsyxx6, on Flickr Then got the spring with adjuster installed on the arms and new shock installed.  360 by djsyxx6, on Flickr I had a look into potentially installing my rear camber arms but having looked at how it was connected and having to drop the diff I decided against it as difficult to do on the floor and I probably be out of my depth in carrying this out so will get this fitted soon. Biggest problem was setting a height I was happy with so required a lot of faffing around till I got to a stage where it was noticeable. Also have to take into account for settling so could go a bit lower. For the adjustable dampening Chrisc recommended from full soft I go 16 clicks at the front and 10 at the rear With everything set and double checking all bolts were tightened properly. I already noticed how much lower it is from before and I barely just clear my driveway with my front splitter. So went out for a road test to see how the suspension was reacting and if there were any abnormal sounds etc. and drove through roads with speed humps to check for clearance and took a few pics today. Excuse the car being dirty I haven't had much time to give it a wash but you get the idea. I also removed my 7mm spacer off the rears as a precaution for rubbing as I am expecting the suspension to settle down plus car only had quarter tank of fuel. 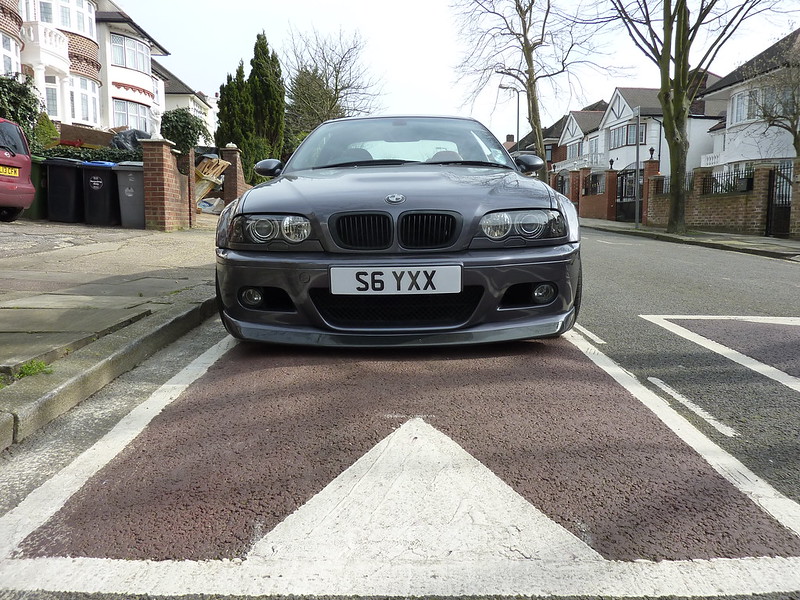 361 by djsyxx6, on Flickr  362 by djsyxx6, on Flickr 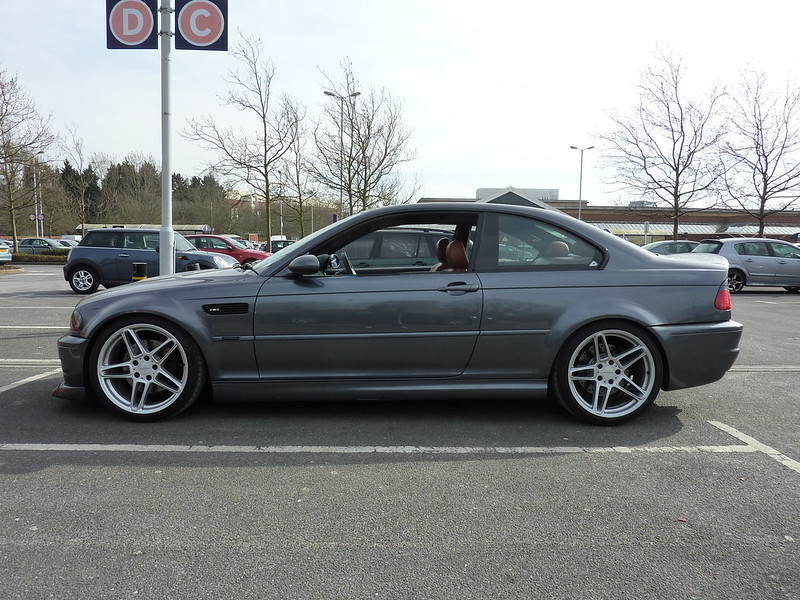 363 by djsyxx6, on Flickr 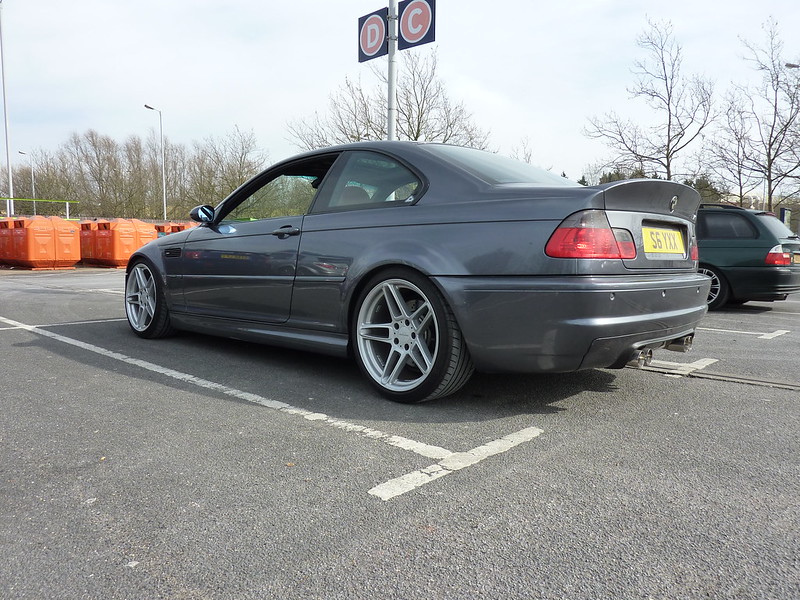 364 by djsyxx6, on Flickr  365 by djsyxx6, on Flickr 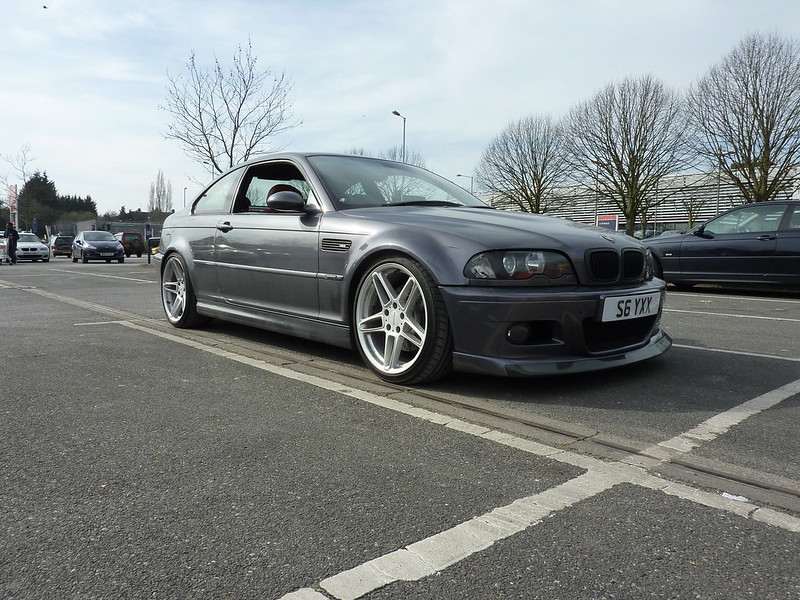 366 by djsyxx6, on Flickr  367 by djsyxx6, on Flickr Didn't get much of a chance to push the car much but first impressions holds the corners well and will be better once its aligned and setup properly. In terms of ride quality and the way it drives I am really impressed. The D2's are bang on the money. I was expecting a bit more of a harder ride compared with my OEM shocks and Intrax Springs but could not believe how very similar it is to my previous setup. Even over bumps its not hard or crashy at all. In hindsight I do wish now I went with Coilovers now as I never thought they would be as good as this so D2's get my vote all day long. Want to say a big thank you Dips aka The Godfather of BM's for his invaluable advice and tips, Gaz and easykam for recommendations, ChrisC and Steve (m3smudge)for their additional input and advice. Thanks for looking. |
||||
|
|
||||
|
||||
|
pbraden
Club Member

Joined: 20 Feb 2011 Location: Barnsley Status: Offline Points: 236 |
Post Options
Thanks(1)
Quote Reply
Posted: 08 May 2014 at 6:08pm |
|||
|
Looking good fella, it suits the schnitzers!
|
||||
|
||||
|
Neilb
Club Member
Joined: 13 Apr 2013 Location: Darwen Status: Offline Points: 155 |
Post Options
Thanks(1)
Quote Reply
Posted: 08 May 2014 at 10:13pm |
|||
|
Epic thread... Any more plans for the car?
|
||||
|
||||
|
John Adams
Club Member

Joined: 15 Jun 2011 Status: Offline Points: 241 |
Post Options
Thanks(1)
Quote Reply
Posted: 09 May 2014 at 11:46am |
|||
|
Love this car
its just like all the stuff i would with M3 E46, But i am doing up a E36 Evo . As Neilb above was saying any more plans
|
||||

|
||||
|
||||
|
DJ Syxx
Club Member
Joined: 07 Sep 2012 Location: London Status: Offline Points: 208 |
Post Options
Thanks(0)
Quote Reply
Posted: 15 Jul 2014 at 10:45pm |
|||
Thanks guys In terms of plans I will need to address the subframe as I have started getting corrosion around the spot welds and have noticed a small rust line forming through where the floor folds upwards on the crease line, the usual spot where they go. Its luckily not split nor criticial yet but will need doing. I have the plates from Reddish to carry this out so will be looking to do this towards the end of the year. Meantime this brings me to my next update....... Edited by DJ Syxx - 15 Jul 2014 at 10:46pm |
||||
|
|
||||
|
||||
|
DJ Syxx
Club Member
Joined: 07 Sep 2012 Location: London Status: Offline Points: 208 |
Post Options
Thanks(0)
Quote Reply
Posted: 15 Jul 2014 at 10:47pm |
|||
|
In April did some maintenance on the car. Needed its annual oil change and I also decided to tackle replacing the fuel filter as I had no record or idea of it ever being changed. So first thing was to drive the car around to get the oil nice and runny to drain out better and watch oil run free.
 375 by djsyxx6, on Flickr 375 by djsyxx6, on FlickrOld filter out and new OEM one waiting to go in.  368 by djsyxx6, on Flickr 368 by djsyxx6, on FlickrThe filter kits always come with the crush washer for the drain plug,  369 by djsyxx6, on Flickr 369 by djsyxx6, on FlickrAlong with the crush washer for the oil filter housing, bolt and seal,  371 by djsyxx6, on Flickr 371 by djsyxx6, on FlickrFresh oil courtesy of ECP:  370 by djsyxx6, on Flickr 370 by djsyxx6, on FlickrGave the oil filter housing a clean, I cleaned it up more after this pic and got it very shiny :lol: 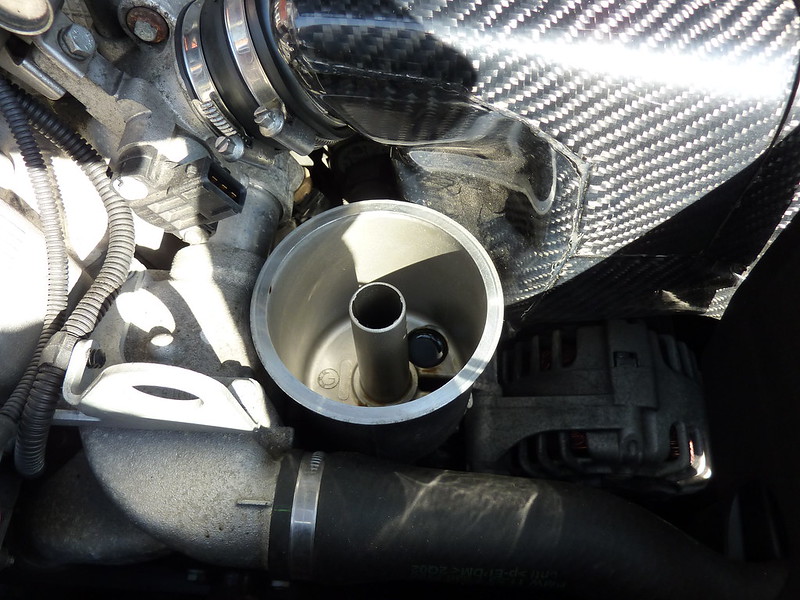 372 by djsyxx6, on Flickr 372 by djsyxx6, on FlickrCleaned the filter housing cap and fitted the new seal: 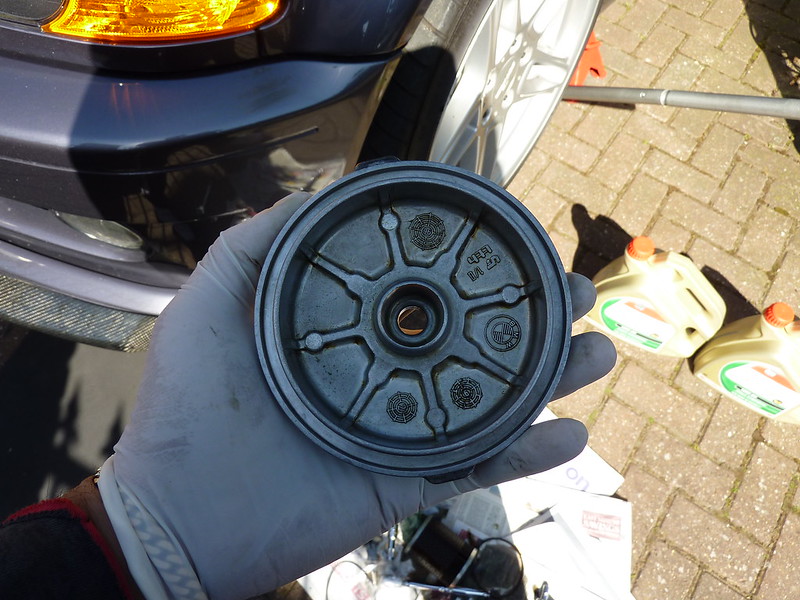 373 by djsyxx6, on Flickr 373 by djsyxx6, on FlickrFilter in its new home: 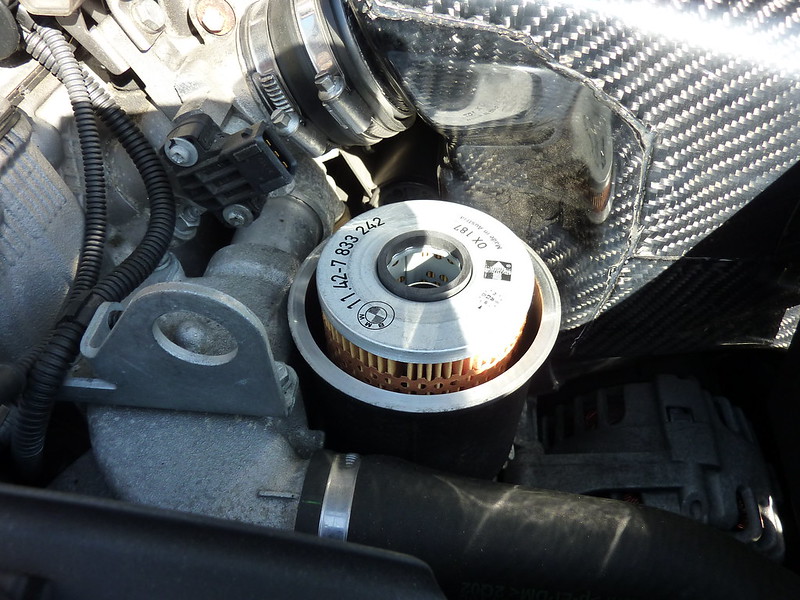 374 by djsyxx6, on Flickr 374 by djsyxx6, on FlickrAnd filled up with around 5.5 litres of the good stuff. Next task was to fit the fuel filter. Before carrying out this job, I removed Fuse 54 to stop the fuel pump working started the car up a few times till it cut out to relieve the pressure. This helps in stopping a lot of fuel spraying everywhere under pressure. This was a little difficult doing it on the floor as you need to remove the two plastic shields and the metal one protecting the filter. I started at the front and you need a 19mm spanner and a monkey wrench or vice grip etc to loosen it from the fuel line. As you will see I loosened it already. And disconnect the breather pipes attached. 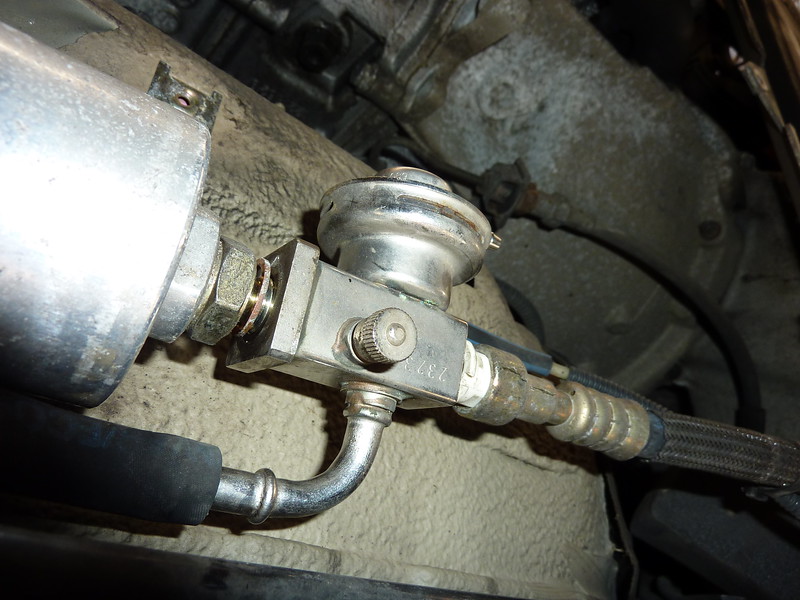 376 by djsyxx6, on Flickr 376 by djsyxx6, on FlickrNew vs old filter. 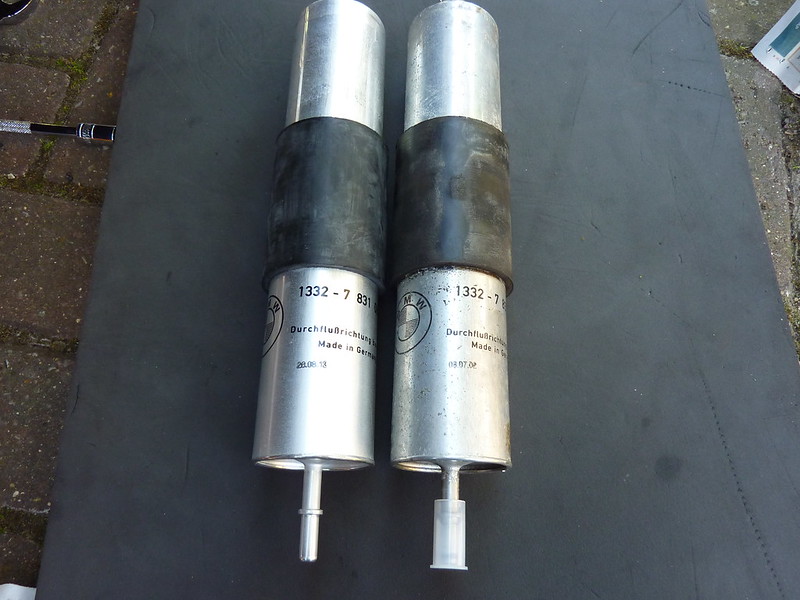 377 by djsyxx6, on Flickr 377 by djsyxx6, on FlickrAs you see the build date for my new filter is recent: 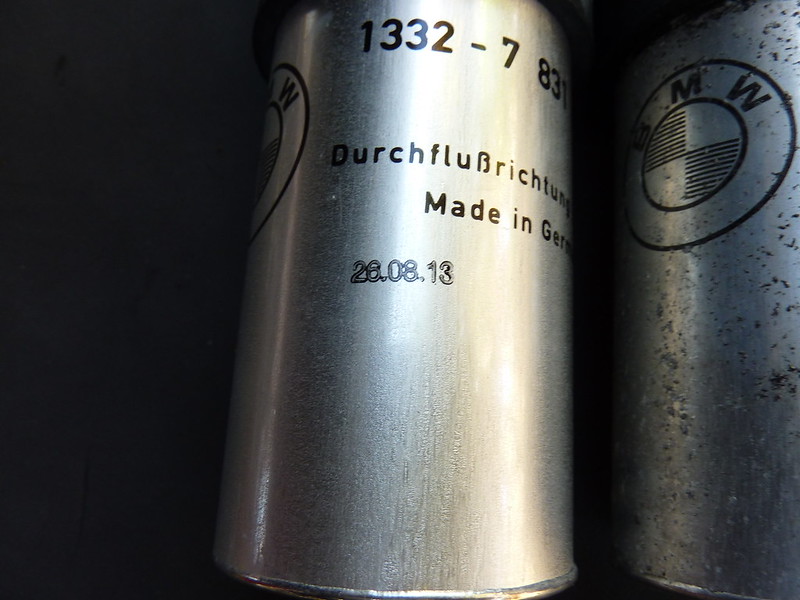 379 by djsyxx6, on Flickr 379 by djsyxx6, on FlickrAnd this is the old, the same build date as my car so original one from factory!!! 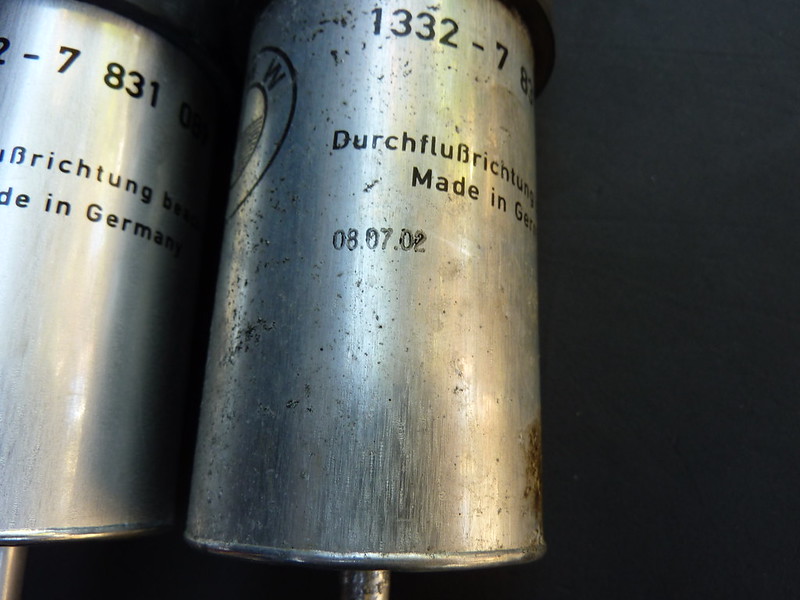 378 by djsyxx6, on Flickr 378 by djsyxx6, on FlickrNew one now fitted: 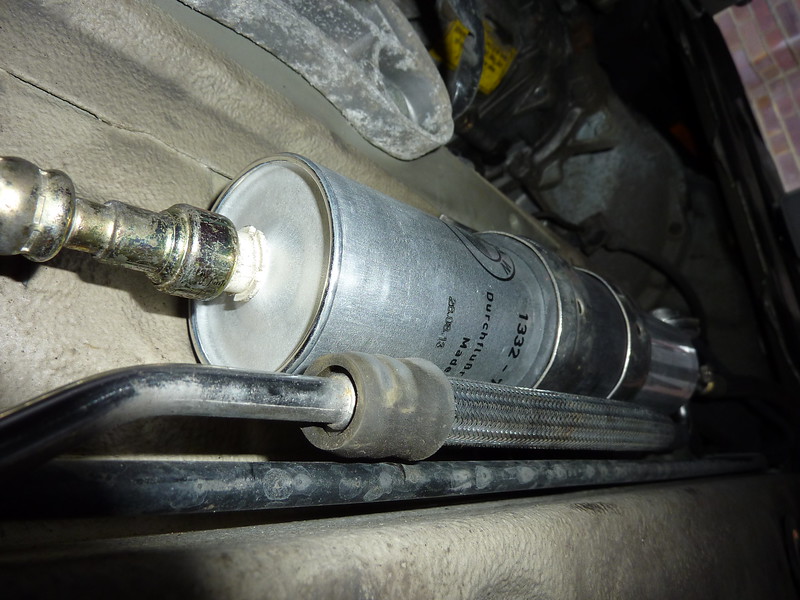 380 by djsyxx6, on Flickr 380 by djsyxx6, on FlickrLastly since fitting my coilovers I was advised by a few and read on the internet to fit reinforcement plates for the rear top mounts to reduce stress on the mount. You can buy Z3 ones or get ones made by Phoenix Motorsport so I ordered a pair from them and slipped them on for added protection. Thanks to Kash for the recommendation. 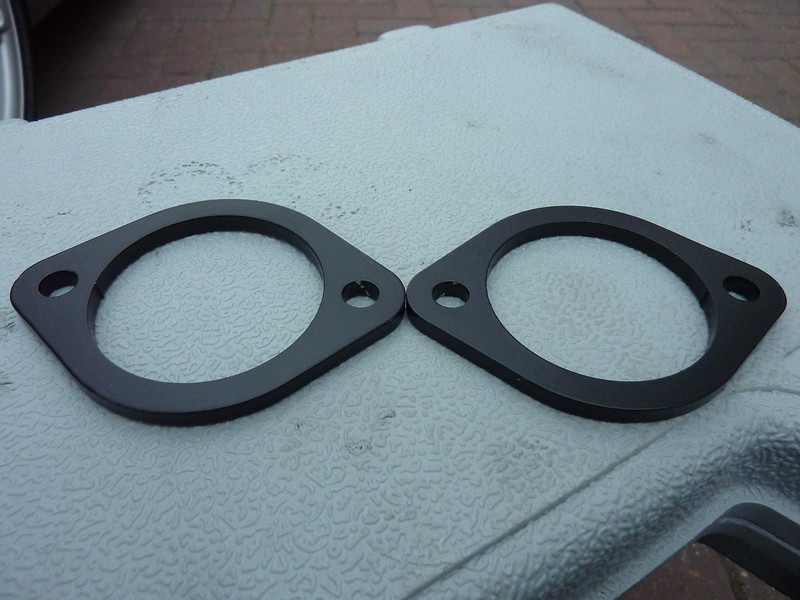 381 by djsyxx6, on Flickr 381 by djsyxx6, on FlickrSimply go over the top and bolt them down: 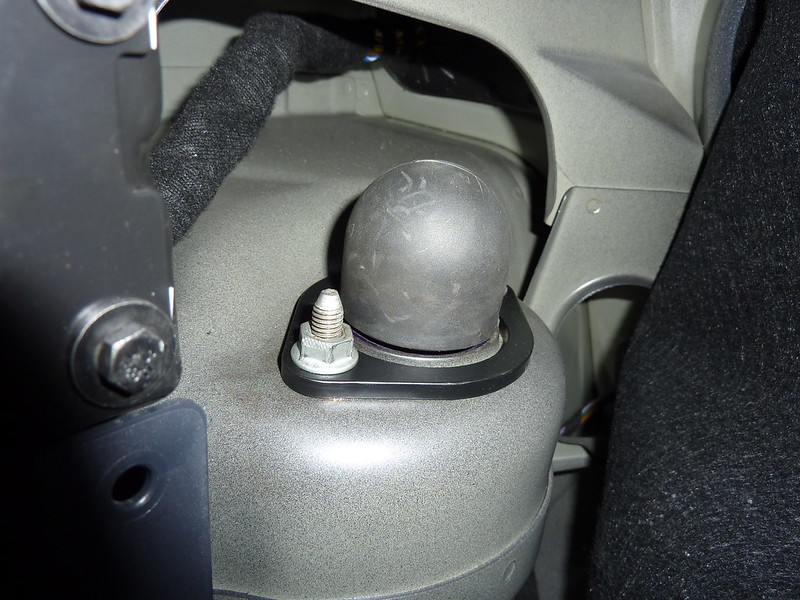 382 by djsyxx6, on Flickr 382 by djsyxx6, on Flickr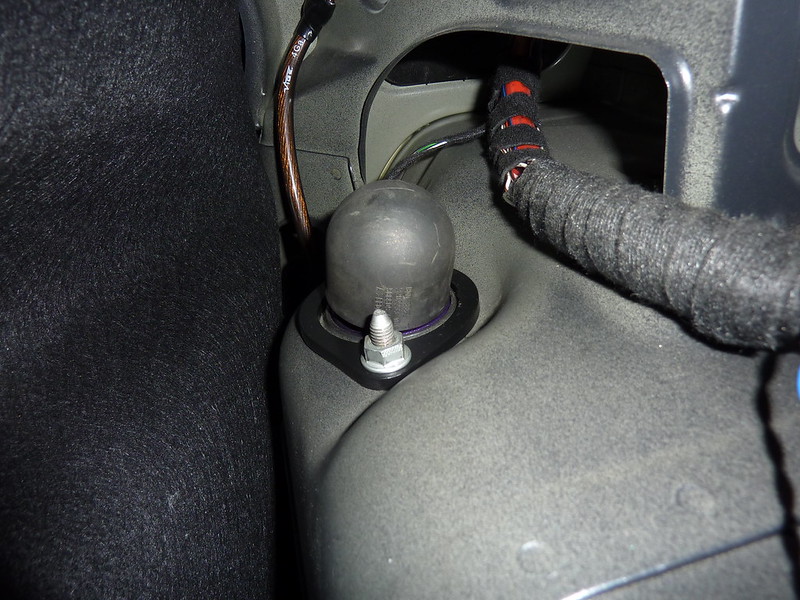 383 by djsyxx6, on Flickr 383 by djsyxx6, on Flickr
|
||||
|
|
||||
|
||||
|
Post Reply
|
Page 123> |
| Forum Jump | Forum Permissions You cannot post new topics in this forum You cannot reply to topics in this forum You cannot delete your posts in this forum You cannot edit your posts in this forum You cannot create polls in this forum You cannot vote in polls in this forum |


 Topic Options
 dteagles wrote: